We may earn a commission when you click on the affiliate links in this post.
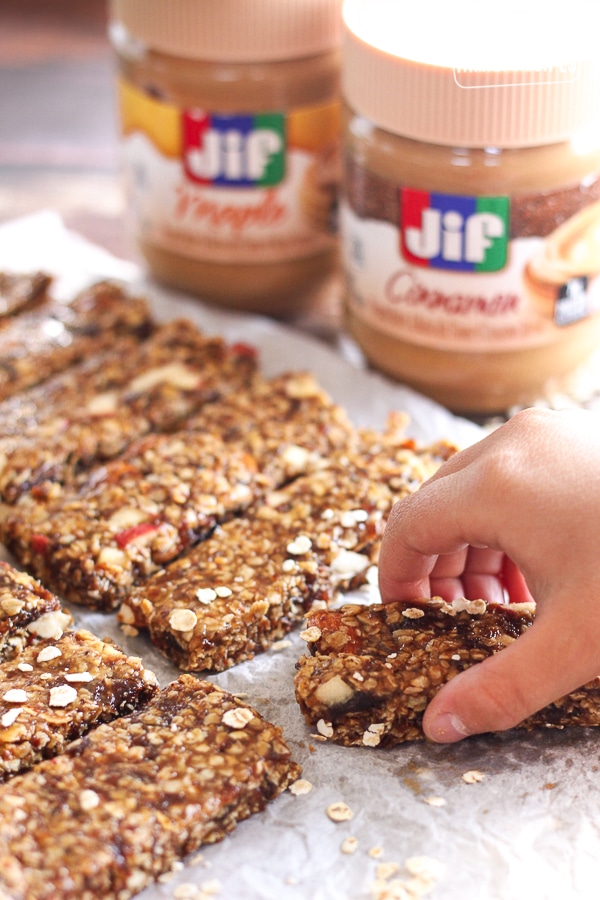
Fuel your day with no-bake peanut butter granola bars. This healthy and customizable recipe includes oats, dates, almonds, and cinnamon. Perfect for breakfast or a snack.

Table of Contents
An Easy No-Bake Breakfast
I’m excited to share my go-to recipe for No-Bake Peanut Butter Granola Bars—my secret weapon for a quick, healthy energy boost anytime I need it! These homemade granola bars are packed with creamy peanut butter, juicy dates, and an assortment of tasty mix-ins that keep me fueled during busy mornings, after school, or even at soccer games.
I first experimented with these bars when I was looking for a snack that was not only delicious but also easy to make ahead of time. Now, I can’t imagine my day without them! Here’s the recipe that has become a staple in my kitchen.
Why I Love Peanut Butter Granola Bars
For me, these no-bake granola bars are more than just a snack—they’re a convenient way to pack in energy and nutrition on even the busiest days. I love how versatile they are; they’re perfect for breakfast on the go, an afternoon pick-me-up, or even a pre-workout snack.
Ingredients You’ll Need
- Dates (or raisins): I love using dates because they blend into a thick, sticky paste that holds everything together.
- Jif Peanut Butter: Whether you prefer creamy or crunchy, peanut butter is the star ingredient that brings it all together.
- Honey: This natural sweetener not only adds flavor but is essential for binding the ingredients.
- Almonds: For a satisfying crunch and healthy fats.
- Dried Apples: They add a lovely, tangy sweetness—though you can swap these out for dried apricots, bananas, mangos, or any other dried fruit you love.
- Quick Rolled Oats: They provide the perfect texture and make these bars wonderfully filling.
- Kosher Salt: Just a pinch to enhance all the flavors.
- Vanilla Extract: For an extra layer of warmth and sweetness.
- Cinnamon: A dash of cinnamon adds a cozy, aromatic touch that elevates the flavor.
How I Make My Peanut Butter Granola Bars
- Prepare the Dates: I start by placing the dates in my food processor and blending them until they form a thick, sticky jam. You should be able to roll the mixture into a ball with your hands.
- Melt the Peanut Butter and Honey: In a microwave-safe bowl, I combine the peanut butter and honey, heating them for 30-45 seconds until they’re perfectly melty.
- Mix It All Together: I then stir in the date mixture until it’s well incorporated. Next, I add the oats, almonds, dried apples, a dash of kosher salt, vanilla extract, and cinnamon, mixing everything until it’s evenly combined.
- Press and Chill: I line an 8×8-inch glass baking dish with foil or wax paper, then press the mixture firmly and evenly into the dish with my hands. The more compact you press it, the better it will hold together.
- Set in the Fridge: Cover the dish with plastic wrap and refrigerate for at least 20 minutes to let the flavors meld and the bars firm up.
- Cut and Store: Once chilled, I cut the mixture into 10-12 even rectangles.
Tips for Perfect Peanut Butter Granola Bars
- Invest in a Good Food Processor: A quality food processor makes it much easier to achieve that smooth, jam-like consistency with your dates.
- Experiment with Fruits and Nuts: Don’t be afraid to switch up the ingredients! While I love using dates and dried apples, you can also try raisins, dried apricots, or even mix different nuts like walnuts or pecans along with almonds.
- The Magic of Honey and Cinnamon: If your granola bars aren’t sticking together as well as you’d like, double-check your honey measurement. It’s not only a natural sweetener but also the key ingredient that binds everything, while the cinnamon adds a delightful warmth.
Storing and Freezing Your Granola Bars
I know how important it is to have these bars ready for those busy days. Here’s how I keep mine fresh:
- Room Temperature Storage: If you plan to enjoy them within a week, simply wrap each bar individually in wax paper or plastic wrap, and store them in an airtight container.
- Refrigeration: For extended freshness, I refrigerate my granola bars. They’ll keep well for up to two weeks in the fridge.
- Freezing: If you’ve made a big batch or want to have them on hand for longer, you can freeze the bars. Wrap each bar individually, or layer them between sheets of wax paper in an airtight container. When you’re ready for a snack, just thaw a bar in the refrigerator or at room temperature for a few minutes.
Questions About Peanut Butter Granola Bars
The secret is using enough honey as a binder and pressing the mixture firmly into your pan before refrigerating. This helps the ingredients meld into one delicious, cohesive bar.
Absolutely! I love experimenting with different dried fruits like apricots or mangos, and you can swap out almonds for walnuts, pecans, or other nuts. Feel free to adjust the spices or even the sweetener to suit your taste.
These bars are packed with nutritious ingredients like peanut butter, almonds, and oats. They provide a good balance of healthy fats, protein, and fiber, making them a perfect energy booster for busy days or post-workout fuel.
Yes, you can! Simply substitute honey with a vegan-friendly sweetener like maple syrup or agave nectar to enjoy a delicious vegan version.
They can be if you use certified gluten-free oats and ensure that all other ingredients are gluten-free. Always check the labels if you have dietary restrictions.
Yes, you can try alternatives like maple syrup or agave nectar. Just keep in mind that the flavor and binding properties might vary slightly.
More Quick and Easy Breakfast Recipes

No-Bake Peanut Butter Granola Bars
Equipment
Ingredients
- 1 cup dates (raisins will work, too)
- 1/4 cup Jif Peanut Butter
- 1/4 cup honey
- 3/4 cup almonds (we did whole and sliced mixed)
- 1/2 cup dried apples
- 1 1/2 cups quick rolled oats
- 1 teaspoon Kosher salt
- 1/2 teaspoon vanilla
- 1/2 teaspoon cinnamon
Instructions
- Place dates in a food processor (or blender) and process until it becomes like an extra thick, sticky jam (you should be able to form a ball in your hands).
- Place peanut butter and honey in a medium-sized microwave-safe bowl and microwave for 30-45 seconds.
- Add date mixture to the melted peanut butter and honey and stir. Add remaining ingredients and stir until well combined.
- Place foil or wax paper in an 8×8 glass baking dish and press firmly and evenly with hands.
- Cover with plastic wrap and refrigerate at least 20 mintes.
- Remove from fridge and cut evenly into rectangles. (should make about 10-12).
- To store, wrap individually in wax paper or plastic wrap or store together in an air-tight container.
Notes
- Add coconut for fiber and flavor
- Try dried blueberries or cranberries for fun flavor, color, and texture
- Mix in mini chocolate chips or white chocolate chips for a fun variation
- A sprinkle of chia seeds provide an excellent source of fiber, as well as promote heart health
- Cashew pieces or sunflower seeds can add salt and crunch
Nutrition Information
I hope you enjoy making and eating these peanut butter granola bars as much as I do! They’re not only a tasty treat but also a fantastic way to fuel your day with wholesome, energy-packed ingredients. Give this recipe a try, and let me know in the comments what creative twists you add to make it your own!
Happy snacking!