We may earn a commission when you click on the affiliate links in this post.
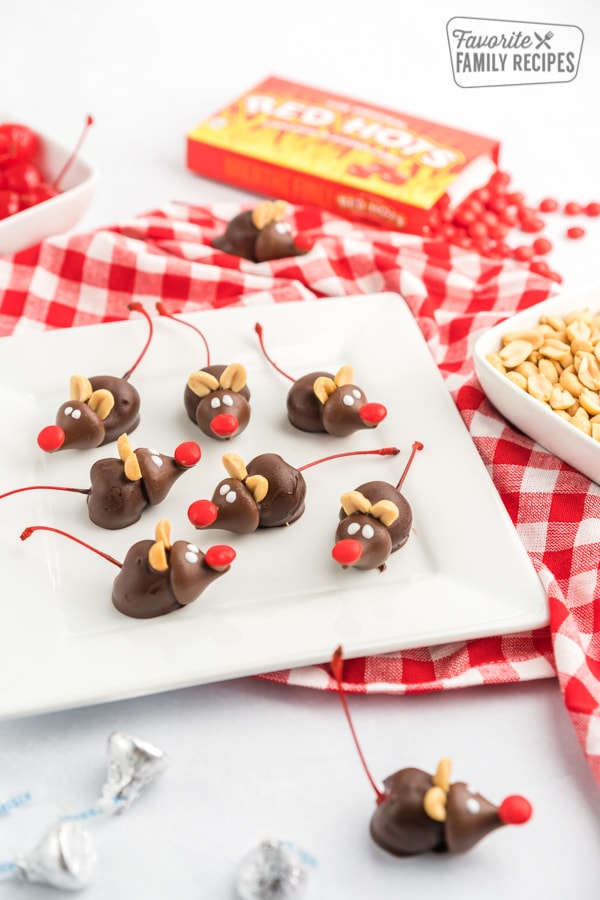
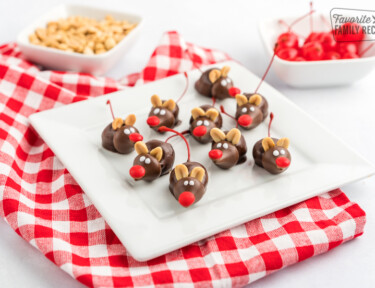
Chocolate mice are the cutest little Christmas candies! You will love the tasty combination of a milk chocolate Hershey’s Kiss and chocolate-covered cherry. Kids love the adorable mouse face that is fun to make and eat.
Featured with this recipe
- Ingredients in Easy Chocolate Mice
- How to Prepare the Body of the Chocolate Mice
- Decorating the Chocolate Mice
- How to Use Chocolate-Covered Cherries
- Homemade Chocolate Mice Variations
- Tips for Making the Best Chocolate Mice
- Christmas Mice For Holiday Neighbor Gifts
- Storing Chocolate Mice and Making Ahead
- Frequently Asked Questions
- More Fun Christmas Candy
- How to Make Chocolate Mice
- Chocolate Mice Recipe
These sweet, edible chocolate mice are a favorite in our family! Not only are they adorable, these chocolate mice are so simple to make. It is a great tradition to make with kids and see their creativity come through. They are fun for Christmas, Halloween, or themed parties. It is a year-round treat that kids to adults love!
Chocolate mice have a sweet and tangy flavor. The rich chocolate and sweet maraschino cherries are the perfect combination! These cute little treats have minimal ingredients and are simple to put together. Create different types of chocolate cherry mice or make them all the same. They are great for sharing with friends, family, and neighbors. Chocolate mice are a classic holiday treat!
Ingredients in Easy Chocolate Mice
You will love how simple these chocolate cherry mice come together with a few baking staples. Melting the chocolate, cleaning the cherries, and assembling them all together is a fun and easy holiday experience! Kids love to help and make this a tradition your family will love doing together!
- Chocolate – Milk chocolate, semisweet chocolate chips, or candy melts are all ways to make the chocolate color for the body. I love using chocolate candy melts in this recipe. They are so easy to use, they melt so well and turn out so smooth every time. Wilton and Ghirardelli are both great brands. Of course, you can use chocolate chips as well, but you will have to add a little bit of oil to them.
- Cherries – Maraschino cherries with stems make the body of the mouse. It is important to find cherries with stems. They are tough to find sometimes, but you need the stems to make the mice tails. The stems become the tail of the mouse.
- Hershey chocolate kisses – You can use milk or dark chocolate depending on your preference. The chocolate kisses make up for the mouse’s face.
- Peanut halves – This recipe calls for halved peanuts for the ears, but you could easily swap them out for sliced almonds or even little bits of marshmallows for the ears.
- Cinnamon red hot candies – These are getting harder to find around the holidays as well. A mini M&M will also work as a nose.
- White frosting – I usually just buy a small squeeze tube from the grocery store cake aisle because you are using such a small amount, but you can also make your own. Our recipe for royal icing is perfect for the small detail of the eyes.
How to Prepare the Body of the Chocolate Mice
You can easily make these yourself, or bring in the kids and make an assembly line. It is a fun project for the whole family during Christmas break! This delicious treat will be a part of your family traditions each year.
- Prepare – Unwrap the Hershey kisses and place them in a large bowl. Drain cherries in a colander and dry with a paper towel.
- Melt – Melt the chocolate in a microwave-safe bowl or double boiler.
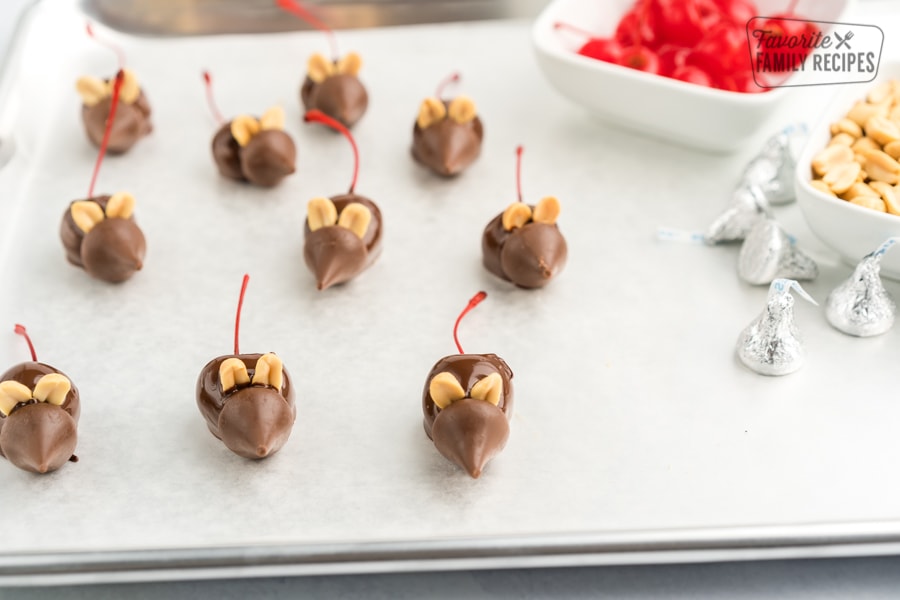
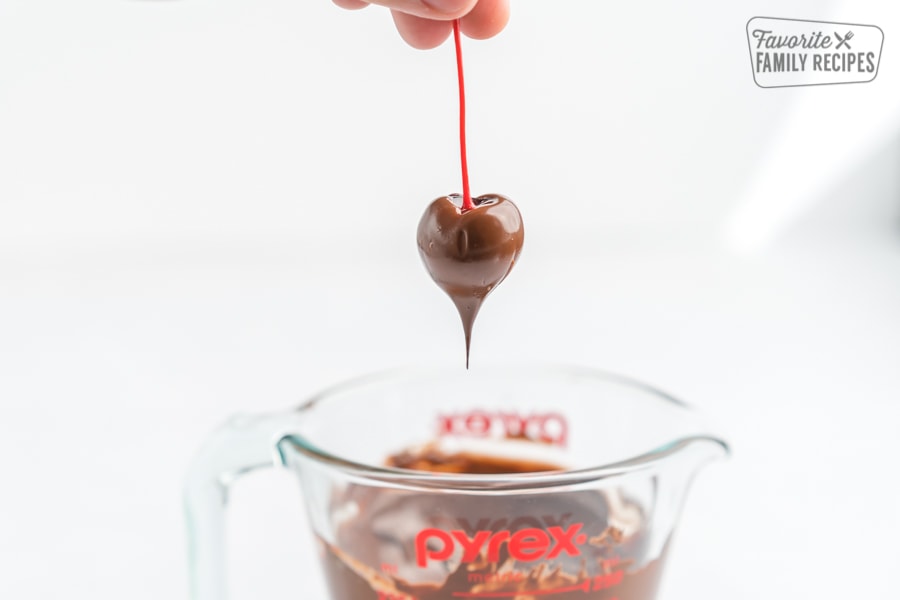
- Make the mouse – Dip the maraschino cherry into the melted chocolate mixture. Hold the cherry by the stem and make sure it is fully covered in the chocolate. Place the dipped cherry on its side on a rimmed baking sheet lined with wax paper or parchment paper.
- Press eyes on – Press a chocolate kiss onto the front of the cherry. It’s important to do this while the chocolate-covered cherry is still wet so they will stick together.
Decorating the Chocolate Mice
Making and creating the chocolate mice is the best part! Tiny hands may struggle with this part, but older kids will do great. It is easy to assemble the ears, eyes, and nose. Create uniformed mice or all unique ones!
- Ears – Press two halved peanuts or almond slices between the cherry and kiss for the ears. Make sure to do this while the chocolate is still wet.
- Eyes – Add two dots of white frosting. If you don’t have a frosting bag and tip, then you can spoon the frosting into a small plastic bag and cut a tiny hole in the corner of the bag to pipe eyes.
- Nose – Using a toothpick, add a dot of melted chocolate to a red hot and place it on the end of the kiss. There are your chocolate cherry mice!
How to Use Chocolate-Covered Cherries
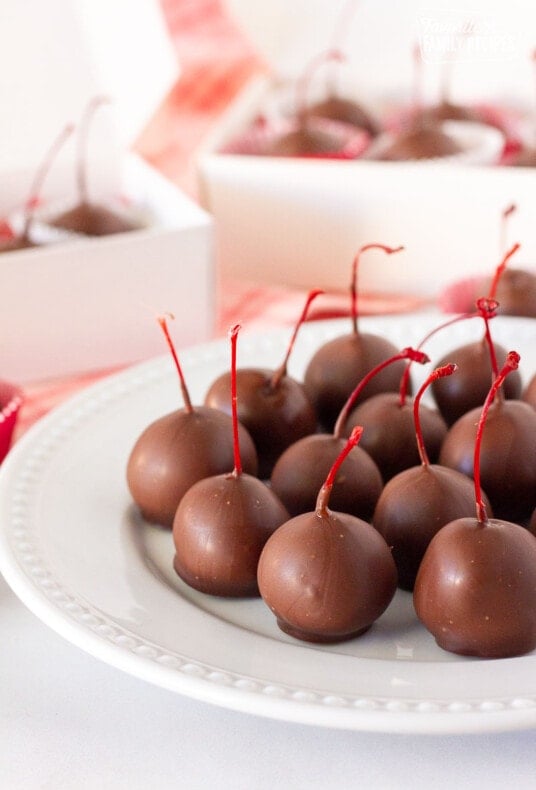
You can use any kind of chocolate-covered cherries for this recipe as long as it has the stem intact. If you plan at least two weeks for the cherries to set, you can make our classic chocolate-covered cherries and use them for this recipe. The cherries will have a softened, creamy fondant layer between the cherry and the chocolate layer.
They are my favorite way to make these chocolate cherry Christmas mice but they do take more time and planning. To get the Hershey’s Kisses to stick on the front, simply melt some chocolate and use it as glue to hold the two candies together.
Homemade Chocolate Mice Variations
These variations for chocolate mice are so fun and cute each way you make them! Take your creative side and make these cherry mice with the things you have in your kitchen pantry. The options are endless and fun!
- Nutty Surprise – Add a whole almond or a roasted hazelnut inside the cherry before molding it. The nut adds a nice crunch and flavor contrast.
- White Chocolate Option – Instead of dark chocolate, use white chocolate for dipping. This creates a sweeter and creamier contrast to the fruity center.
- Coconut-Coated – Roll the chocolate-dipped mice in shredded coconut after dipping for a tropical twist. This complements the sweet cherry and chocolate. This works especially well when using white chocolate.
- Spiced Chocolate – Add a pinch of cinnamon or a hint of cayenne pepper to the melted chocolate for a subtle kick in flavor.
- Sprinkles and Confetti – Decorate the mice with colorful sprinkles, edible glitter, or tiny edible sugar pearls for a festive look.
- Mini Marzipan Ears – Mold small almond or chocolate marzipan slices into mouse ears and attach them to your chocolate-dipped mice for extra cuteness.
- Chocolate Drizzle – After dipping the mice, drizzle contrasting chocolate with white on dark or dark on white to give the mice a fun design.
- Peanut Butter Filling – Swap the cherry with a peanut butter filling similar to the filling in our peanut butter bon bons for a classic peanut butter and chocolate flavor.
Tips for Making the Best Chocolate Mice
Chocolate mice are a festive treat that is fun to have for the holidays and parties! With a few simple steps and minimal ingredients, these chocolate mice are sure to be a family activity. Follow these helpful tips to make the best chocolate mice even better!
- Dry cherries – Make sure your cherries are dry by using a towel paper patting them carefully without squishing them or altering their appearance.
- Quality ingredients – Using high-quality chocolate ingredients will help with flavor and how well they last when stored.
- Melting chocolate – For best results use a double broiler to heat the chocolate. If you need it quicker, using a microwave in low and small heating increments also works well.
- Careful – The maraschino cherries can be fragile when dipping into the chocolate. Go a little slower and carefully wipe the excess drip of the chocolate on the side of the bowl.
- Setting chocolate – Be sure the chocolate is dry and hardened completely before covering it with plastic wrap or placing it in a tin or cellophane bag.
- Sharing – In addition to serving or gifting them on a plate or in a box with a ribbon, they are a fun topper for cupcakes or a themed birthday cake.
Christmas Mice For Holiday Neighbor Gifts
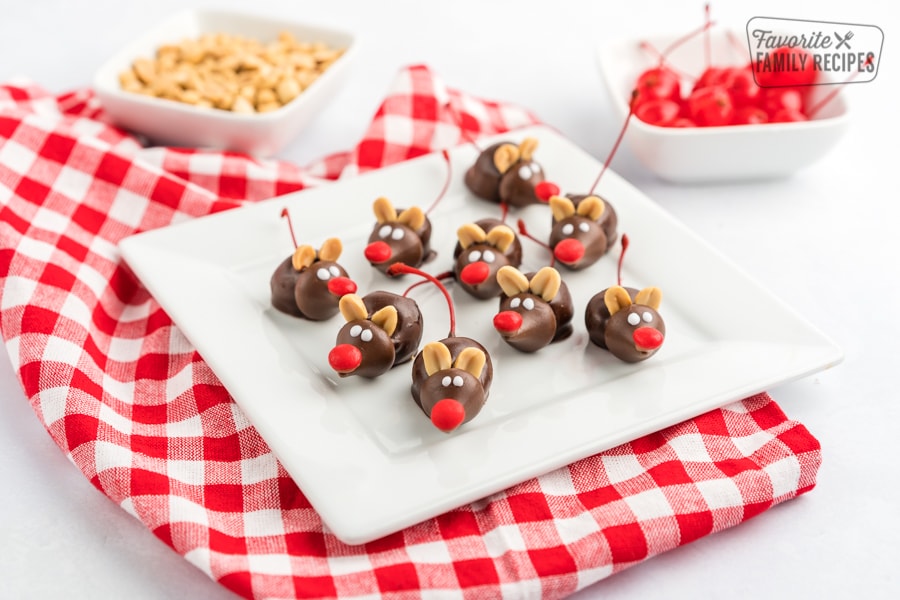
Turn these cute chocolate mice into Christmas mice for a darling neighbor gift for the holidays. Make a plate of them and attach a card saying “‘Twas the night before Christmas and all through the house, not a creature was stirring, not even a mouse.”
“These are absolutely adorable! Made them with my niece and nephew who at 5 and 4 thought they were the most fun thing ever!”
-Gina
Storing Chocolate Mice and Making Ahead
Storing chocolate cherry mice is an easy task and can even be made ahead of time! These last for a week in the fridge and even longer in the freezer. Colder temperatures allow the chocolate mice to hold their form and last until they are enjoyed!
- Making ahead – These chocolate mice are a great way to get ahead in making them for friends and family. Follow the instructions and once they are set, place in the fridge until ready to enjoy.
- Refrigeration – Store the chocolate-covered cherry mice in an airtight container in the fridge for two weeks. The cooler temperature of the fridge will help hold together the chocolate mice and give them the structure they need.
- Freezing – Once the chocolate mice are cooled and ready to store, flash-freeze them on a lined cookie sheet in the freezer. Place the frozen chocolate mice in a
- Serving – When ready to serve or give as a gift, let the chocolate mice sit at room temperature before biting into the chocolate cherry. Place on a plate or in a gift box for sharing!
Frequently Asked Questions
You can easily swap out peanuts for almond ears, or mini marshmallows for the ears.
It is best to use the maraschino cherries for flavor and appearance. Maraschino cherries have a fresh sweet flavor that has a vibrant red coloring.
YES! We highly recommend being creative and using the pantry items you already have at home. We have seen mini candy bows, colored sprinkles, or even edible glitter to make these mice even better!
Mice have beady red eyes or black eyes in most photos or things that we see. We wanted the eyes to look soft and cute. We used white chocolate or white frosting for the eyes. You can use black frosting, dark chocolate, or even mini chocolate chips to switch things up. Red gel icing will look good for a Halloween appearance.
READ NEXT: 25+ Christmas Dessert Ideas
More Fun Christmas Candy
In our family, we love making big batches of goodies to give to our neighbors, and candy is our favorite thing to make! Try a few more of our favorites to box up for friends and neighbors.
How to Make Chocolate Mice
Chocolate Mice
Video
Ingredients
- 1 cup chocolate candy melts milk or semi-sweet (You can also use chocolate chips with ½ teaspoon of shortening or coconut oil)
- 20 Maraschino cherries WITH stems (these are a little hard to find, but they are a must!)
- 20 Hershey’s chocolate kisses
- 40 Unsalted peanut halves
- 20 Red-hots
- White decorating frosting I usually just buy a small squeeze tube from the grocery store cake aisle.
Instructions
- In the microwave or over the stove, melt the chocolate. Stir until smooth.
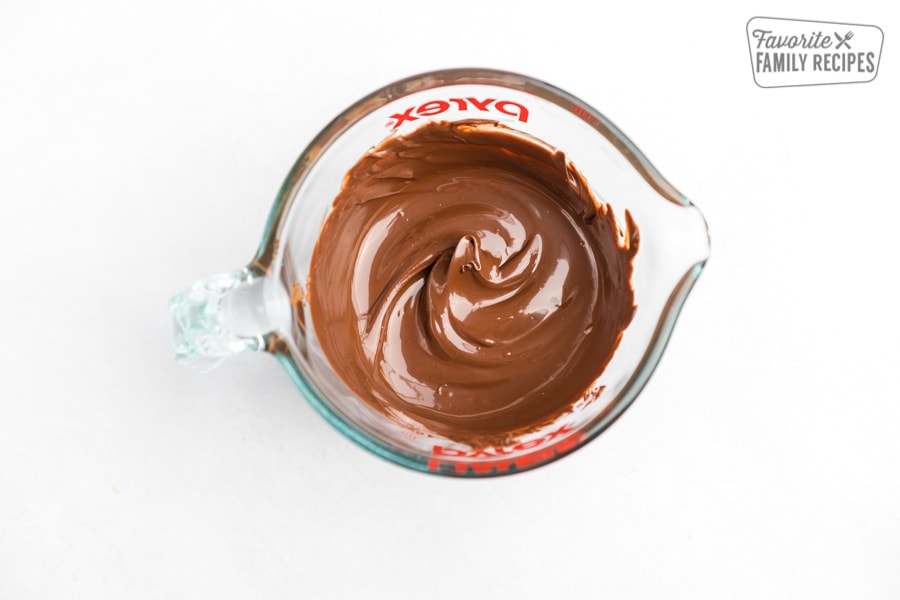
- Holding a cherry by its stem, dip it into the chocolate. Place on a baking sheet covered with wax paper.

- Press a chocolate kiss on the front of the cherry. The wet chocolate will hold them together. Wedge peanut halves between the cherry and chocolate kiss to make the ears.

- Add a couple of dots of white frosting for the eyes, then put a little melted chocolate on a red-hot and place it on the end of the kiss to make the nose.

Notes
- Unwrap the Hershey kisses and place them in a large bowl.
- Drain cherries in a colander and dry with a paper towel.
- Melt the chocolate in a microwave-safe bowl or double boiler.
- Dip the maraschino cherry in the melted chocolate. Hold the cherry by the stem and make sure it is fully covered in the chocolate. Place the dipped cherry on its side on a rimmed baking sheet lined with wax or parchment paper.
- Press a chocolate kiss onto the front of the cherry. It’s important to do this while the chocolate-covered cherry is still wet so they will stick together.
I made 22 mice today. The red hots were too heavy so I put a small pink dot on each nose. I melted 2/3 cup of milk chocolate chips with 1/2tsp. Coconut oil in the microwave. These mice are for my grandchildren, a special neighbor and a few friends. I could have made more but the remaining cherries were without stems.
Thank you for sharing your substitution ideas! It is frustrating when the cherries don’t have stems. Thank you for your comment!
We have a peanut allergy in our house so we switched out the peanuts for brown m&ms for the ears. They turned out super cute! Thanks for this fun recipe.
These look adorable lining the edge of a cheesecake.
Great idea! Thank you, Diane!
Can I freeze them?
Sure!
I made these a couple of years ago for a holiday party. I put them in a lined shoebox with shelled sunflower seeds for ‘droppings’.
These came out so cute! I wound up using fresh Rainier cherries and dark chocolate kisses, and then sliced almonds for the ears. They came out great! I gave them as a birthday gift and the recipient loved them. Will make again for sure! They’ve kept for at least 4 days without refrigeration and are fabulous.
Yay! So glad to hear!
The only place I could find cherries WITH stems was in a liquor store. They come in both regular and liquor saturated. Of course, be sure to get the regular if making for children.
Tavette – South Florida
Do these have to stay refrigerated
No, you can store them on the counter in an airtight container.
Can’t wait to try this recipe out for xmas! Ty
Gordon Food Service (GFS) sells sells big containers of the stem on cherries
I used mini red M&M s for the nose.
The kind that comes in a little tube of red & green for Christmas!
Adorable! I m wondering if these could be frozen as I d like to make ahead?!
I think that would work!
These are absolutely adorable! Made them with my niece and nephew who at 5 and 4 thought they were the most fun thing ever!
I just love these adorable little mice! My daughter giggled the entire time we were making them, so fun!