We may earn a commission when you click on the affiliate links in this post.
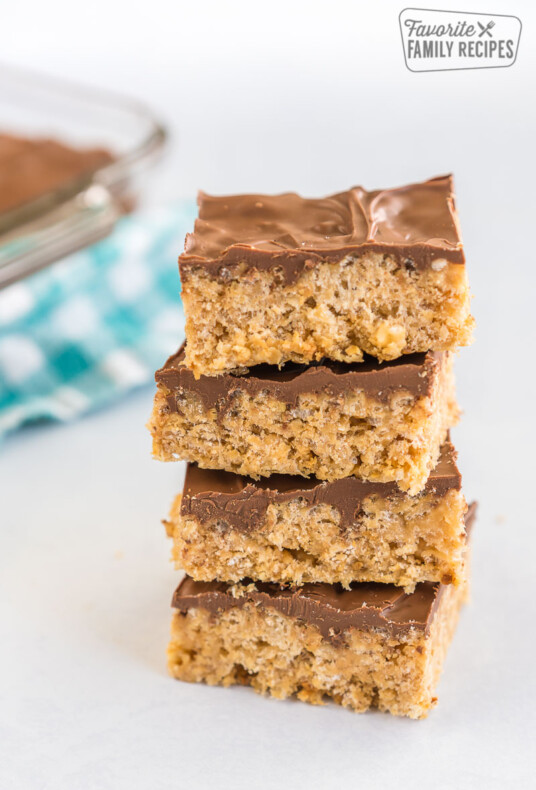
Make soft and chewy Microwave Rice Krispie Treats in less than 5 minutes! This easy no-bake recipe uses just three ingredients and turns out perfect every time. I love how it is less mess than making them over the stove.

5 Star Reviews ⭐️⭐️⭐️⭐️⭐️
“My teens ask why mine now tastes better than gma’s does… Super easy, much softer than the traditional recipe. Just some hot soapy water rinsed and maybe soaked and it’s all clean again.” – Monica
“Yummy first time and I’m 75. Haha. Had a box of krispie rice and regular marshmallows. Followed it all, added a tbsp of vanilla. Wow it was super easy to make in the microwave. Husband loved it. Will definitely make again.” – Martha
“Microwave is the way to go for rice krispie treats! Best way to make them!” – Michelle
The Secret to Perfect Rice Krispie Treats
Rice Krispie Treats have always been a favorite snack at our house—especially for the kids, but I have to admit, I love them just as much! Over the years, I’ve tried all kinds of methods to make them, but this Microwave Rice Krispie Treats version is hands-down my favorite. I’ve been making them this way for over 20 years, and they turn out soft, chewy, and perfect every single time.
Not only is this method faster and easier than the stovetop version, but I actually think the results are even better. Once you try making Rice Krispie Treats in the microwave, you may never go back! Be sure to check out some of our other favorite no-bake treats like our Copycat See’s Fudge Recipe and chocolatey No Bake Cookies.
🩷 Heidi
Table of Contents
- 5 Star Reviews ⭐️⭐️⭐️⭐️⭐️
- The Secret to Perfect Rice Krispie Treats
- Ingredients You’ll Need
- Sweet Variations and Fun Add-Ins
- How to Make Microwave Rice Krispie Treats
- Recipe Tips
- Gluten-Free Version
- Peanut Butter Version
- Frequently Asked Questions
- How to Store
- More Rice Krispie Recipes You Will Love
- Microwave Rice Krispie Treats Recipe
Ingredients You’ll Need

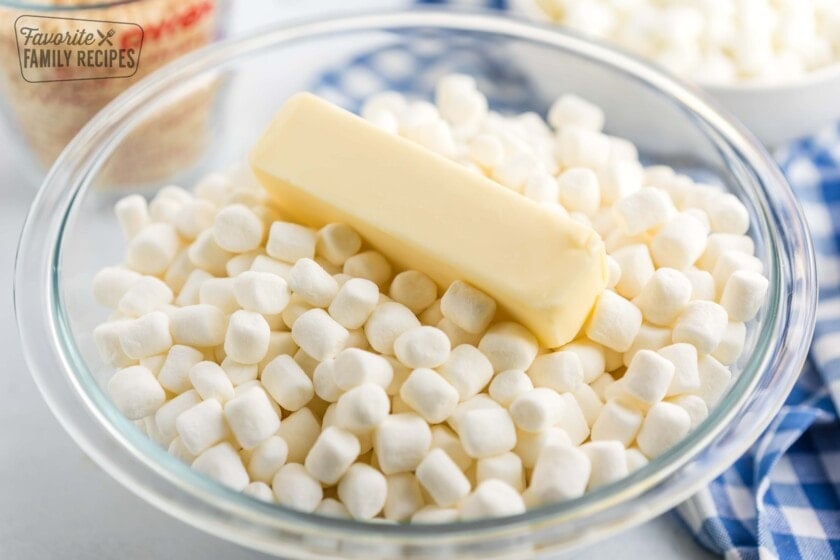
- Mini Marshmallows – Fresh mini marshmallows melt quickly and smoothly, giving you that classic gooey texture.
- Butter – A little butter helps the marshmallows melt evenly and adds delicious richness.
- Rice Krispies Cereal – Or any crispy rice cereal you prefer. This is what gives the treats their signature crunch.
- Cooking Spray or Butter (for greasing) – Grease your pan and spatula to make spreading the mixture easier.
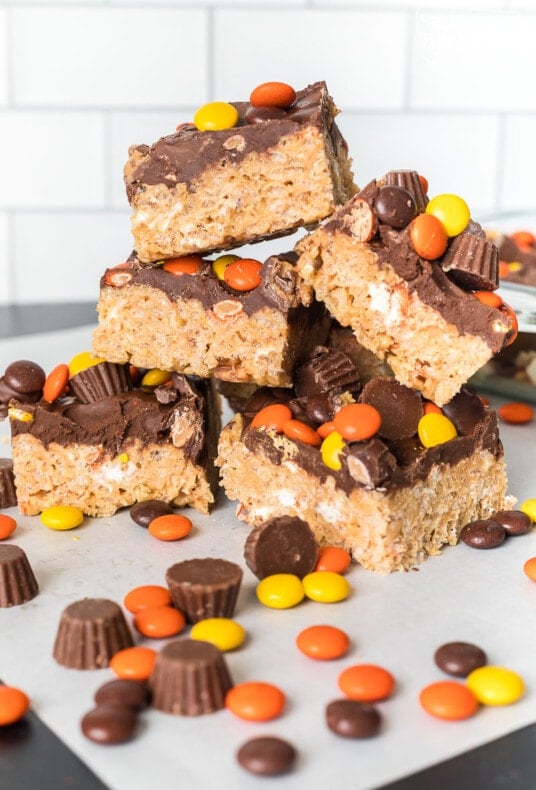
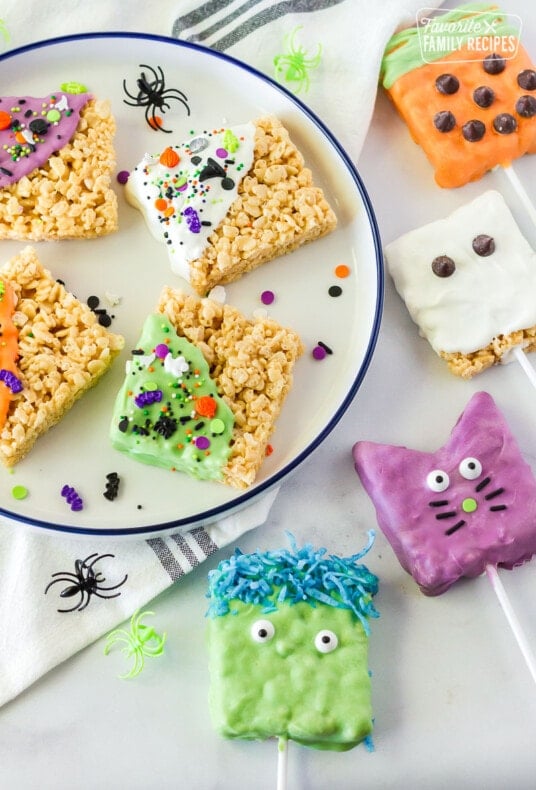
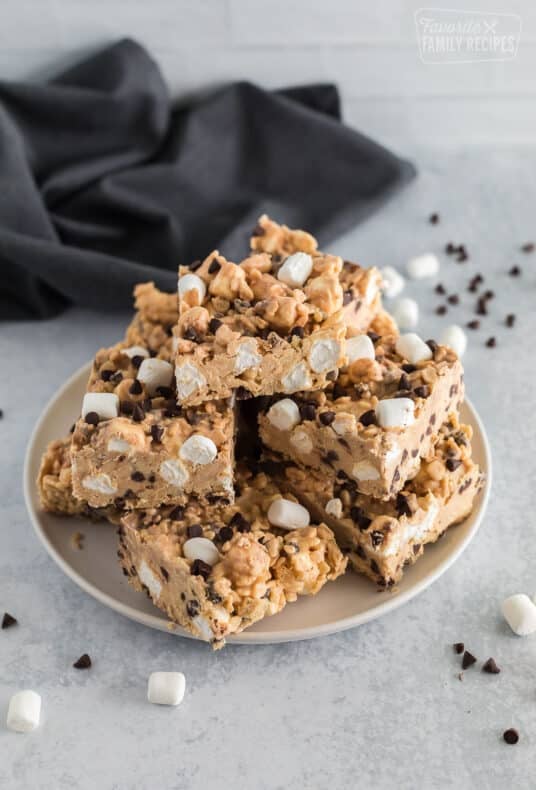
Sweet Variations and Fun Add-Ins
This is a classic, no-frills recipe, but you can easily add your favorite mix-ins. Here are some fun ideas to try:
- Salted Caramel Rice Krispies – a fun and tasty twist on the original.
- M&Ms – Add color and sweetness with mini M&Ms or seasonal ones for holidays.
- Reese’s Pieces or Mini Peanut Butter Cups – For a chocolate peanut butter combo.
- Rainbow Sprinkles – Great for birthdays or fun celebrations.
- Crushed Cookies – Oreos or other cookies create a cookies-and-cream vibe.
- Flavored Extracts – A few drops of vanilla, caramel, or butter extract enhance flavor.
- Toffee Bits – Add a little crunch and buttery richness.
- Cereal Swaps – Try Fruity Pebbles, Cocoa Krispies, Reese’s Puffs, or Cheerios.
- Holiday Candies – Candy corn for Halloween or Cadbury mini eggs at Easter are festive and fun!

How to Make Microwave Rice Krispie Treats
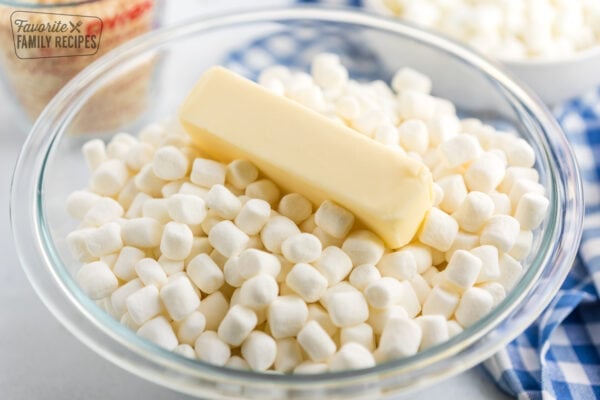
- Add butter and marshmallows to a large, microwave-safe bowl.

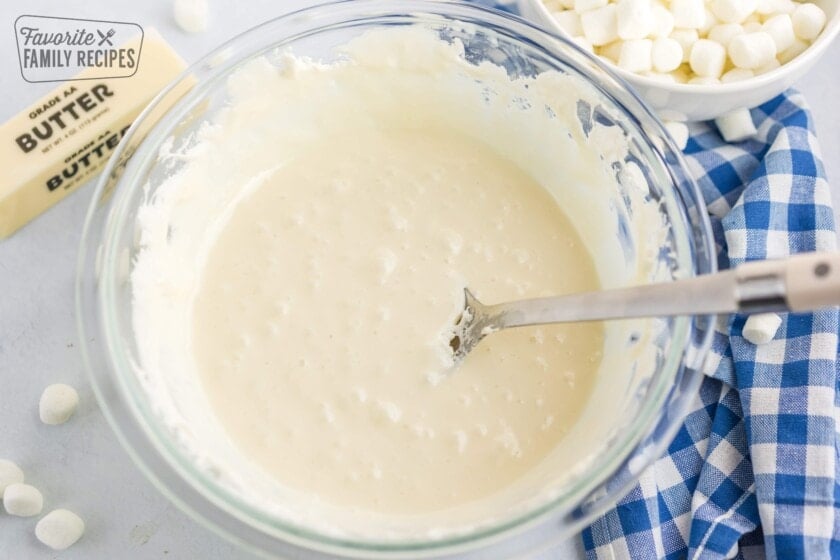
- Microwave on high for 1 minute, stir, then heat for another 30 seconds. Stir again until just melted—don’t overheat.

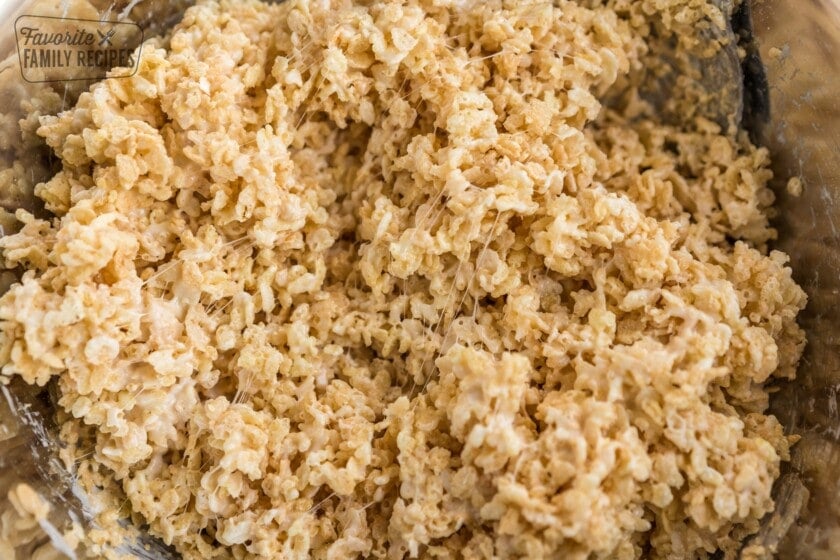
- Quickly fold in the rice cereal until everything is evenly coated.

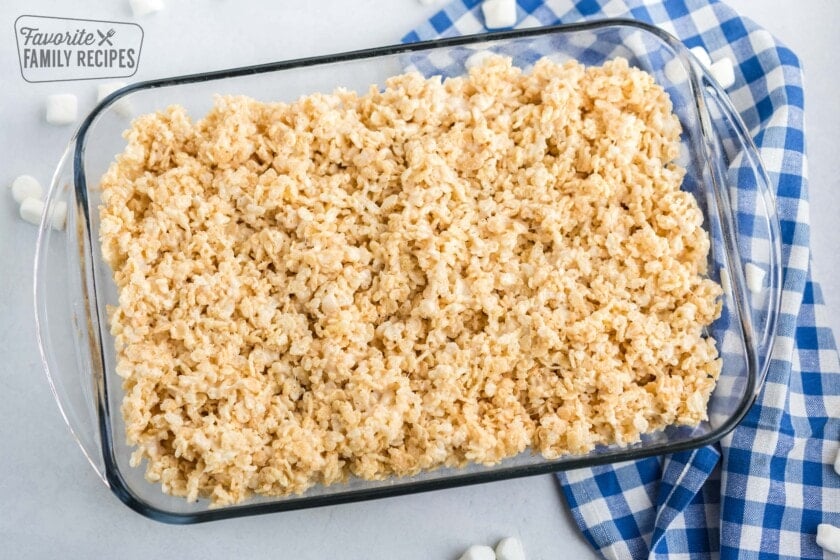
- Pour the mixture into a greased 9×13 dish. Gently press the mixture into an even layer.
Recipe Tips
- Use fresh ingredients – Stale marshmallows or cereal can lead to dry or crumbly treats. Always start with a fresh bag for the best texture.
- Microwave for better results – The microwave offers more control than the stovetop and helps prevent the marshmallows from overheating and turning hard.
- Melt in short intervals – Heat the butter and marshmallows in 30-second bursts, stirring in between. Stop as soon as the mixture is just melted—don’t overdo it.
- Choose the right bowl – Use a large microwave-safe bowl to prevent overflow and make stirring easier. If needed, melt in a medium bowl and mix in a larger one.
- Grease your tools – Lightly coat your spatula, spoon, or hands with cooking spray or butter to keep the sticky mixture from clinging.
- Work quickly – Once the cereal is added, mix and press into the pan right away before the mixture sets.
- Press gently but firmly – Use a greased spatula or your hands to evenly press the mixture into the pan without packing it down too tightly.
- Let them cool completely – Allow the treats to rest at room temperature for about 30 minutes before cutting. This helps them firm up and hold their shape.

Gluten-Free Version
Since we discovered some gluten sensitivities in our family, we’ve had to be more mindful about ingredients. If you’re wondering whether Rice Krispie Treats are gluten-free, it depends on the cereal. The classic Kellogg’s Rice Krispies contain barley, which means gluten.
However, many generic brands of crispy rice cereal are gluten-free. I’ve had great luck using Malt-O-Meal’s gluten-free rice cereal in this recipe—it works perfectly!
Peanut Butter Version
A reader, Karen, shared this peanut butter variation with us:
“I’ve been making these treats in the microwave for 25+ years. Always a hit wherever we take them. The favorite add in would be ⅓ cup peanut butter stirred into the melted butter/marshmallow mixture. Stir until completely melted, then add the cereal as before. Yummm!”
Frequently Asked Questions
Yes! Regular marshmallows work just fine. Just be sure to measure by weight and melt them thoroughly, stirring frequently.
Nope! They’re best stored at room temperature in an airtight container. Refrigerating them can actually make them too hard or dry.
They’ll start to set up within 10–15 minutes but are easiest to cut and enjoy after about 30 minutes at room temp.
A 12 oz. box has about 10 cups. For this recipe, you’ll use just one cup less than a full box.
Lightly grease your hands or spatula with butter or cooking spray before pressing. This helps keep the mixture from sticking.
Absolutely. A teaspoon of vanilla adds great flavor, and you can experiment with caramel, almond, or butter extracts too.
How to Store
To keep your treats soft and fresh:
- Store them in an airtight container once cooled.
- Place wax paper or parchment between layers to prevent sticking—especially handy if you’re packing them for a picnic or camping trip!
- You can also keep them right in the pan with plastic wrap over the top or wrap each bar individually.
More Rice Krispie Recipes You Will Love
If you are looking for Rice Krispie treats that are a step beyond the basic recipe, try some of these tasty variations!
Let me know how your Microwave Rice Krispie Treats turned out in the comments below! I’d love to hear if you added any fun mix-ins. If you enjoyed the recipe, don’t forget to leave a rating and share it with a friend who needs an easy, no-bake treat!
Microwave Rice Krispie Treats

Video
Ingredients
- 1/2 cup salted butter, if using unsalted butter, add a dash of salt to the recipe
- 16 ounces mini marshmallows
- 9 cups crispy rice cereal, (i.e. Rice Krispies Cereal)
Instructions
- Place butter and marshmallows in a LARGE microwave-safe bowl.

- Microwave on high for 1 minute. Remove bowl from microwave and stir. Return bowl to microwave and microwave another 30 seconds. Stir again until marshmallows and butter are completely melted together. You only want it JUST melted.
- Fold in rice cereal until well combined.
- Place mixture in a greased 9×13 dish and press down evenly (spray a little cooking spray on your hands to prevent sticking). Allow to cool before serving.
Notes
Nutrition
Nutrition information is automatically calculated, so should only be used as an approximation.
Love this recipe?
We want to hear from you! Please leave a review.
This is great! It fills up the whole pan, unlike the brand name recipe. Thank you.
So glad you liked it!