We may earn a commission when you click on the affiliate links in this post.
Omelette in a bag is a perfect breakfast for camping, family reunions, or even at home. Everyone can customize their own with their favorite ingredients. And clean-up is a breeze!

Featured with this Recipe
- Ingredients in Omelette in a Bag
- How to Make an Omelette in a Bag
- Serving Omelettes for a Crowd
- Types of Omelette Fillings and Toppings
- Variations for Omelettes
- BPA Free Plastic Bags
- Tips for the Best Omelette in a Bag
- Frequently Asked Questions
- Making Omelettes Ahead and Storing
- More Tasty Breakfast Recipes
- Omelette in a Bag Recipe
This omelette-in-a-bag recipe is so much fun! We make these every single time we go camping. They are SO easy and there is virtually no cleanup. I have all the ingredients prepped before we go camping so we wake up and get some water boiling. Everyone loves making their omelets EXACTLY how they want and it is fun! They always come out perfect and nothing tastes better after a long night of camping.
I find myself making these a few times just at home throughout the year because they turn out so fluffy and tasty. They are way better than trying to do it in a pan; plus you can make them all at once instead of just one at a time. We have made these when guests come visit and they are always surprised with how good they are. Serve with some fresh fruit and you have the perfect breakfast!
Ingredients in Omelette in a Bag
- Eggs
- Water
- Fillings – see our list below for all our favorite filling ideas!
- Toppings – shredded cheese, avocado, sour cream, salsa, ketchup, hot sauce, sliced green onions, chives, salt and pepper.

How to Make an Omelette in a Bag
This is the perfect breakfast for feeding a crowd or enjoying a fun breakfast with your family. It is perfect at home and out camping. We use this recipe all the time when we’re out camping. They’re so easy and fun. All you need are some large eggs, a little water or milk, and any fillings you like for your omelette. When we’re camping I bring along diced ham, turkey bacon and a few different types of cheese. Then I pack a few containers of toppings: avocado, diced green onions, chives, shredded cheese, ketchup, hot sauce, salsa, sour cream, anything I know my family likes on their omelettes.
- To make the omelettes, bring a large pot of water to a boil. I like to give myself plenty of room in the pot to add the bags of eggs, so I generally fill it only about 2/3 of the way full.
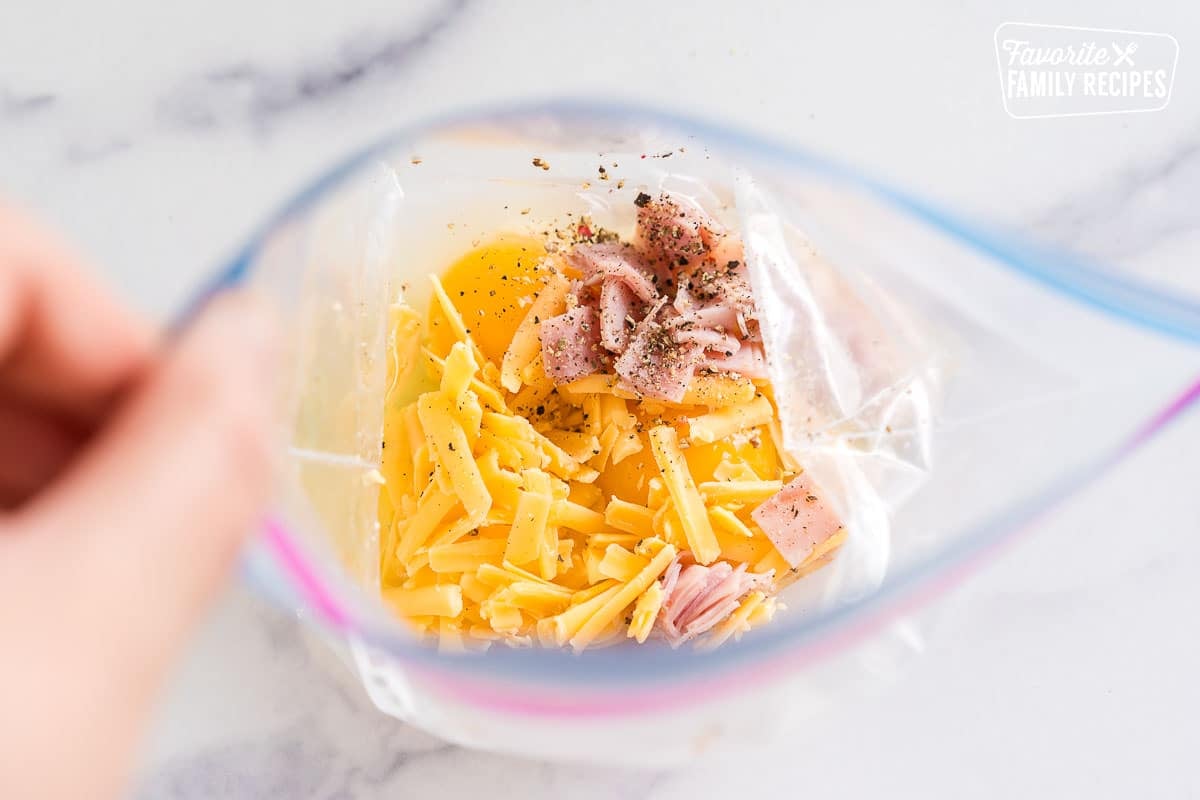
- While the water boils, crack your eggs into a Ziploc heavy-duty, large freezer bag and add a little splash of water. You can use smaller bags, like the quart-sized freezer bags, for younger members of your family who may only want one egg instead of two or more. Everyone can make their own!
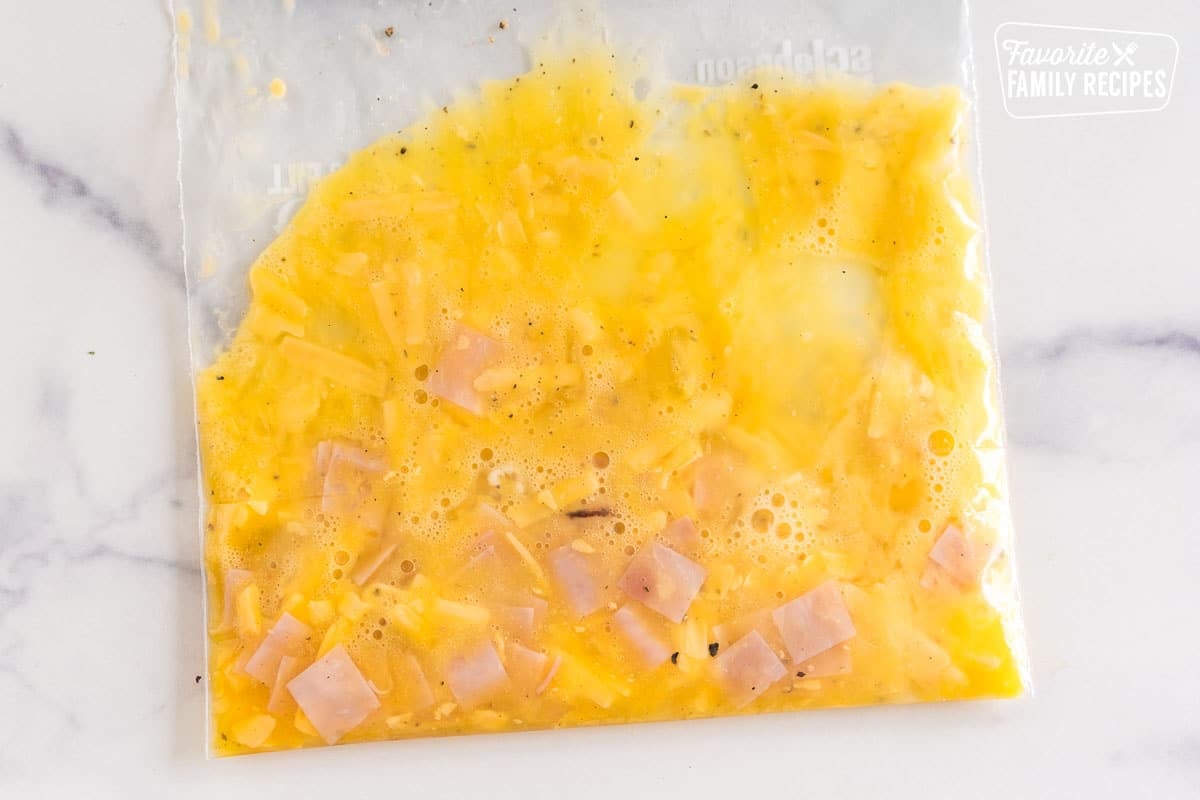
- Seal up the bag and smash, smush and squish the mixture around with your hands. Do whatever it takes to get those eggs beaten up and scrambled.
- Add any remaining ingredients that you would like, press excess air out of the bag as you can, and seal tightly. Smoosh the ingredients around a little bit to get an even distribution.
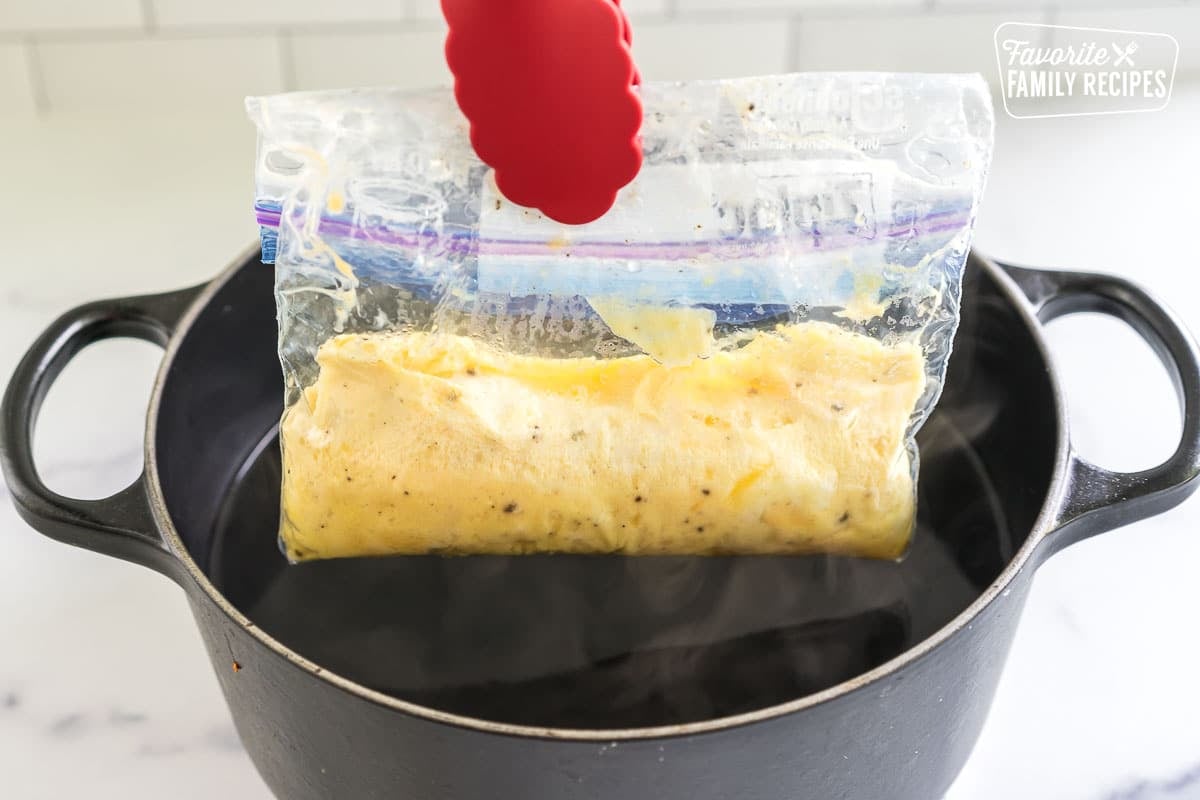
- Place bags in the boiling water and cook for 13 minutes. Knowing my family, I bring extra eggs for the bigger eaters. I just plan on adding one to two minutes per additional egg if people want bigger omelettes.
- When the eggs are done, use tongs to carefully remove bag or bags from the water. When you open the bag, the omelette should easily slide onto the plate.
- Top with salt and black pepper along with any additional toppings and enjoy!

Serving Omelettes for a Crowd
This omelette in a bag recipe is a great recipe if you are cooking breakfast for a crowd. You can make big batches all at once and again, clean-up is a snap! Whether camping, at a reunion, or just at home wanting to switch things up, you can’t lose with this simple, satisfying, and super fun breakfast! Also, have you seen our FAMILY REUNION Meal Planning Guide? We share lots of other great meals you can make for big groups. Be sure to check it out!
Types of Omelette Fillings and Toppings
The sky is the limit when it comes to omelets in bag fillings. Here are some of the more common types of Omelette recipes with fillings.
- Denver Omelette – Ham, bacon, bell peppers, onions, cheese.
- Western Omelette – Ham, onion, green pepper, cheese.
- Mediterranean Omelette – Spinach, feta cheese, olives, red onion, garlic.
- Southwest Omelette – Bacon, tomato, avocado, Monterey Jack cheese, salsa, sour cream.
- Steak Omelette – Sliced steak, mushrooms, onions, green pepper, and tomatoes.
- Veggie Omelette – Bell peppers, onion, mushrooms, baby spinach leaves, tomato, avocado, cheese.
Variations for Omelettes
Make the most of your omelette in a bag! Add in protein, veggies, and shredded cheese to fill your omelettes. Garnish with toppings for a complete meal!
- Meat filling ideas – Diced ham, bacon, ground sausage, Kielbasa sausage, steak slices, Spam, pulled pork, seasoned ground beef, pepperoni, salami, shredded chicken.
- Vegetable filling ideas – Red, green, orange, or yellow bell peppers, mushrooms, red onion, green onion, white onion, cherry tomatoes, Roma tomatoes, garden tomato, fresh spinach, diced zucchini, broccoli, avocado, butternut squash, alfalfa sprouts.
- Cheese filling ideas – Cheddar cheese, Monterey Jack cheese, Provolone, Pepper Jack, Swiss, Gruyere, Mozzarella.
- Topping ideas – Shredded cheese, salsa, sour cream, guacamole, cilantro, parsley, diced tomatoes, diced onions, basil leaves, lime, Hollandaise sauce, Greek yogurt.
BPA Free Plastic Bags
We have had some comments about the bags being safe to boil. We use Ziploc freezer bags which claim to be BPA-free. If you are still worried about it, there are reusable boiling bags that you can purchase online as well. We have no qualms about using the Ziploc freezer bags, especially since we only make these on special occasions.

Tips for the Best Omelette in a Bag
- Fresh ingredients – Chop, cut, and prepare all the ingredients. Having all the ingredients fresh and prepared will help make this omelette in a bag much smoother when making it.
- Seal the bag – It is crucial to make sure to seal your bag so none of the contents will fall out over the pot or in the boiling water. Double-check them before adding them to the water.
- Elevation – Also, cooking times vary depending on elevation – check your eggs every few minutes. They are ready once they are no longer runny and feel set!
- Plastic melting – Make sure the tops of the bag don’t hang out over the edge of the pot, especially if you are doing it over a fire– you don’t want the plastic to melt.
- Clothespin – One of our readers suggested clipping the bags together with a clothespin and draping them over a skewer or stick placed across the pot to keep them from falling over the sides– a great idea!
- Tongs – Use tongs to remove the omelette in a bag from the boiling water. This will prevent any burns on your hands.
“We started doing this a couple of years ago on our family group camping trips. We use a Turkey fryer filled with boiling water and write our names in permanent marker on the bag before filling. So much fun!”
-Debbie
Frequently Asked Questions
Yes, they are safe! Ziploc bags are BPA-free and can be heated without issue. We make these all the time for ourselves and our kids.
We’ve found that 13 minutes works for up to 6 eggs. If adding more eggs, add 1-2 minutes per additional egg. Also, cooking times vary depending on elevation – check your eggs every few minutes. Once they are no longer runny and feel like they are set, they are ready!
You can spray a little cooking spray in the bag before filling.
It is best to use bags that are used for baking and cooking that can withstand the heat from the boiling water.
Make sure the bag is properly sealed and the air is removed from the bag. You can also clip the bags together too!
Pre-cooked meat is best for the omelette in a bag. If you do plan to use raw meat, make sure that your meat is cooked through when boiling in the bag.
READ NEXT: 33+ Breakfast Ideas
Making Omelettes Ahead and Storing
These omelettes in a bag are the best breakfast choice for making ahead and storing! They are great for meal prep and making the best outdoor breakfast. The possibilities are endless!
- Making ahead – Prepare the ingredients ahead of time and fill the bags full of the fillings. Write the names on each bag to remember who has which bag. Place in the refrigerator for 24 hours. When ready to boil them take them out and continue with the recipe card instructions.
- Storing – Place all the leftovers or extra omelettes in an airtight container in the fridge for three days.
- Reheat – Take the leftovers out of the fridge and reheat on a lightly greased pan on the stove or in the microwave.
More Tasty Breakfast Recipes
From sweet to savory, we have dozens of delicious breakfast recipes right here! Check out a few of our favorites! These are quick and easy breakfast recipes you have to try!

Omelette in a Bag
Video
Ingredients
- 2 eggs
- 1 Tablespoon water
- 1 Tablespoon cheese shredded
- 1 Tablespoon ham diced
additional ingredients (to your liking):
- bacon cooked & chopped
- sausage cooked & crumbled
- tomato diced
- bell peppers diced
- onion chopped
- mushroom sliced
- whatever other toppings you like
Optional Toppings:
- Salt & pepper
- sour cream
- salsa
- avocado
- guacamole
- any additional topping ingredients you like
Instructions
- While waiting for the water to boil, crack eggs into a Ziploc heavy-duty, large (at least quart-sized) freezer bag and add water. Add any remaining ingredients that you would like, press as much air out of the bag as you can, and seal tightly.

- Seal and shake, smash, squish the bag – whatever you can to get those eggs really beaten up.

- Bring a large pot of water to a boil (approximately ⅔ full). Place bags (up to 6) in the boiling water and cook for 13 minutes (adding 1-2 minutes per additional egg if people want bigger omelettes). Also, cooking times vary depending on elevation – check your eggs every few minutes. Once they are no longer runny and feel like they are set, they are ready!

- Carefully remove the bags from the water. When you open the bag, the omelette should easily slide onto the plate. Top with any additional toppings and enjoy!

Notes
-
- Meat filling ideas: Diced ham, bacon, ground sausage, Kielbasa sausage, steak slices, Spam, pulled pork, seasoned ground beef, pepperoni, salami, shredded chicken.
-
- Vegetable filling ideas: Red, green, orange, or yellow bell peppers, mushrooms, red onion, green onion, white onion, cherry tomatoes, Roma tomatoes, garden tomato, fresh spinach, diced zucchini, broccoli, avocado, butternut squash, alfalfa sprouts.
-
- Cheese filling ideas: Cheddar cheese, Monterey Jack cheese, Provolone, Pepper Jack, Swiss, Gruyere, Mozzarella.
-
- Topping ideas: Shredded cheese, salsa, sour cream, guacamole, cilantro, parsley, diced tomatoes, diced onions, basil leaves, lime, Hollandaise sauce, Greek yogurt


Thank you Echo, for your response and input. I didn’t know about adding salt before freezing. My plan is to freeze (after cooking) in the same bag I boiled it in (assuming the bag survives, of course), to reduce contamination (from transferring).
Stumbled on this. Love the idea/concept … want to try it. Question: Can the omelettes be frozen after cooked (and vacuum or ziploc sealed), for use at a later date. Assume, for reheating (after being thawed) … can drop in boiling water for a couple of minutes. Thanks.
Hi Diana, I have not tried freezing the omelette in a bag. After doing a little online research I found that it should work. Be sure to add a teaspoon of salt to the omelette before freezing. Ham and cheese will freeze great in the omelette and most vegetables, except tomatoes.
I wanted something easy to make a breakfast for one. I’ve tried these a few times with different filling & they always turn out amazing. Only change I made is cook them for 12 minutes.
So glad you like them! They make perfect omelets every time!
Can these omelettes in a bag be frozen before making them?
We haven’t tried that so I can’t say if that would affect the taste or texture. Let us know how it turns out if you try it!
Can I use frozen veggies or should they be fresh?
Fresh usually tastes better but you can use frozen if that is what you have on hand.
I found it best to use sandwiches bags. Works great
Can I use milk or half and half in place of the water?
Sure!
Sounds like a winner! Will be trying this!
We started doing this a couple of years ago on our family group camping trips. We use a Turkey fryer filled with boiling water and write our names in permanent marker on the bag before filling. So much fun!
That is awesome! So glad you liked the recipe!
This looks amazing! Can’t wait to try it. Pinning it now!
Since I’m already making boiled eggs. I’m going to try doing this at the same time. Don’t worry when my boiled eggs are done I’ll remove them.
Love this recipe and technique. I use a silicone bag instead of a Ziploc. The plastic slide bar that keeps the silicone bag closed could not be used with any heat, so I had to leave that off and secure the bag by clipping it to my pot with clothespins, but it worked perfectly. I cook mine a bit longer, maybe 15 to 16 minutes, and they are perfect every time.
Thanks for sharing that this works well with silicone bags! Very good to know!
Do you have to use the gallon size ziplocks or would quart size work?
Quart size actually works the best for individual servings. Thanks for asking!
Would this work with the quart size ziplock freezer bags or do you need the gallon size?
Quart size works great!