We may earn a commission when you click on the affiliate links in this post.
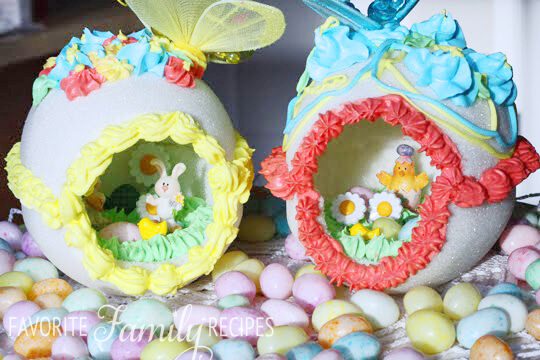
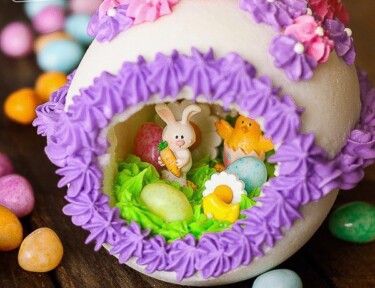
Panoramic Easter Eggs are such a fun Easter craft for kids! Decorate with frosting, flowers, jelly beans, and little bunnies and chicks.
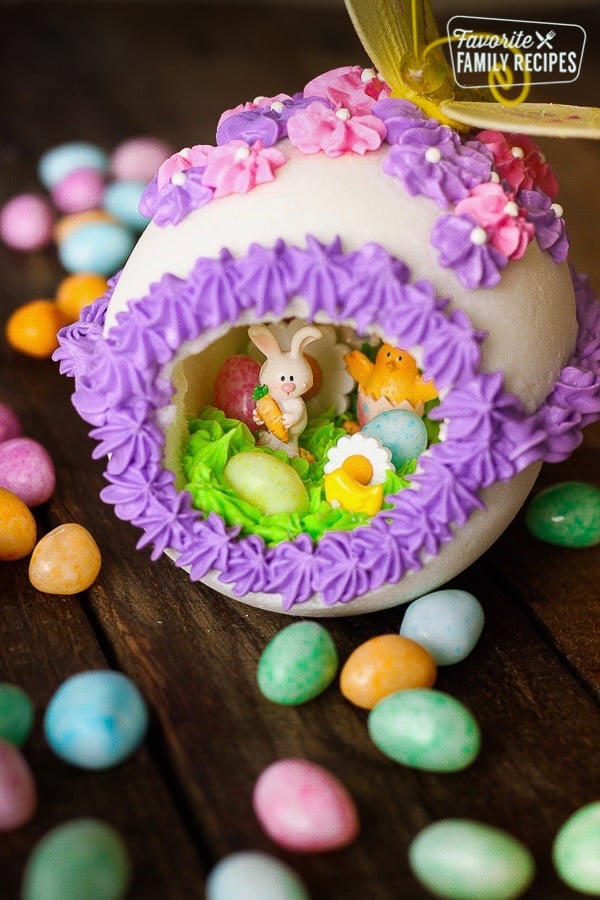
Table of Contents
- A Fun Easter Craft for the Whole Family
- What You’ll Need to Make Panoramic Easter Eggs
- Step-by-Step Guide to Making Panoramic Easter Eggs
- Creative Ideas for Your Panoramic Easter Eggs
- Helpful Tips from Fellow Crafters
- Questions About Panoramic Easter Eggs
- Keep the Tradition Alive
- More Easter Recipes
- Panoramic Easter Eggs Recipe
A Fun Easter Craft for the Whole Family
I’m so excited to share one of my absolute favorite Easter crafts with you – Panoramic Easter Eggs! These beautiful, sugar-crafted eggs aren’t just decorations; they’re little windows into magical Easter scenes that you and your family will cherish for years to come. Whether you’re crafting with kids, friends, or flying solo, this is a fun, creative way to add a special touch to your Easter celebrations.
Why I Love Making Panoramic Easter Eggs
Though these aren’t edible (I know, it’s tempting because they’re made with sugar!), they hold a special place in my heart. This craft is a beloved family tradition, filled with laughter, creativity, and lots of colorful messes. Plus, they make fantastic gifts and keepsakes that can be treasured year after year.
What You’ll Need to Make Panoramic Easter Eggs
The best part? You probably already have most of these ingredients at home. Here’s your Panoramic Easter Egg supply list:
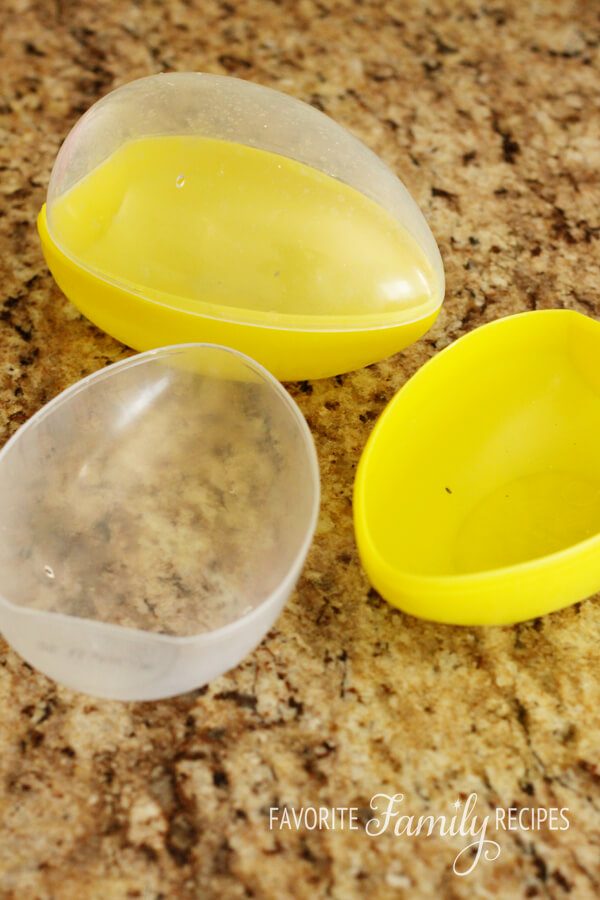
- Egg Mold: You can use a plastic Easter egg or even create your own mold. Look for ones with a flat base so your egg stands easily.
- Egg White: This acts as the glue, bonding everything together.
- Sugars: Both granulated and powdered sugar help create that sturdy egg shape.
- Decorations: Jelly beans, mini Easter candies, tiny figurines, and colorful sprinkles work perfectly.
- Icing: Royal icing to hold things together and add decorative borders.
- Optional: Green-tinted coconut, Easter grass, ribbons, or even small photos for a unique background.
Step-by-Step Guide to Making Panoramic Easter Eggs
Ready to get started? Let’s hop into it!
- Prepare the Sugar Mixture – Whisk the egg white until it’s foamy. In a separate bowl, mix the granulated and powdered sugars until well combined. Pour the egg white into the sugars and stir until the mixture feels like wet sand—perfect for molding.
- Fill the Egg Mold – Pack the sugar mixture firmly into each half of your egg mold. Smooth the surface with the back of a spoon to avoid cracks.
- Create the Egg Halves – Place a stiff piece of cardboard over the mold, flip it quickly, and gently lift the mold off. You should have two perfect sugar egg halves!
- Hollow Out the Eggs – After the eggs start to set, gently scrape out the moist sugar from the center with a spoon. This creates the hollow space for your panoramic scene.
- Cut the Viewing Window – Carefully trim the tip of each egg half with a serrated knife to create a peek-through window.
- Let Them Dry – Allow the egg halves to dry overnight. This step is key to ensuring they harden properly.
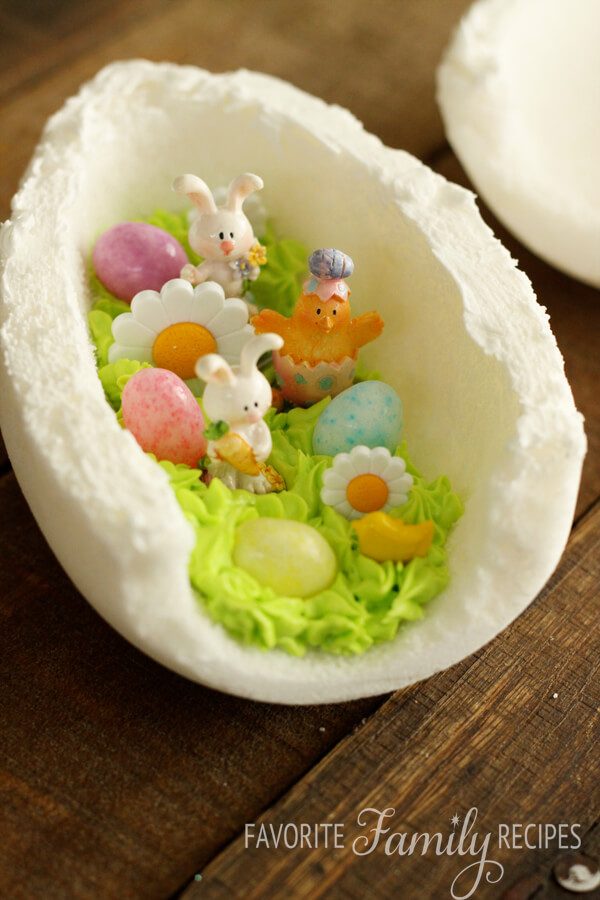
- Decorate the Inside – Now the fun really begins! Use royal icing to secure tiny decorations inside—think mini bunnies, jelly beans, flowers, and Easter grass.
- Assemble the Egg – Use royal icing (or hot glue) to attach the two halves together. Run your finger around the seam to smooth any excess icing.
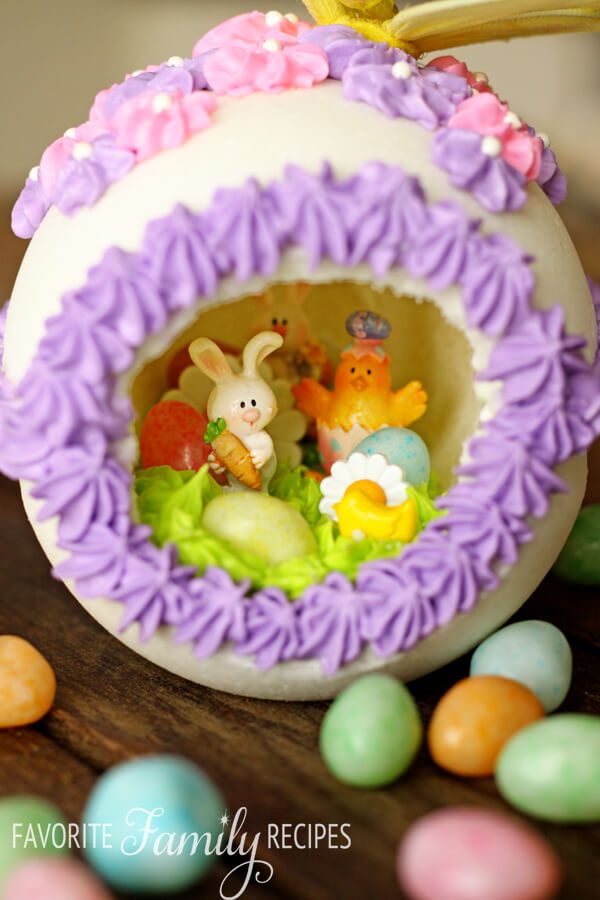
- Add the Final Touches – Pipe decorative frosting around the seam and viewing window. Add extra embellishments like ribbons, frosting flowers, or edible glitter.
Creative Ideas for Your Panoramic Easter Eggs
- Bright Colors: Add a few drops of food coloring to your sugar mixture for vibrant eggs.
- Themed Scenes: Create tiny gardens, Easter bunnies in meadows, or even miniature springtime picnics inside your egg.
- Photo Backgrounds: Use small printed photos as backdrops for an extra personal touch.
Helpful Tips from Fellow Crafters
Here are tips from our readers that have made these Panoramic Easter Eggs:
- Pre Make the Opening – When you unmold the top and bottom sugar shapes to bake, put them on a wooden board with the small ends facing each other. Cut about an inch off of each small end, scrape away that portion, and carefully push the two egg halves together so those blunt ends touch. After they have baked, take them off the board and scrape out the insides. The viewing opening will automatically form. – Virginia
- For Easy Windows – One trick I use is to perforate the viewing end, using a toothpick, so it can be easily, but carefully, cracked off when scraping the egg out. You need to make a ½ circle of perforations on the top and again on the matching bottom. Do this carefully when the sugar egg is first turned out of the mold. – Julia
- Decorations – I used paste food coloring for more vivid pinks, blues, and other colors for the sugar egg. Sometimes using a ribbon that went all the way around the horizontal egg with a bow on top and crafted flowers like roses that dried hard over the ribbon. The background inside could be photos of small clusters of flowers found on postcards. But, have to be small as it is the background. I used a Wilton egg-shaped 2-piece cake pan, to make a giant egg as a centerpiece to use “after” the actual cake was cut up and served, still had a centerpiece for the table. – Shelley
Questions About Panoramic Easter Eggs
They date back to the 19th century in Germany, where children received sugar eggs in their Easter bonnets.
Nope! They’re made with food-safe ingredients but are purely decorative.
Store in a cool, dry place, wrapped in tissue paper or bubble wrap. Keep away from moisture to prevent melting.
If stored properly, these decorative eggs can last for many years! Just be sure to keep them away from humidity and direct sunlight.
Yes, you can get creative with household items. Try using small bowls, cups, or shaping the sugar mixture by hand.
Don’t worry! Use royal icing as “glue” to repair minor cracks. For larger breaks, consider incorporating the crack into your design with decorative piping.
Keep the Tradition Alive
I hope you have as much fun making these as I do every year. They’re more than just decorations—they’re memories in the making. If you try this craft, let me please know how it goes below in the comments and how you decorated yours. Happy Easter crafting!
More Easter Recipes
These are always fun and delicious ways to share a little more Easter traditions with your loved ones! These cakes, cookies, and chocolate is the perfect pairing for any Easter meal or fun for kids to help within the kitchen this spring season.
Panoramic Easter Eggs
Video
Ingredients
- 1 egg white
- food coloring optional
- 3 1/2 cups granulated sugar
- 1/2 cup powdered sugar
- royal frosting
- jelly beans
- tiny Easter figurines and decorations
Instructions
- Whisk the egg white until it becomes kind of foamy. In a separate bowl, mix together the granulated and powdered sugars so they’re mixed well. Pour the egg white into the sugars and begin stirring.*

- At first it will seem like it won't get wet enough, but keep stirring until it becomes like damp beach sand.

- Once your sugar mixture is ready, start filling your egg mold. With each scoop, pack down firmly. You want the egg to be smooth, so press down on the sugar to prevent any small gaps or cracks from forming. If you have excess sugar and want to make more eggs, keep it in a bowl and place a damp paper towel directly over the sugar to prevent it from drying out.

- Place a stiff piece of cardboard directly on the top of the mold. Bracing one hand on the cardboard and the other underneath the mold, quickly flip it upside-down so that the egg halves are now resting on the cardboard. Quickly remove the mold—now you should have two perfect sugar egg halves.

- At this point, the egg halves need to dry out a little before you can use them. You can let them sit at room temperature for about 6-7 hours, or you can put them in a 200-degree oven for 15-30 minutes (depending on the humidity and elevation where you live). Once the eggs have started to set, they need to be hollowed out. It is important to do this when the outside is hard, but the insides are still soft. Once the egg has fully set, it cannot be reshaped! Pick up the egg half, hold it in the palm of one hand and use a spoon to scrape out the moist sugar. Continue to scrape the interior of the egg until you have a sugar shell that is about 1/2-inch thick. You want it to be as thin as possible, while still being sturdy enough to hold together.Scrape out the interior of the other egg half. CAREFULLY use a serrated knife to slice off the tip of each egg, this will be the hole you look through to see the panorama so make it about the size you would like. Be careful not to apply too much pressure and cause the egg to collapse or crack. Continue to gently whittle/sand away to front of the egg until the two halves match. At this point the eggs need to dry out further before they can be completed. I would recommend letting them dry out overnight.

- Once the egg halves are dry and very hard, you can decorate the inside with a beautiful Easter scene. Pipe a small amount of royal icing (click HERE for recipe) into the bottom portion of the egg half. This is to anchor everything else you add. Add a layer of green-tinted coconut or Easter grass, if desired, and press gently to adhere it to the frosting. Add little figurines, pictures, buttons, small candies, or sugar decorations. It is easiest to add a dab of royal icing to the back or bottom of your decorations to help them stick. Now it is time to glue the two halves of the egg together. Pipe a thin line of royal icing (or you can use a hot glue gun) around the lip of the bottom half of the egg. Press the top half down onto the bottom, making sure that they line up evenly. Run your finger around the seam where the eggs meet to remove any excess frosting. You want to do this right away so that it will not begin to harden into unsightly shapes. Allow the egg to sit for about 30 minutes, until the frosting has hardened enough to move the egg without damaging it.

- Time to put the finishing touches on your egg! Pipe a decorative border around the seams where the two egg halves were joined together. Also pipe a border around the opening of the window, to better frame the scene inside and to hide any uneven edges. If you have frosting flowers or other decorations for the outside of the egg, now is the time to put them on. Use a small dab of royal frosting to secure them to the egg. Decorate to your desire with any additional frosting.

Notes
- Do not eat. Panoramic Easter eggs are for decoration only.
- If you would like to color your egg, add food coloring to the egg white in Step 1 above and mix well. If you do add coloring to your egg, remember that you will be adding a lot of sugar to the egg white, so it’s a good idea to dye the egg white a darker color than what you want your final product to be.
Flashback to my childhood!! I loved these!! I am excited to make some for my kids!
I remember making something like this when I was a kid. Brought back a lot of memories. Thanks!
Aww, The memories! Thank you for sharing, Beautiful!!!
I’ve always wanted to do these!! We had them as kids but my sister ate them!!
this looks like such a fun project to do with my grandchildren!
The egg molds look to be about 5” long and my question is how many eggs will this recipe make?
Hi Laurel — it should make 2 eggs if you use the molds mentioned above. If you have a larger mold it will make 1. Hope this helps!
Where do you get the cute things to put in the middle of the eggs? I want to make some of these eggs but need stuff for the middle. Thanks
Most craft stores like Michael’s or Hobby Lobby should have miniature figurines to put in the eggs!
The kids love making these!
I love reading the stories about when people were younger I remember when I was a little girl and we would go to the store and buy those eggs I have not seen a recipe that uses egg whites I’m going to try it also people were asking about the little things inside the eggs if you go onto Pinterest you will find lots of photos of almost anything for girls and boys I print the picture out of course I Downside the picture and then I lemonade it and I stick the pictures into the egg you can also use pictures of the child that you’re giving it to for instance I’m making a little girl it first holy communion age I have a picture of her with their hands praying standing to the side looking up and found the picture of Jesus from the side giving communion in the background is a picture of the church she goes to the picture is smaller and everything is laminated also I have around laminated disk that I use for the window to look in I hope this helps
Those are all such great ideas! I love the idea of using laminated pictures. You can also use those “shrinky links” and have the kids draw little pictures and shrink them down so they fit in the eggs.
I’m so glad I found this site. I made sugar eggs about 28 years ago for my children’s classes, family and friends. They were a big hit1 Using the large wilton sugar mold, I made the flat bottom the panoramic window and removed one end to make the bottom. I used thread to gently “saw” the bottom off and loosen the panoramic window. I’m researching how to do them again because I’m making them for my grandchildren this year. I went to see my Aunt last year and she said I have something to show you. She still had the sugar egg I made her so long ago. It was in a large plastic ziplock bag and except for some fading of the royal icing it looked great.
Wow! She still had it? That is amazing! These sugar eggs can definitely hold up. They are such a fun family tradition– and not as hard to make as they seem, right? I am sure your grandchildren are doing to love them! Thanks for taking the time to come back and comment 😀
Hi, I can’t get the egg out of the mold. Do you have any suggestions?
Yikes! I have never had that happen before! Were you able to finally get it out?
From my own experience, I found if the egg doesn’t come out of the mold easily it’s because the sugar mixture is too wet. Try adding a bit more sugar.
i tryed this last year w a different recipe . they came out ok in the beginning but as soon as i strated digging them out they broke,everytime, i tryed 6 of them and happened eveytime, what holds the 2 together just the frosting .?im going to try again , it was very disappointing i really wnated these as gifts.
You have to do the royal frosting that hardens (the recipe is included here in our recipe) it is like CEMENT when it dries. It always holds it together!
Just a tip about the opening you look into. When you unmold the top and bottom sugar shapes to bake, put them on a wooden board with the small ends facing each other. Cut about an inch off of each small end, scrape away that portion and carefully push the two egg halves together so those blunt ends touch. After they have baked, take them off the board and scrape out the insides. The viewing opening will automatically form.
Great advice, thank you!!!
I started making the sugar eggs about 40 years ago. We still have some of the first ones I made. I wrap them in shrink wrap and they last really well. Water melts them, and sun fades them, but other than that they make good keepsakes.
I always just used sugar and water for the shells, and royal icing to decorate. I always advised against eating the, but there was nothing in them that would hurt anyone. The only thing was the inserts which were plastic. If you want them to last don’t put candy inside as a decoration, since it breaks down over the years. If you want it completely eatable, make the inserts with the royal icing and let them dry before putting in the egg.
I sold them for years, just by word of mouth to friends and co-workers, and always made enough to do something really fun for my family.
I haven’t made them for years, but may start again. I have so many cute inserts, and have a granddaughter that I think would like to learn to do them this year.
Thank you for sharing this Peggy. What a great tradition to pass down to your granddaughter!
Oh my goodness!! Do you remember the water to sugar ratio? I’d love to try your recipe as well! I’ve got young kids, (a toddler and a 4 mo. old) I’d love to make them some and save them for when they are older! So cute!
This looks like a fun project! I’ve had one for about 40 years, it was given to me by a woman I babysat for I believe she made and sold them. It’s pink and the color is fading, but otherwise it’s in great condition. I just wrap mine in tissue paper or bubble wrap and nest it inside another Easter decoration for protection. It goes in the Easter box in the garage. I’ve never had a problem with bugs.
Wow! 40 years? Thank you for sharing this! I’m happy to know they will last that long… and even longer.
Hi,
I have made these eggs over the last 60 yrs. One trick I use is to perforate the viewing end, using a tooth pick, so it can be easily, but carefully, be cracked off when scraping the egg out. You need to make a 1/2 circle of perforations on the top and again on the matching bottom. This should be done, carefully, when the sugar egg is first turned out of the mold.
Also, when I read your suggestion of drying the eggs in the oven for 1/2 hr or so,I thought this was a great idea. But I found 15 min would be better. The egg was terribly hard to scrape out when dried 1/2 hr.
I like to scrape my dried egg shell out to about 1/4 to 1/3 inch. I feel 1/2 inch makes the egg too heavy.
Thank you for sharing this! It’s always wonderful to get tips from a pro!
The entire “instructions” will not print out.
Very critical that the packing/cutting/drying method be followed.
Have made these before, but wanted to print out the ENTIRE recipe for my files.
Thx
Hi Susan, I’ve sent a printable version to your email. Thanks for asking!
I’m trying to find the pictures of the ones I made for my grandchildren now. I have thousands in my photo files. I hope you don’t mind. I just fb’d this page of yours.
I live in FL. I made them with a friend, and we had to get all the humidity out of the house by AC because they were cracking. I don’t believe my recipe called for egg whites, and that may be why. One, maybe two are still in existence. That was years ago.
How many eggs will 1 batch make?
1 Easter egg
My aunt presented one of these eggs to my 2 yr old daughter for Easter 36 years ago! I still have the egg and we now bring it out every Easter for my now 10 year old granddaughter to enjoy. I still have the original newspaper it was wrapped in from 36 years ago. It is wrapped and stored in an old cracker tin and it is still in perfect condition! Now that I’ve found this tutorial, I’m going to attempt to make a few new eggs this year. Thanks for the tutorial. It brought back great Easter memories!
Butter cream icing will work as well as royal icing and easier to make.
If you want your egg to last, you will want to use royal icing. Buttercream is too soft and won’t get rock hard and last years as a decoration.