We may earn a commission when you click on the affiliate links in this post.
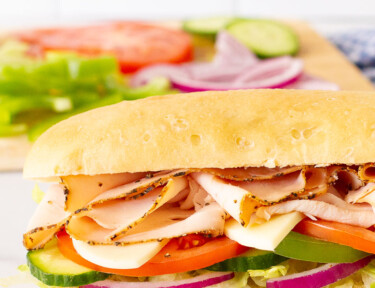
This Subway Bread Recipe is easy to make and tastes even better than the popular restaurant! Soft and chewy, it’s the perfect start to your favorite sandwich.
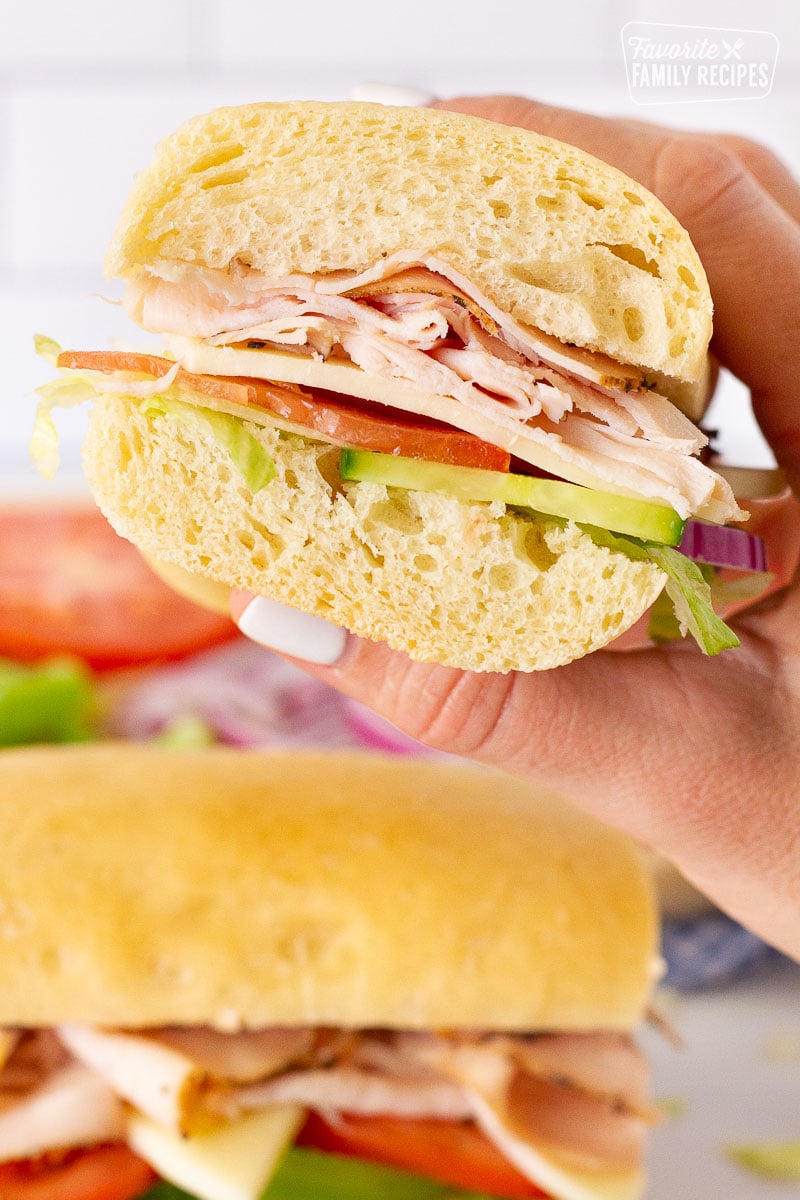
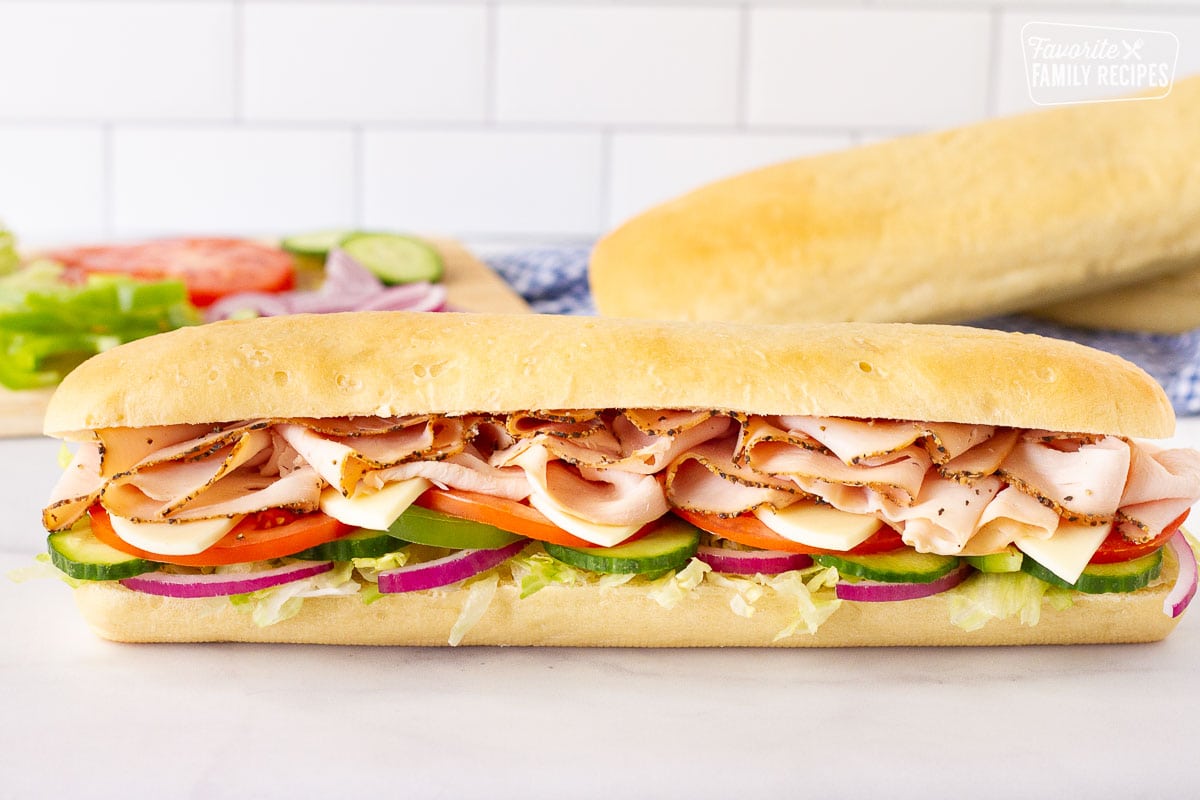
Featured with this recipe
A perfect sandwich begins and ends with the bread! This Subway Bread recipe uses real, actual, bread-making ingredients and tastes even better than what you can get at the restaurant. It’s soft, slightly chewy, with fresh, homemade flavor. You’re probably thinking, why go through all the trouble of making Subway’s sandwich bread at home when you can’t beat a $5 foot long or a cheap 6-inch sandwich? I’m with you there! But hear me out. This recipe is so fun to make at home. It’s ideal for parties, baby showers, picnics, whenever you want to serve delicious homemade sandwiches and wow your guests. My kids love to help shape the dough, watch it bake, then play “Subway” as they assemble all the sandwiches. Try this recipe and see how much fun it can be to create your favorite sub in your own kitchen!
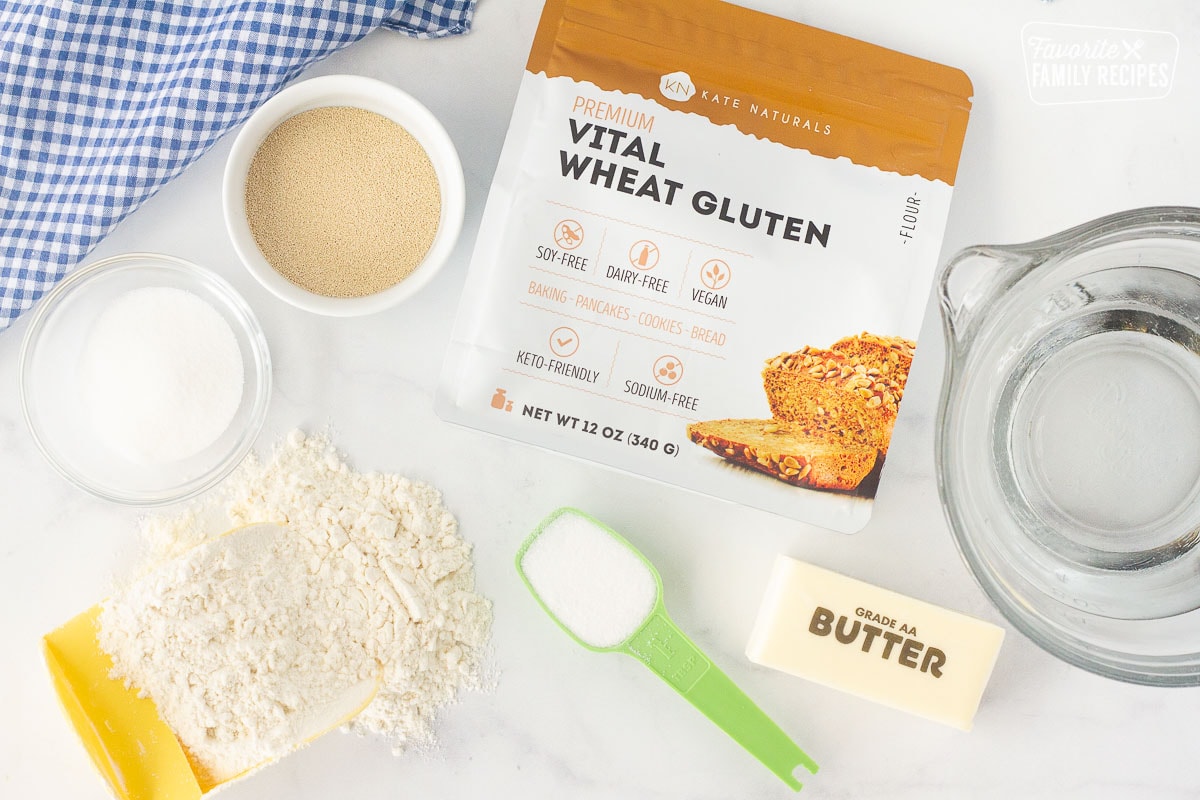
Ingredients in Subway Bread
Making homemade bread isn’t as daunting as it may seem. Just a few pantry staples and you’re well on your way to delicious, fresh bread from your own kitchen. Here’s what you need for this recipe:
- Yeast – use active dry yeast, NOT quick rising yeast.
- Warm water – warm to the touch but not too hot. You don’t want to kill your yeast with hot water.
- Sugar – a couple tablespoons of white sugar helps to activate and “feed” the yeast, making light bread. You don’t need too much sugar – just enough to get that yeast nice and fluffy.
- Flour – regular all purpose flour for white bread.
- Vital Wheat Gluten – you can find this in a “Bob’s Red Mill” brand package at most grocery stores. See notes below for more on this “secret” ingredient.
- Cold butter
- Salt
Secret Ingredient for Subway Bread
What kind of food blogger would I be if I wasn’t honest with my readers. So here it goes: it took a few tries (four to be exact) until I got this Subway Bread just right. There is a little secret ingredient you need for it to be just right and that is Vital Wheat Gluten. I know that sounds intimidating, but it isn’t. It’s what you need to make the bread chewy and soft like real Subway bread and you can find it at your regular grocery store! I got mine at Winco in their bulk bins for about two dollars a pound. If you don’t have a Winco nearby, you can get it in a “Bob’s Red Mill” brand package at most grocery stores but it is a bit pricey. But this is the ticket to soft and chewy Subway bread.
Substitutions and Additions
- Use whole wheat flour to create whole wheat bread
- Add sesame seeds and a drizzle of olive oil to the top of your bread before baking
- For Italian bread or Italian herb bread, sprinkle Italian seasoning or some oregano to the top of your loaf.
- Make cheese bread by sprinkling shredded parmesan cheese to the top of the loaves before baking.
Frequently Asked Questions about Subway Bread
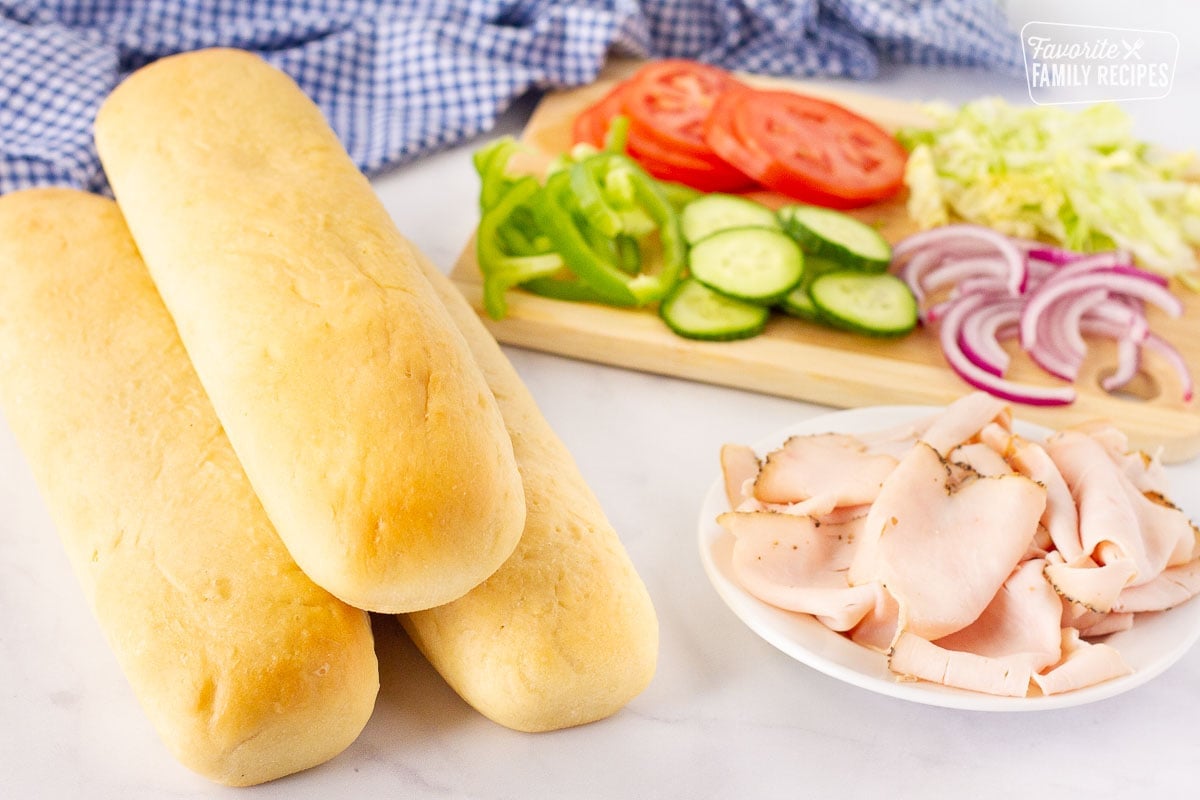
If you REALLY want to make it like Subway, you can use special “sub” bread mold pans. They will help the bread rise in the right direction and you will get that nice “Subway-ish” shape. If you don’t have special pans, you can just shape them as best you can with your hands. The more cylinder-shaped you can get them, the better.
The bread made at the restaurant has a high sugar content and artificial flavors that aren’t too healthy, so making it at home with wholesome ingredients is definitely a healthier option.
If you can’t find the Vital Wheat Gluten locally, you can get it on Amazon, here.
More Bread Recipes
As long as you have a few bread recipes in your back pocket, you will always have something nourishing and comforting to feed your family. Try a few of our favorites:
How to Make Subway Bread at Home
How to Make Subway Bread at Home
Video
Ingredients
- 2 tablespoons active dry yeast
- 1 ½ cup warm water, divided
- 2 tablespoons sugar
- 3 ½ cups flour
- 2 tablespoons Bob's Red Mill Vital Wheat Gluten see above notes
- 3 tablespoons butter, cold, plus a little more for topping cold
- ½ tablespoon salt
Instructions
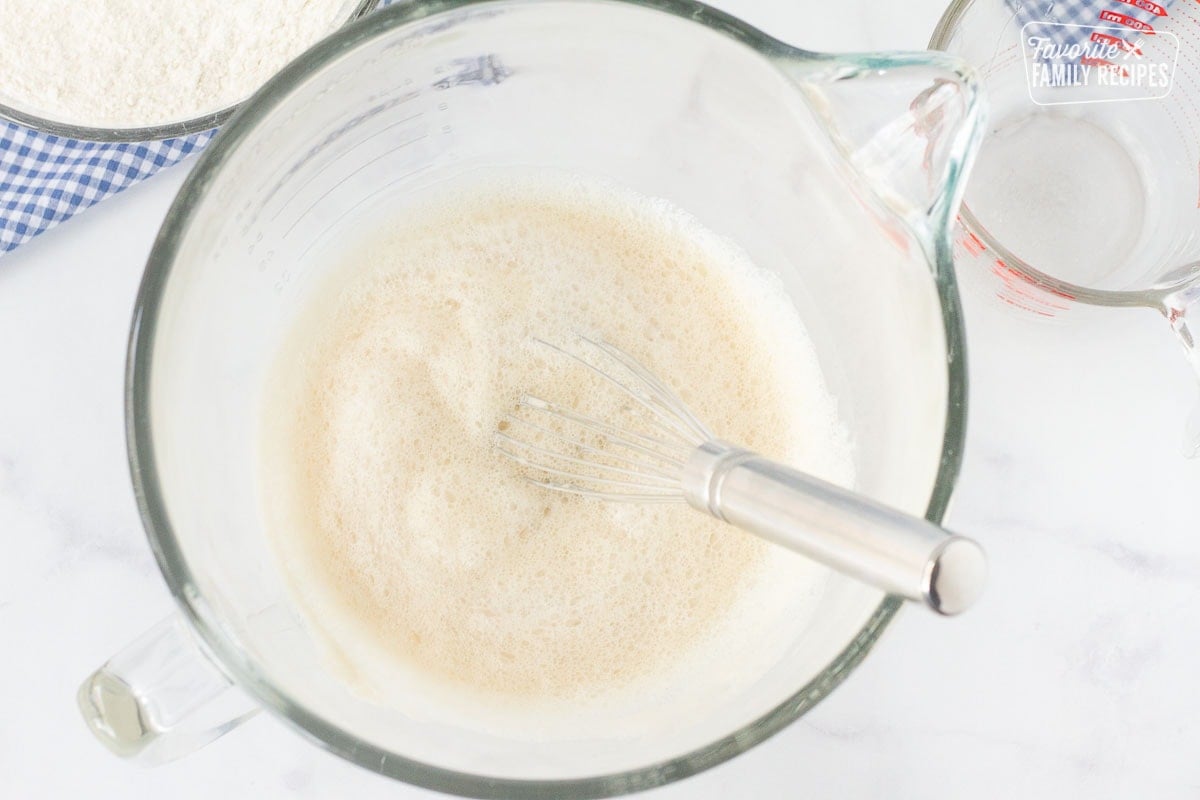
- In the bowl of a stand mixer fitted with a dough hook, combine yeast, ½ cup of warm water, and sugar. Stir until well combined. Let stand for about 10 minutes or until nice and foamy.
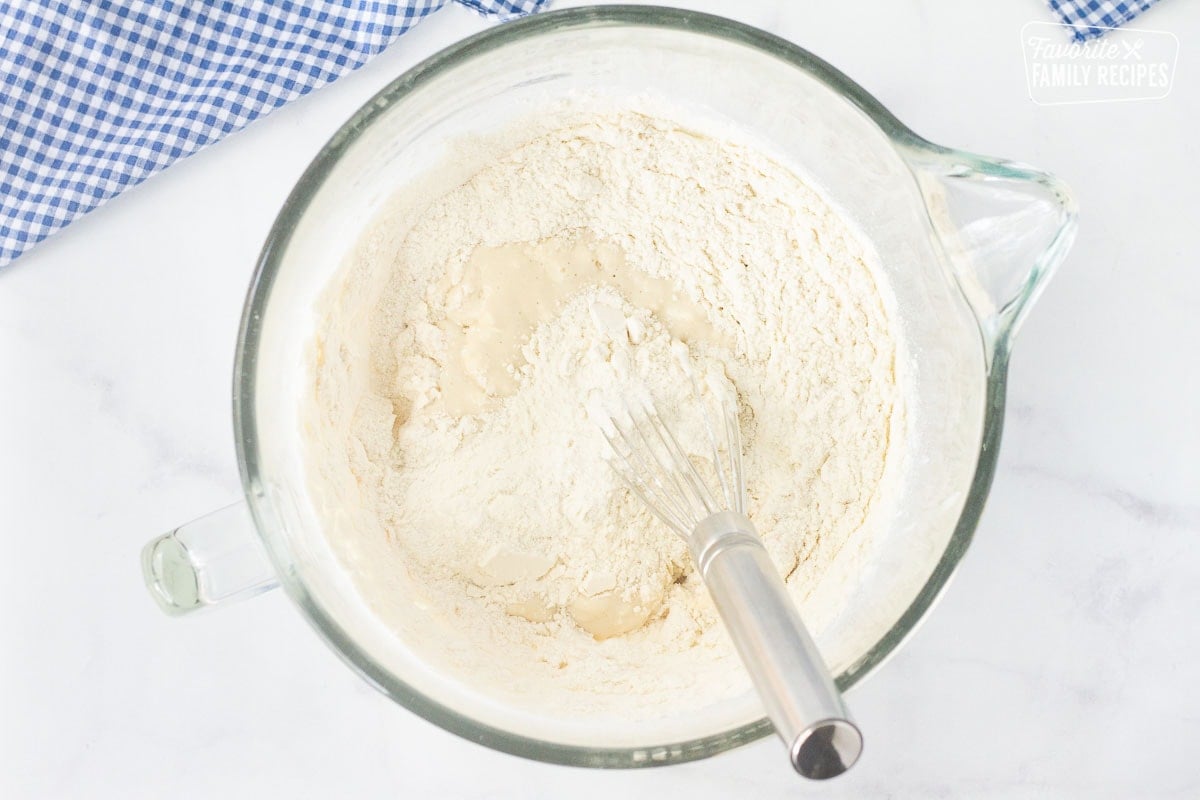
- In a separate mixing bowl, combine flour and vital wheat gluten. Set Aside. Add the remaining 1 cup warm water to the yeast mixture. Add the flour mixture.
- Mix until combined, about 4 minutes.
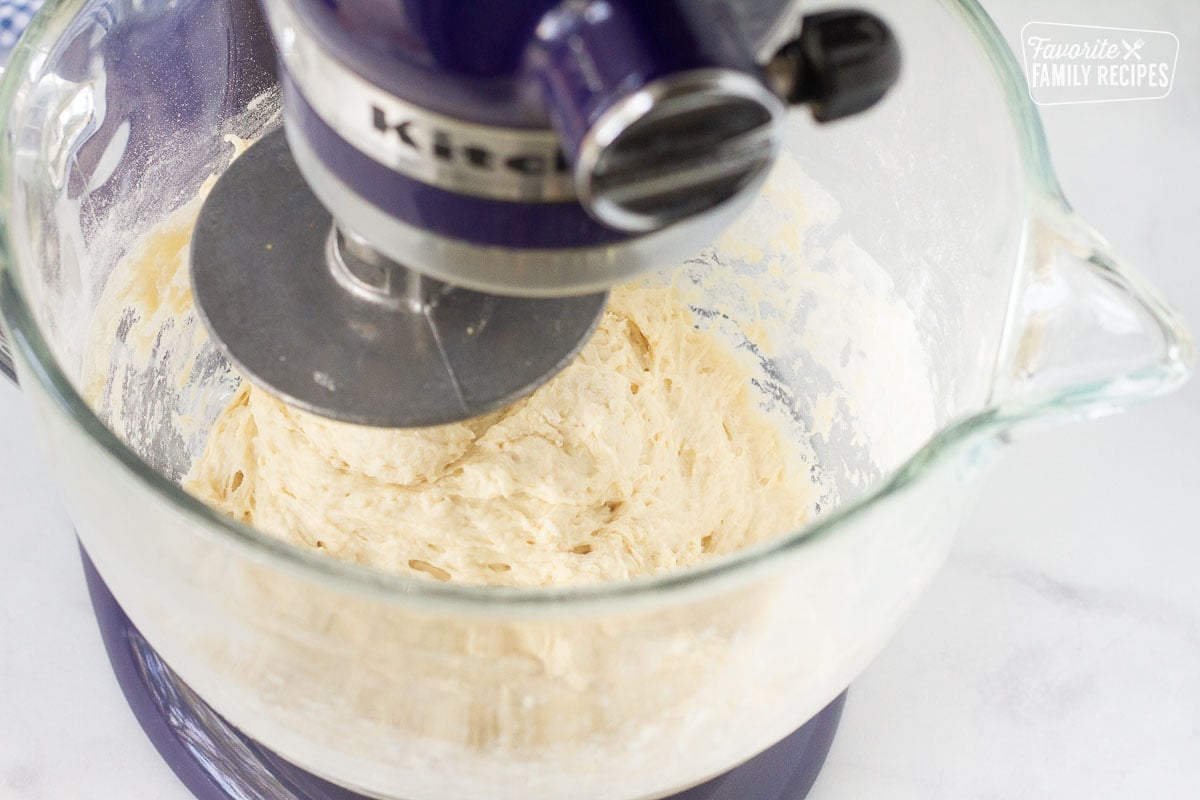
- Add a little flour if necessary; You want it a little sticky, but not so much that it sticks to the sides of the bowl.
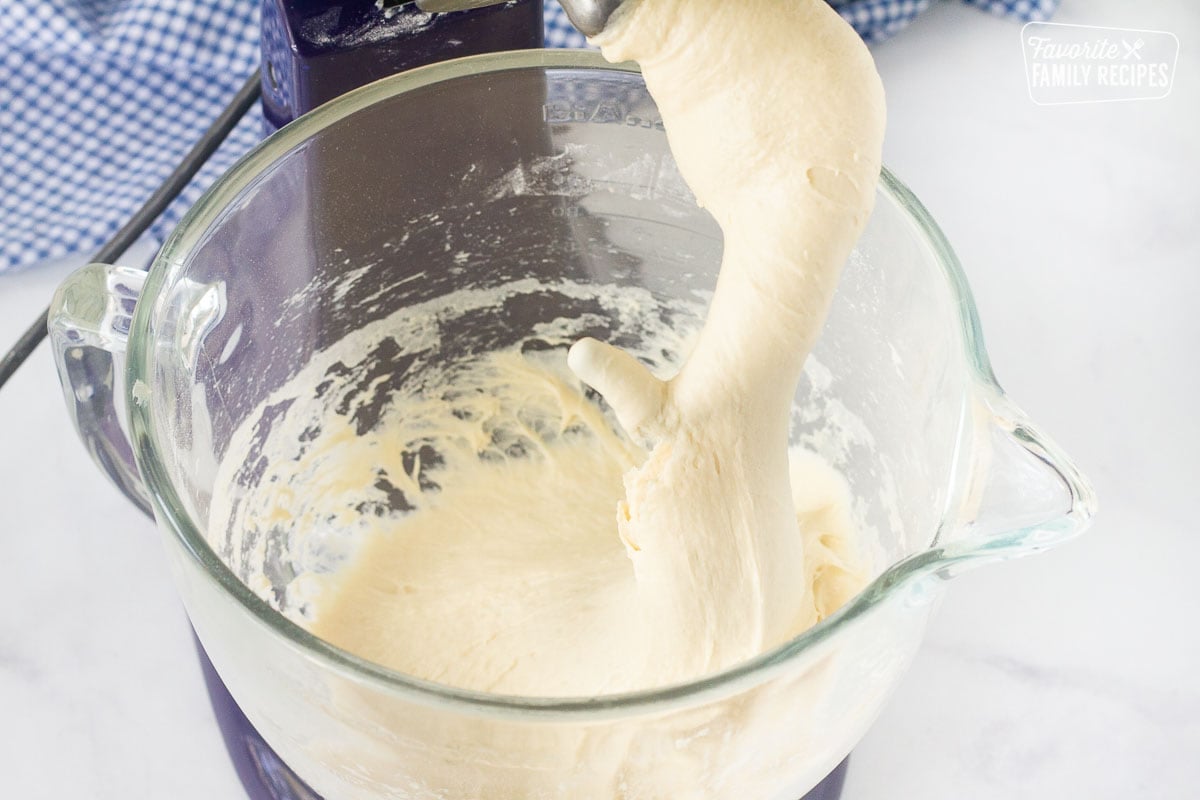
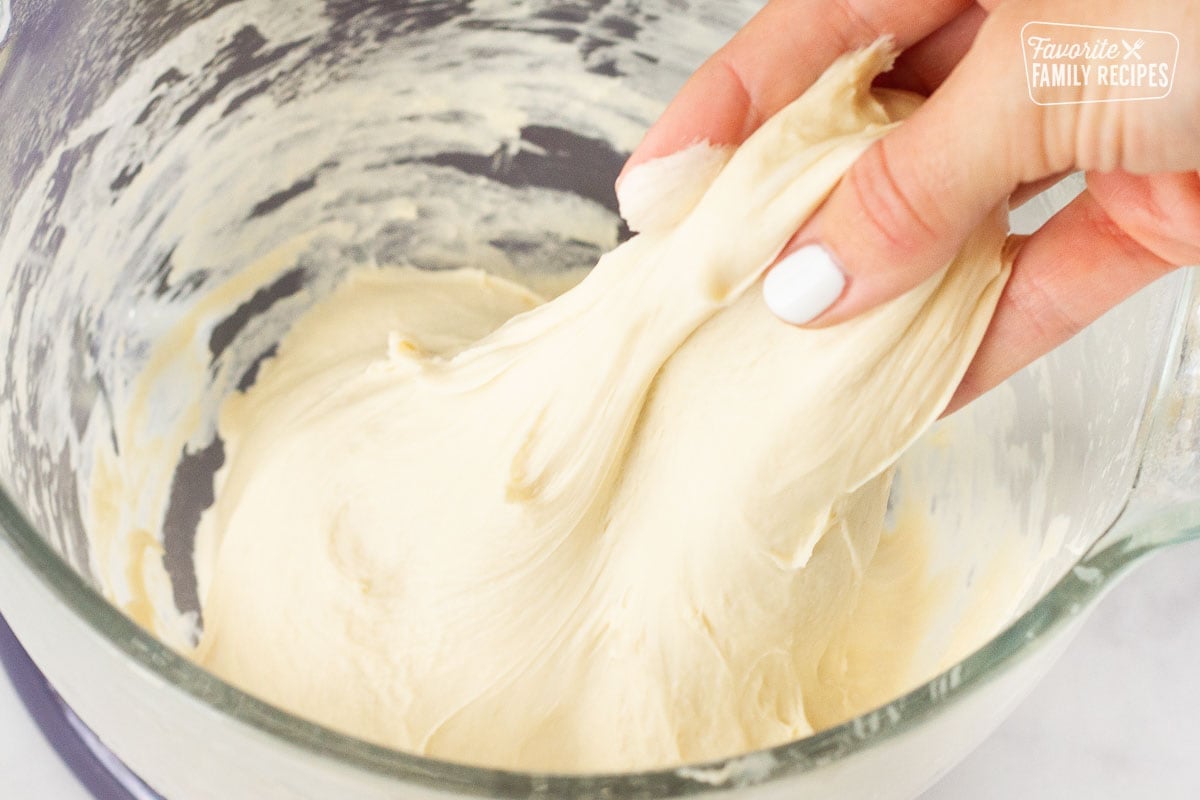
- Cut up cold butter into little cubes and add to the mixing bowl. Add salt. Mix an additional 5-6 minutes, until butter is mixed in. Pull the bread off the hook if needed throughout the mixing process. Again, you want the dough to be slightly sticky and stretchy.
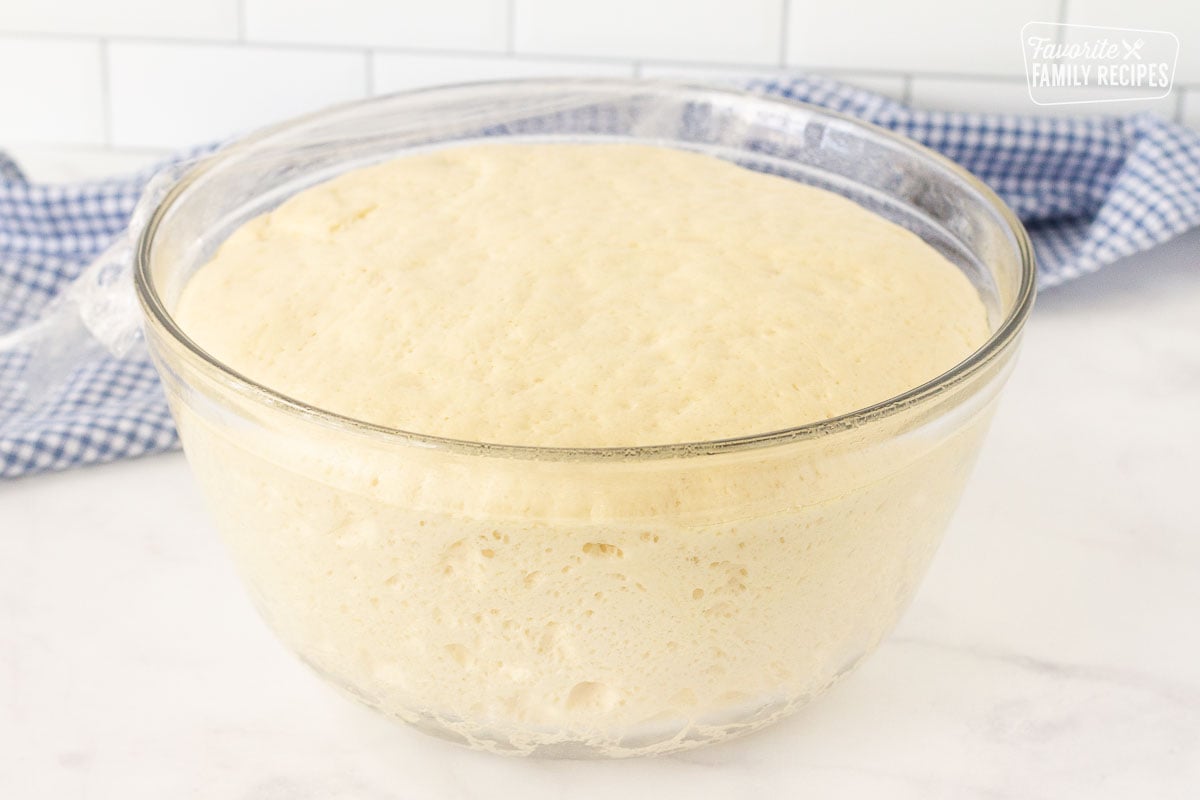
- Grease a large bowl. Place dough inside and roll around a little to get it greased all around Cover and allow to rise in a warm place for about 1 hour.
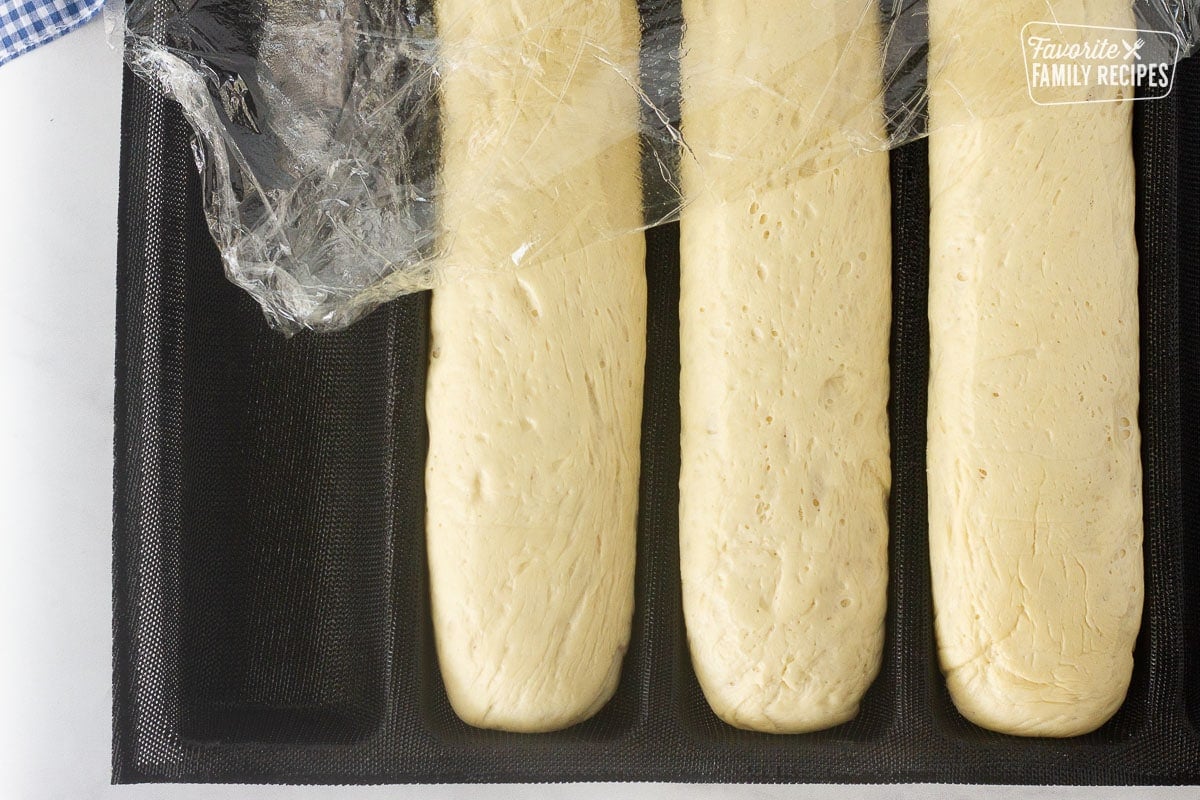
- Punch the dough down and divide into 3 equal pieces. (Flour your hands if the dough is too sticky, for easier handling.) Roll out each piece into a 12-inch-long loaf. The dough should be the same thickness all the way across. Place on a nonstick baking sheet, a baking sheet with a silicone baking mat, or a French bread baking pan. Cover and allow to rise for 40-60 minutes, until dough doubles in size.
- Heat oven to 350 degrees F. Bake for 15-25 minutes (check at 15 minutes), until bread is golden brown. Remove from oven and lightly run a little cold butter over the top.
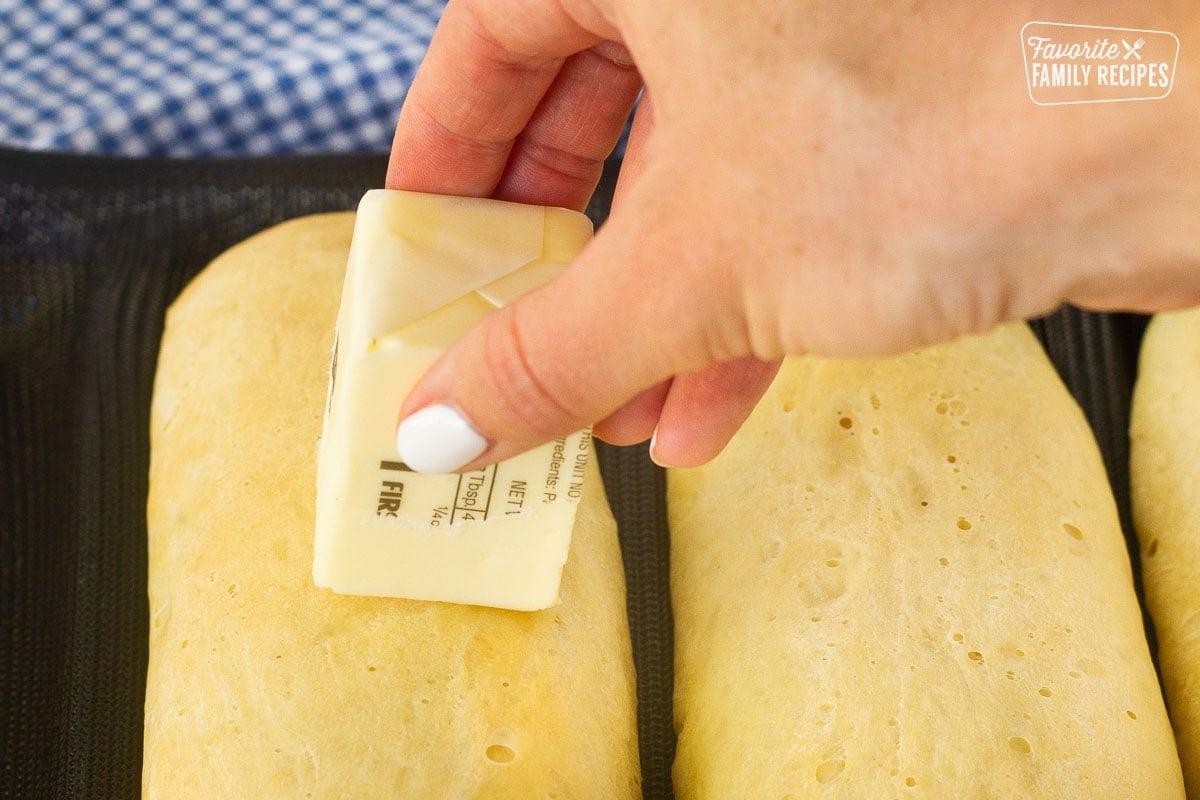
- Allow loaves to cool completely, then serve with all your favorite sub sandwich toppings!

Notes
- You can make variations of this bread easily. To make whole wheat bread, use whole wheat flour. You can also add sesame seeds and a drizzle of olive oil to the top of your bread before baking. For Italian bread or Italian herb bread, sprinkle Italian seasoning or some oregano on the top of your loaf before baking. You can make cheese bread by sprinkling shredded Parmesan cheese on the top of the loaves before baking.
- If you use a bread mold, you’ll get the perfect shape each time.

I have now made this bread several times and it’s a huge hit. So much that I ordered a subway bread form off of amazon which helped the spreading issue. I think the amount of flour depends on if you dip a measuring cup in or if you sift than spoon. If you dip it is more packed and creates more flour. I used KA bread flour but as a previous user suggested I added “some” gluten. My form pan makes five loafs, and is not recommended cooking without all filled… I stretched the original recipe to all five and they were a little small so I altered the recipe to make five… IMO it made them way to big. Next time I’ll adjust to four loafs! But still an amazing recipe and makes my kitchen smell like subway!
Hi Jen– so glad that this bread was a hit for you! I am going to have to find an actual “Subway” bread form– I just use a french bread one. It still tastes the same but I bet the Subway form would make it puffier!
So all together instead 1 and 3/4 th cups of water.there is 1/2 c in with.yeast and sugar and then you add 1 cup if water right before you add the flor gluten mixture. Bc/I think thr directions direct you to add differ amts of water than the ingredients say.
Worked out perfect I used bread flour but did use about 3/4 cup more then recipe needed but excellent recipe just before sticking them in the oven I put Italian seasoning and parmasion cheese on top to tastes just like subways bread !!!!!
Sounds delicious! Thanks Mike!
I’ve been waiting for Subway to offer a gluten free bread forever. Any idea on what differences I’d need to make to this to make it not taste like a sponge?
I’ve really enjoyed the Namaste Gluten Free Organic Flour Blend that you can purchase at Costco. I like it because it a cup for cup substitution. It tends to make the bread a little more dense and you have to cook it a little longer, but it’s overall a good substitute. Thanks for asking.
I tried baking this recipe but at 25m @ 350F, my 3 buns are not even close to nice golden brown shell. I’m thinking 35-45m to fully bake inside and out.
This bread recipe was created being baked at 2,605 ft (794 m). Bread bakes differently at varying elevations and ovens also vary. I think your on the right track with watching the top of the bread to determine how long it should stay in the oven.
This recipe is amazing. Even when I messed it up, it was still good! I followed it to the T and it was perfect. If you are trying this for the first time and looking at the comments for advice… Follow the recipe exactly and don’t make any changes the first time. Even if it doesn’t look right in the mixer at first, it will! Don’t be like me and add extra flour/water to try and fix what *looks* wrong (it isn’t!! It’s just the process!). I would love to see pictures step by step, I think that would help many of us novice bread makers. I will say thank you again though because this recipe is easy and you were very descriptive which I appreciate! This bread is amazing!
Thanks for the suggestion– I will try to do some step-by-step next time I make the recipe 🙂 So glad you liked it!!
Hi! I was wondering if you ever came up with a recipe for the honey whole wheat bread? I searched and didn’t find it, but I was hoping I just missed it.
Thanks!
We don’t have the Subway version, but we do have our own version: /honey-whole-wheat-bread.html
Thank you!
Any tips for making it rise upward and not outward? I made the cylindrical shape as you said, but mine ended up very flat and wide. Not at all like it should have. I would really like to try again!
I gave it a try,and it was fab.it taste really like the subway bread,soft and fluffy.I just did some adjustment.I add 1/2 cup more of flour,reduce the salt to 1tsp. I tried to split the flour into,1.5 cups of all purpose and 1.5 cups of unbleached whole wheat flour to make it healthy. Do you have a recipe for the flatbread?Thanks for the recipe.
No recipe for the flatbread yet but hopefully soon! Glad you liked the recipe and thank you for your comment!
No one else has complained; but, is the amount of yeast (2-1/2 tablespoons) correct? It seems like a lot.
Yep- that is the correct amount 🙂
was thinking the same… my bread had a yeasty bland taste… i tried another recipe and it only called for 2 tsp of yeast. came out more flavorful…
I was eating a Subway sandwich yesterday when I thought: “I can make this myself” and which led me here. I whipped it up yesterday and it turned out great!
I made just a few changes to make it whole wheat bread. I replaced 1 cup of the regular flour with 1 cup of the whole wheat flour and mixed the 1 cup of whole wheat flour, yeast, sugar and all the water together at one time and let it sit for about 30 min. During the kneading stage I mixed it for about 4 minutes in the mixer and 4 minutes by hand both kneadings. To soften them up, as suggested after baking I brushed them with butter and also draped a damp towel with all the water wrung out over the baking sheet for about 15 minutes.
i tried it and it was OK just that the top of the beard is not golden brawn.pls what do i do
The top of the bread was not golden brown? Did it need to bake longer?
The same thing happens to me. Try baking it half the time at 350 then turn it up to 375. Also brush the stop with butter. I’m pretty sure most bread will look sort of “pale” unless it has some type of wash (egg, butter, honey,etc.).
You can brush it with egg wash before baking that should do it
I am so gonna make this subway bread. I make ciabatta bread all the time as my husband gobbles it up so fast. Will see how this goes down. Thanks so much
Let us know how you like it!
I made this recipe for the first time today, as I was taking it out of my mixer the texture was silky smooth! I fell in love 🙂 so much so I immediately started a second batch. Thanks for sharing!
I only have active dry yeast in the little pkgs…how many packages would I use to equal whatever yeast you are using? Thanks!
Usually if I have the small packages I pour them into the measuring spoons to measure for a recipe. I’m not exactly sure off the top of my head the measurements of the packages as they can vary… maybe Google?
Not quite a tablespoon
Typically a pouch measures 2 1/4 teaspoons. It should be listed on the packaging.
Hi Jen!
Professional baker here. Each packet of yeast is 2.25 tsp of yeast. If this recipe is calling for 2 tablespoons of yeast you would need 2 packets + 1/2 tsp more. That being said, yeast packets are poop. They give a way different result than red star or other awesome brands of “bulk” dry yeast. If you want to use your yeast packets most effectively, put them in your trash can and then…no, thats it. Trash can. The end. You will be so much happier with your baked goods when you use quality ingredients. Packets seemed like a good enough idea but they fall short in a big way.
That is really amazing
google.com
I make this recipe 2-3 times a week. Basically live on this bread with sandwiches. On the salt issue, after coating the finished, still warm, bread, with the butter, I sprinkle salt on top. Perfect.! Salt sticks to the butter and you can control to your own tastes.
Thank you for your recommendation!
I love it
I have been looking for a good bread recipe for a while! Every time I make bread it it super dense. I tried this recipe and got a nice fluffy, soft bread! There is way too much salt for my taste and a few other people who tried it but I’m sure that’s just personal preference. Thanks for a great recipe!
Thank you – I’m so glad you liked it!
I’m going to have to try this. Subway sandwiches are for some reason my pregnancy craving, and sometimes the only food I’m okay to eat during the first trimester! I’m already at 11 weeks but this is still worth trying – I can’t get out to subway after the kids are in bed!!
Congratulations on your pregnancy! You do have to give in to those cravings. 🙂
I think you’ll like this recipe. Good luck!
Ok, I just tried this recipe. The changes I had to make in order to make this recipe to work. Salt went down from 1 tbsp to 2 tsp., yeast from 2 tbsp to 3 tsp, flour from 3 c to 4,5 cups… I added 4 tbsp of gluten to make the buns more stretchy as 2 tbsp are not enough… Buns turned out really good, We ate them hot right away.
The original recipe made liquidy salted batter with pancakes batter consistency….
I just took these out of the oven, and LOVE the texture. I doubled the recipe and used my Bosch mixer. I think I will decrease the salt for us, as well, but no other changes for this family! Thanks for sharing the recipe!
Agree with Luka. I tried this recipe in my BM yesterday by halving all the ingredients. However after 10min of kneading i noticed it was more of a batter than a dough. Added almost 1 more cup of flour yet the dough is still very hard to work with.
To mask the mess I had on my baking tray, I sprinkled some oregano & parmesan before baking and the whole house smelled like Subway! Lovely ~~
Help! I really want this recipe to work…
Loving Subway sandwiches as I do, I decided to give this recipe a try. In the process of mixing, I discovered that 1 Tablespoon of salt is entirely way too much! I added more sugar to counteract the saltiness, which helped a bit, but the finished product is still too salty, in my opinion. Also, I added at least 1-1 1/2 cups more flour and the texture of the baked rolls is soft and slightly chewy as a hoagie roll should be. I also baked the rolls on a lightly greased baking sheet. I advise anyone making this recipe to cut the salt to 1 teaspoon, as that would be sufficient.
Thank you so much for your comment! So glad that it was the right texture but sorry that you found it too salty. Very good recommendation– I will re-visit the recipe and change if necessary. Thanks again!
I agree on the salt. I found it too salty. I had too increase flour. I put it in bread machine and it started out with a soupy mixture had to add about a cup and half of flour.