We may earn a commission when you click on the affiliate links in this post.
Water bath canning is the most common way to preserve your high acidic, home grown foods. It’s easier than you think! I will walk you through, in very detailed steps, how to can fruits and veggies using a water bath canner so you can enjoy your garden’s bounty all year long.
I don’t know about you, but in our family, August and September doesn’t just mean “back to school”, it also means “canning time”. It’s actually probably a good thing canning season is in full swing when my kids are back in school because the house can get a little crazy with tomatoes, peaches, and more. My kitchen becomes a full-on canning factory, and a pretty efficient one at that. Our family has been doing this for generations and we have gotten pretty good at it. Whether it’s your first time canning or you are a seasoned canner, I am here to guide you every step of the way! You will be a pro canner before you know it!
What is Water Bath Canning?
Water bath canning is the most common household way of canning and processing foods. The terms “packing” and “processing” are terms that are commonly used when canning. Simply put, “packing” means “putting food in jars” and “processing” means “heating those jars for a certain amount of time”.
Using a water bath canner is one method of processing, with steam canning and pressure canning being the other two. Water bath canning is best for high-acid foods, meaning foods with a pH level of 4.6 or less. Foods with a pH higher than 4.6 are considered “low acid” and must be pressure canned. During the water bath process, canned foods are submerged completely in boiling water for a certain amount of time until the jars are adequately heated and the jars are safely sealed for long-term storage.
Foods Than Can be Canned in a Water Bath Canner
As mentioned above, only foods with a 4.6 pH or lower can be safely canned. Some of these foods include:
- High acid fruits: Peaches, pears, apples, cherries, berries, plums, cranberries, and apricots.
- Applesauce and apple butter
- Salsas and relishes: follow canned salsa and relish recipes closely because you will want to make sure you add the right ingredients to make it acidic enough
- Pickled vegetables: most vegetables aren’t acidic enough on their own to can. They will have to be pickled to get the right levels. Pickles and beets are great ones to pickle and process in a water bath canner.
- Jams, Jellies, and Preserves
- Fruit pie filling
- Fruit juice
- Rhubarb
- Tomatoes, tomato juice, and tomato sauces: tomatoes are actually not quite acidic enough to can on their own, you will most likely have to add lemon juice or citric acid to increase the acidity.
- Spaghetti sauce: same story as tomatoes, just be sure to follow an actual canned spaghetti sauce recipe and you will be fine.
- More: For an ENTIRE list of what can be water bath canned, visit the National Center for Home Food Preservation.
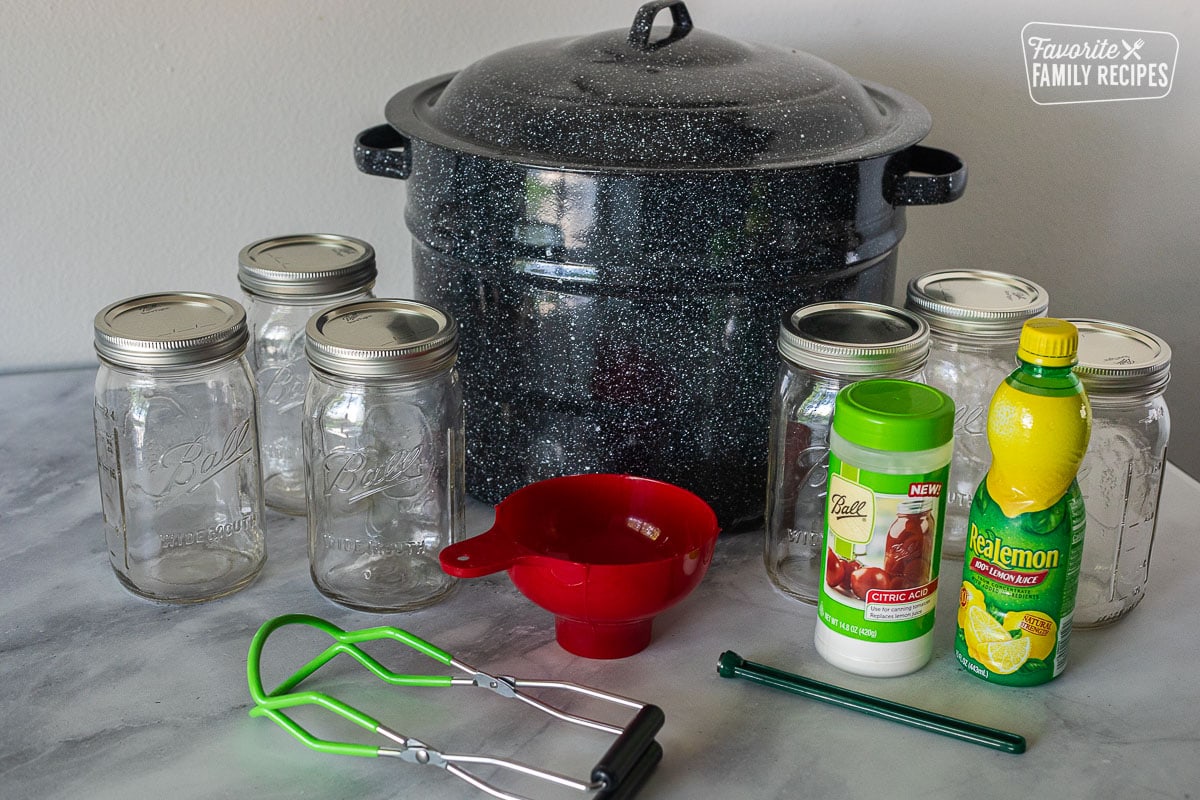
Equipment Needed for Water Bath Canning
- Canning Jars: Most of the time I like to use wide-mouth jars because they are easier to pack, but regular works great.
- Canning lids and rings (or bands): Canning lids are just the little flat tops that go right on top of the mouth of the jar. They have a thin little rubbery ring on the bottom that helps the lid cling to the jar and makes it have a tight seal when processed.
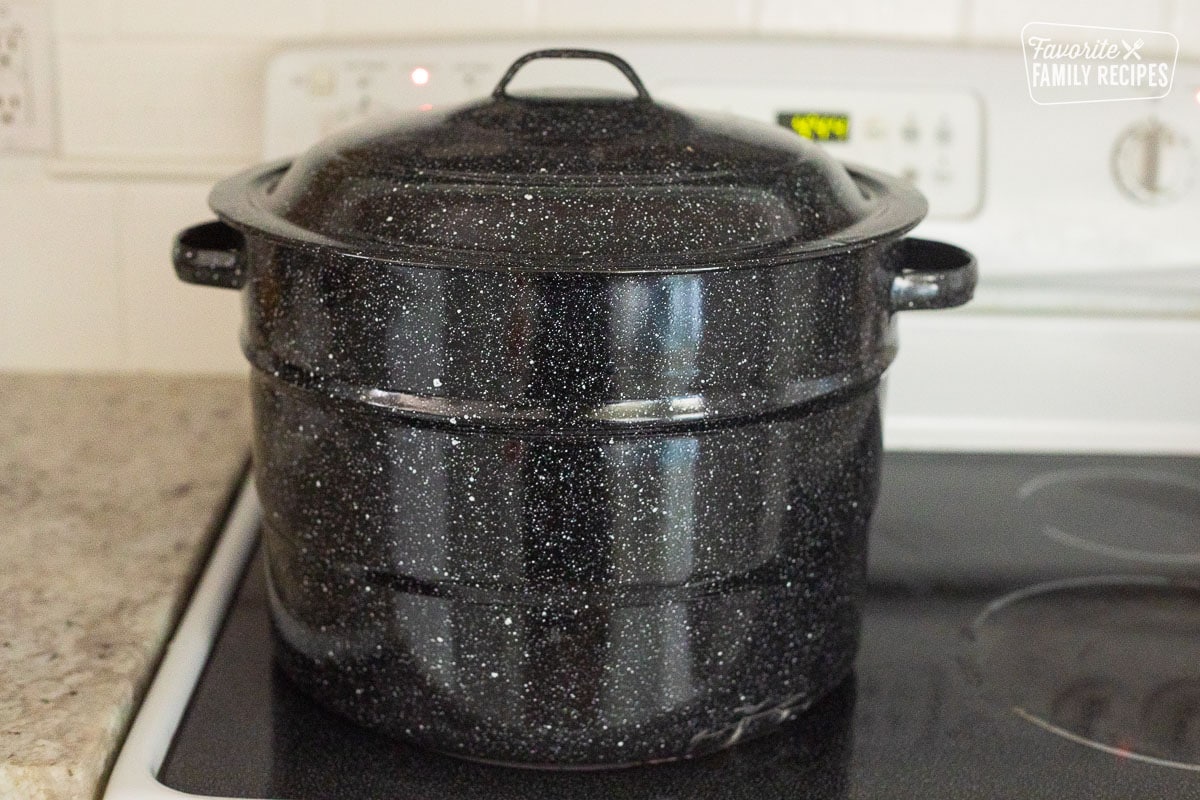
- Water Bath Canner: This is basically just a large pot with a removable wire basket. It’s nothing fancy and generally pretty cheap. The name makes it sound more complicated than it actually is.
- Jar Lifter: This tool will help you easily lift and lower hot jars. A must for canning.
- Magnetic Lid Wand: This is basically just a little stick with a magnet on the end. It seems simple but will make placing lids easier and will save your finger tips from getting burned.
- Funnel: Makes packing jars SO much easier and way less messy.
- Citric acid (optional): used to raise the acidity in fruit, mostly used for canned tomatoes. You can also use lemon juice.
Water Bath Canning Step-By-Step
Canning may seem intimidating, but it’s actually super easy! I will walk you through the process step-by-step so you can be a confident canner in no time.
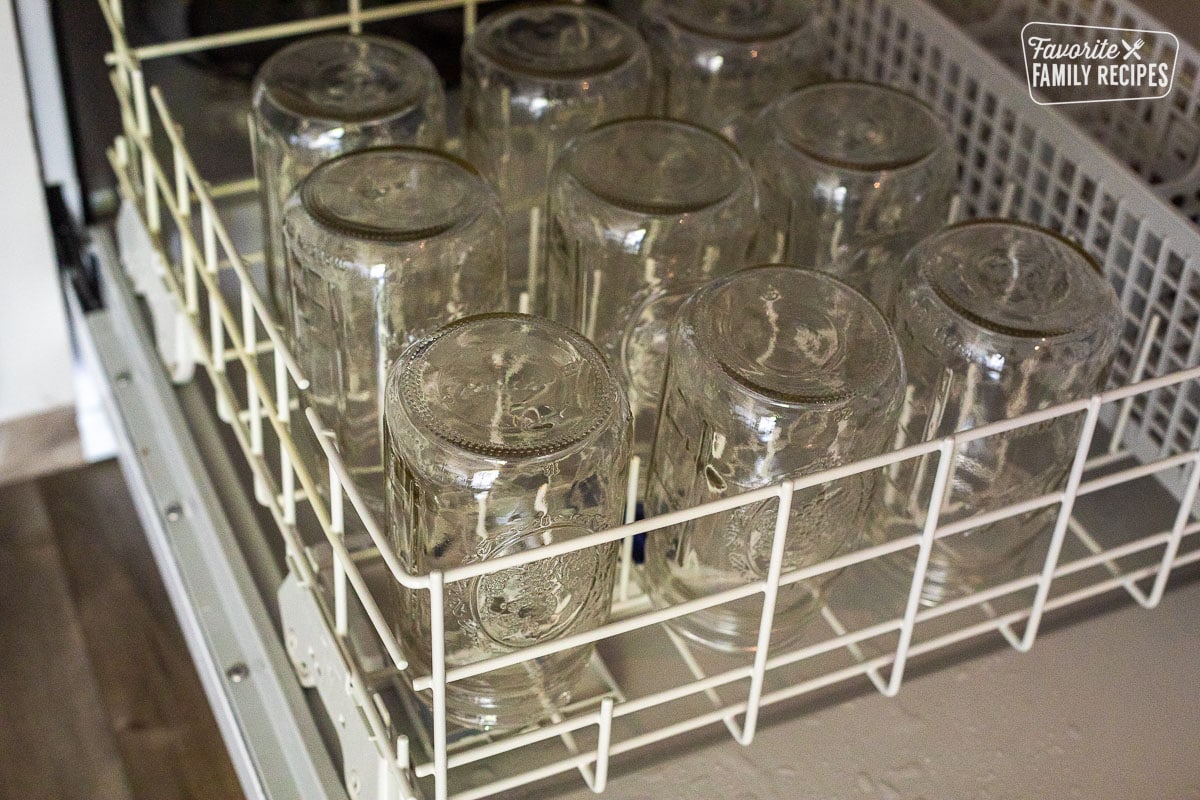
First, prepare the jars: Before you start canning, you want to make sure your jars are clean and sterilized. The easiest way to do this is to run them through a “sanitize” cycle in the dishwasher. When they are finished, I like to keep the jars in the dishwasher with the door closed so the jars stay nice and hot. If you keep the jars hot until you put them in the water bath canner, they will be less likely to break. You can also sterilize them by submerging them in water your water canner (open-side up so they get filled with water) and simmering them for 10 minutes, or you can wash them by hand and put them in a 275-degree F oven for 10 minutes until they are dry. There is actually some debate on if the jars actually need to be sterilized because they will be sterilized during the processing process but it’s never a bad idea to overkill when it comes to safety.
Use jar lifters to move the hot jars from place to place. This will save your fingertips from getting burned. One side of the jar lifters will be flat and easy to hold. The other side is curvy and grippy. The curvy side is used to clasp and hold on to the jars (as seen in the image below).

Prepare the canner. I like to get the water in my water bath canner going at about the same time my jars are sterilized. Fill the canning pot half-full of water and bring it to a boil and then reduce it to a simmer. I like to cover it with a lid while it is simmering to keep the water from steaming out while I finish preparing the jars. I will sometimes have a separate pot of water boiling so I can add it to the canner just in case more needs to be added to cover the jars.
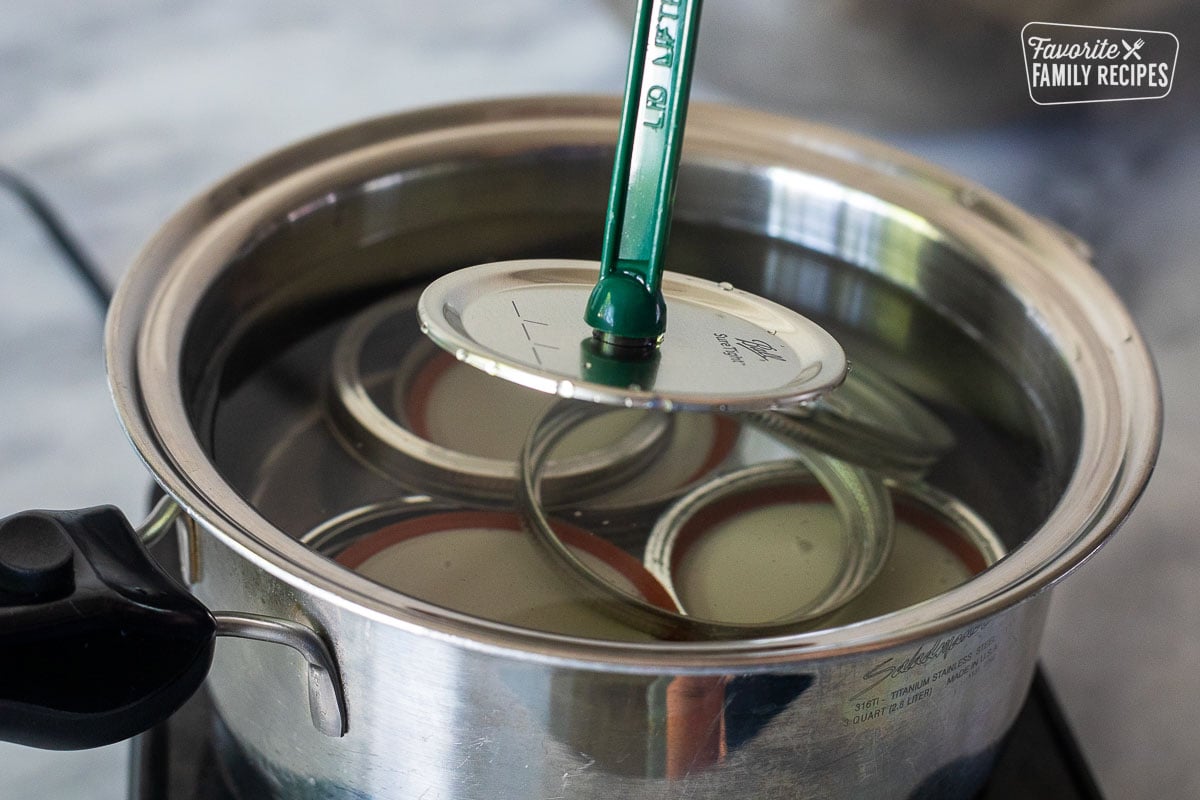
Next, prepare the lids and bands. The rubbery ring on the bottom side of the lids needs to be heated and softened so it can grip the lip of the jar better when it is placed on top. I like to bring a small pot of water to a boil and then I separate the lids if they are stuck together and place them in the boiling water. Sometimes I throw the bands (or rings) in there too so they can be sterilized as well. I like using this little stick with a magnet on the end to pull each lid out. You can get them for super cheap on Amazon. They make the process so much easier!
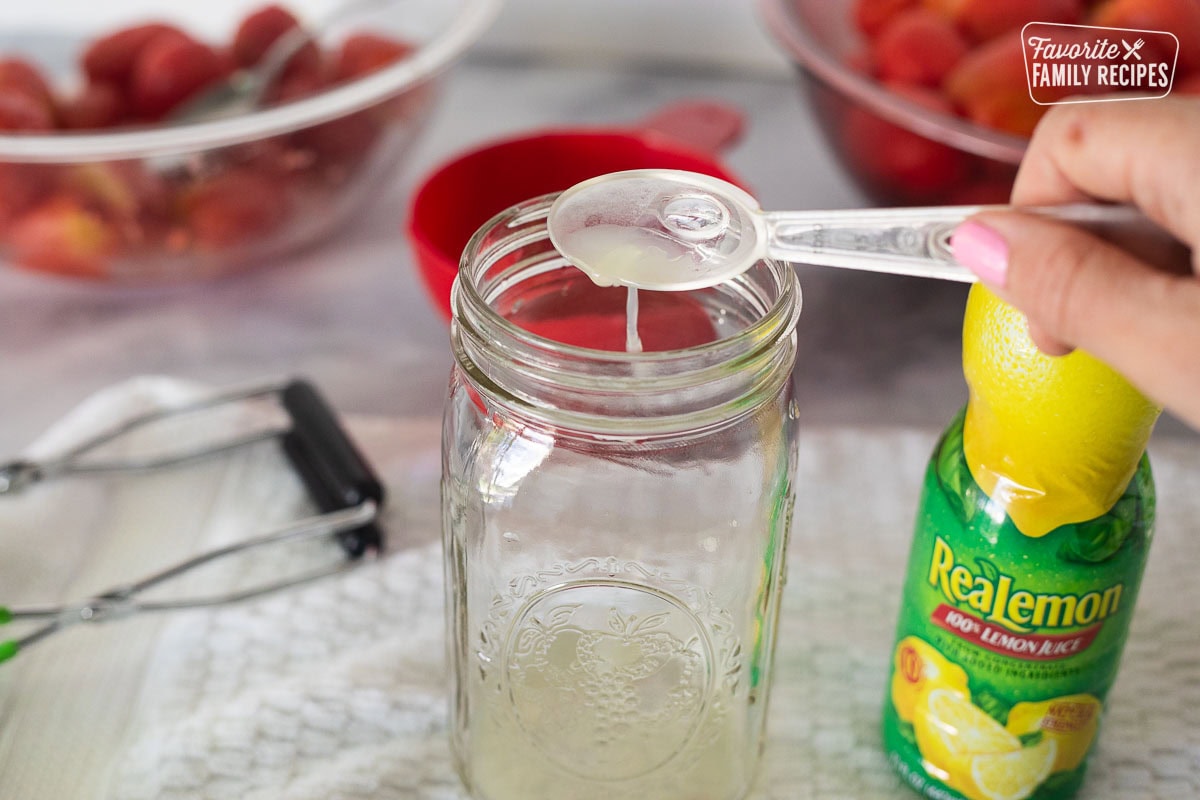
Add acid to the jars (if needed). As mentioned above, water bath canning is only conducive to high-acid foods. Some foods, like tomatoes, don’t have enough acidity on their own to can safely. That is where lemon juice and citric acid come in. Adding a couple tablespoons of lemon juice to each jar will help bring the acidity up to safe levels for canning. Always follow canning recipes exactly when it comes to adding acidity and don’t forget this step if it is required! If you forget, you will either have to refrigerate and eat your canned food within a week or you will have to re-can right away with new lids. I can’t tell you how many comments we have had from people forgetting this step and I always feel so bad having to tell them they have to re-process their cans.
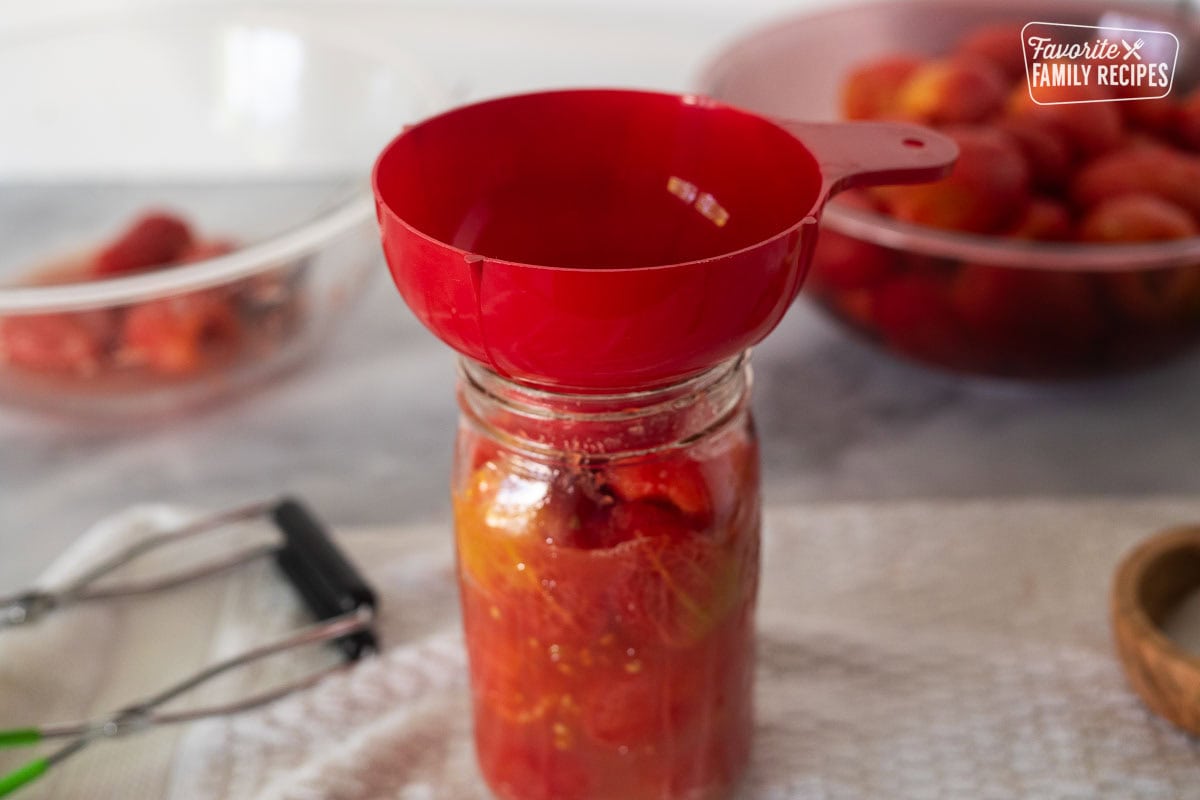
Next, fill the jars. I always use a funnel to help me fill the jars. I am sure there are people out there who can fill their jars without a funnel but I am just not that talented. Using a funnel will also help you keep the lip of the jar clean, making less work later on. Fill the jars up to almost the first little band on the neck of the jar. You need to leave some headspace at the top so there is room for expansion when the jars are being processed. The jar could crack or the food can bubble up and make it so the lids don’t seal properly to the jars. Once my jars are filled I like to get a knife (just a regular table knife) and run it round the inside of each jar to help get any trapped air bubbles up to the surface.
Wipe down the lip of the jars. I usually just use a clean, dry paper towel to wipe off any splatters on and around the lip of the jar. Even the tiniest little splatter can make it so you don’t get a tight seal. Sometimes I will do this with a little vinegar to help get any oils off of the lip of the jars but most of the time I just give them a quick wipe down.

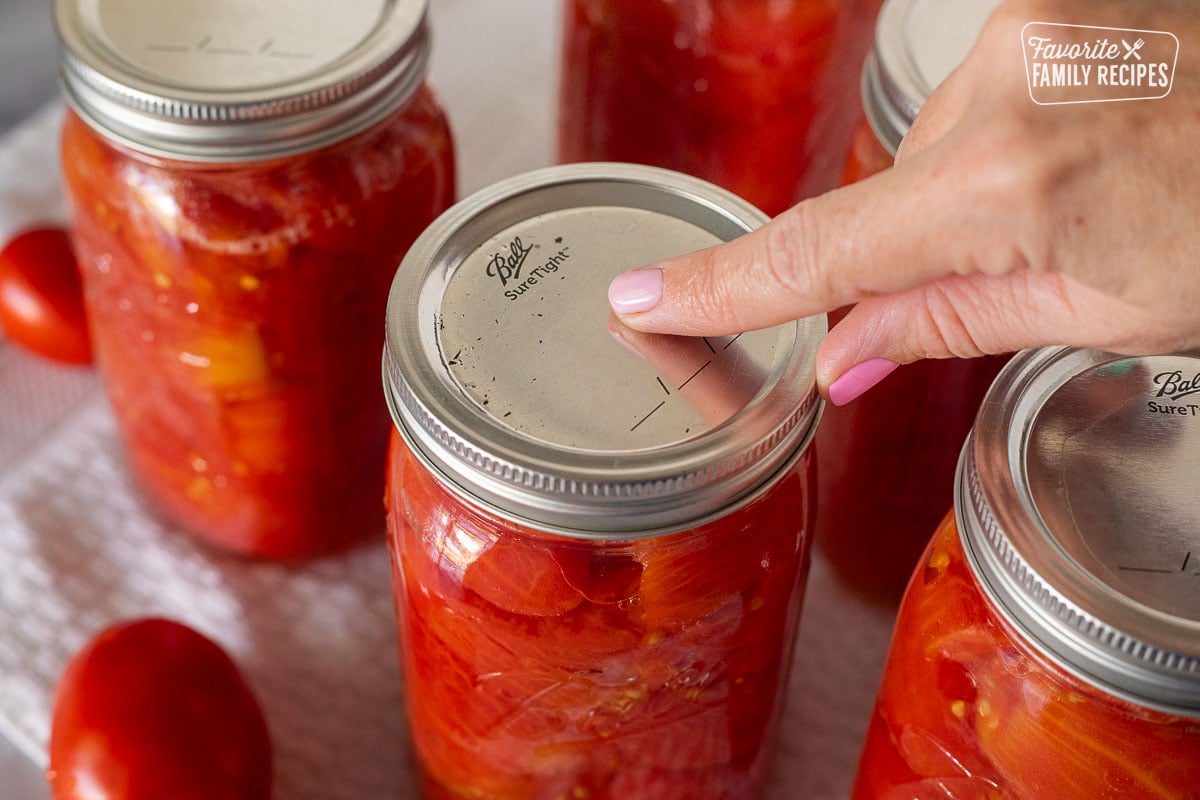
Add the lids and bands. Take a lid from the hot pot of water and place it on the lip of the jar. Move it around a little until you can feel the rubbery part of the lid catch on to the lip of the jar. Once it is on nice and straight, place the band (or ring) over the top and screw it on gently. It does not need to be very tight. In fact, you don’t want it too tight or it may be too difficult to remove later. I usually just lightly screw it on with my finger tips until the ring naturally stops.

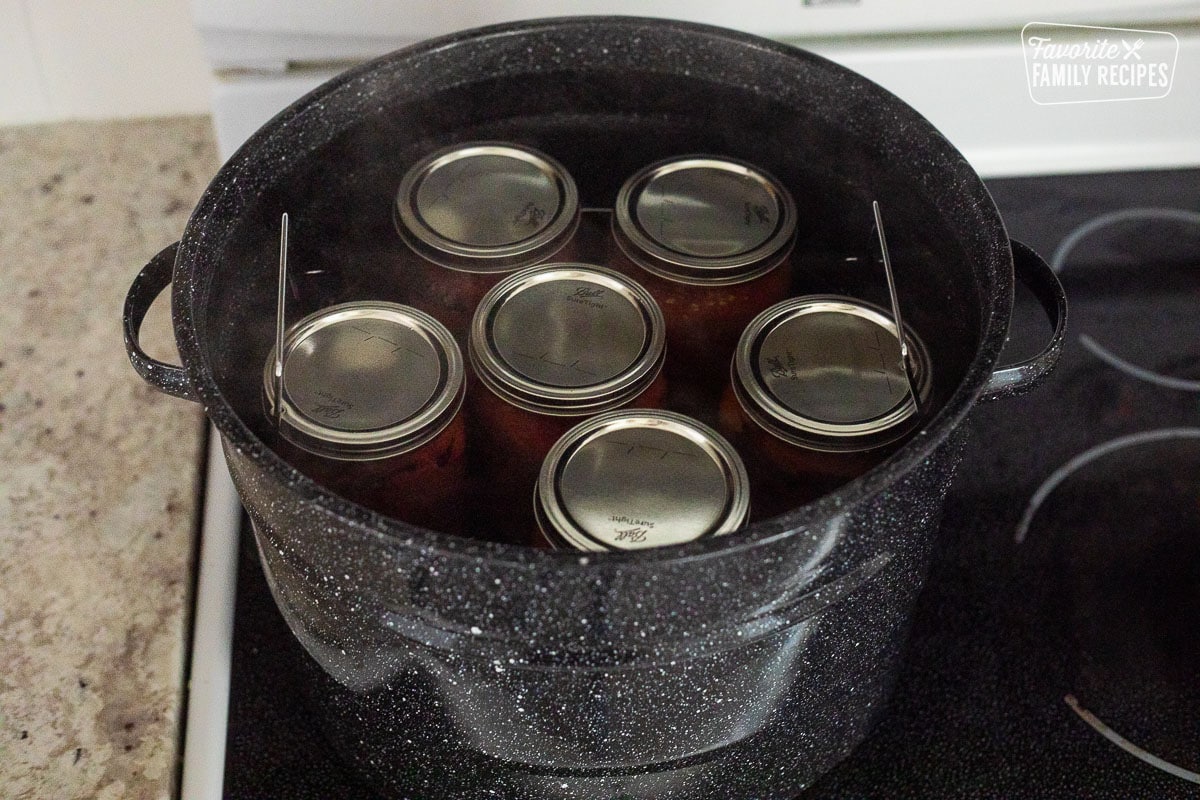
Place the cans in the basket. Do this very carefully and don’t crowd your jars. You want to have a little bit of space between each jar so they don’t rattle against each other and crack or break. Bring the water in the canner up to a rolling boil then carefully lower the basket down into the canner. The jars need to be completely submerged in water by 1-2″. This is where the extra pot of water can come in handy just in case too much water steamed out.
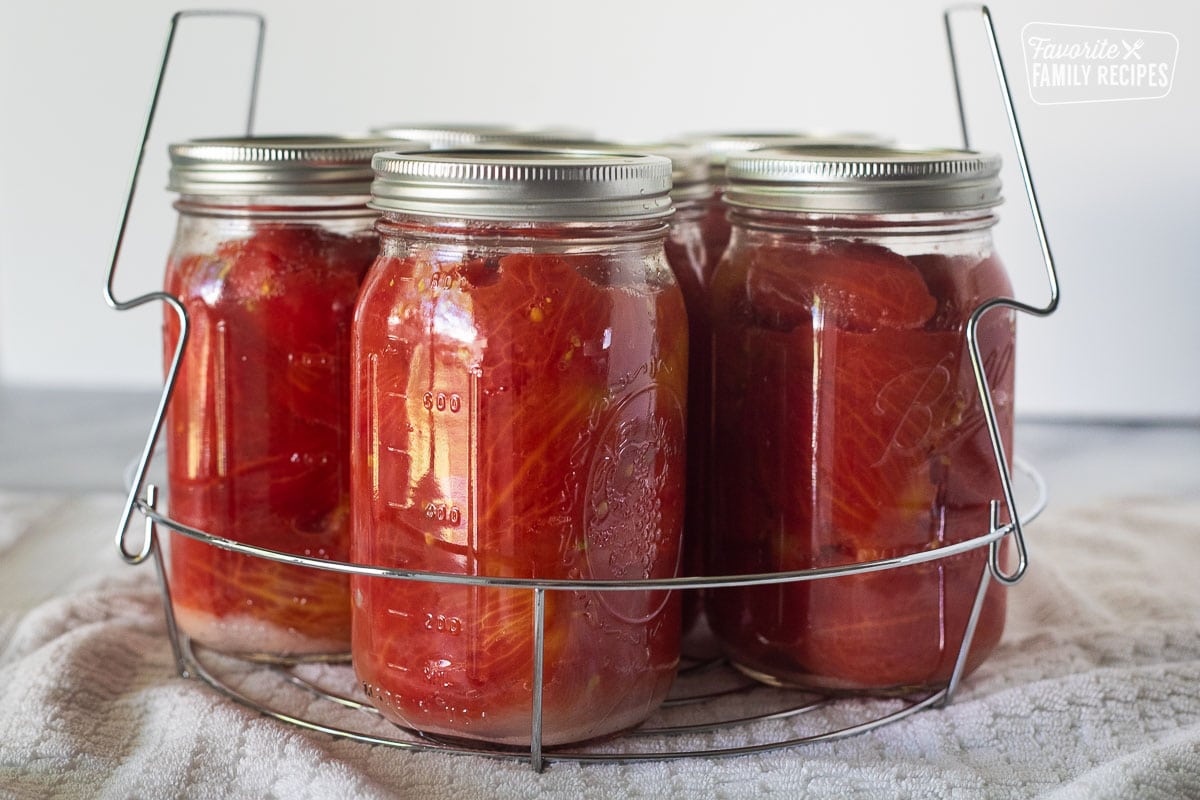
Process. The processing time begins when the jars are in the canner and the water has been brought to a boil. It might take a few minutes after you put the jars in for the water to come to a boil so wait until the water is boiling to start the time. Add the lid to the canner at the same time you start the time. Processing times are different for different foods and elevations. so be sure to follow the recipe exactly.
Cool and Seal. When the processing time is done, carefully remove the lid to the canner (it will be steamy) and the jar lifter to remove the cans from the canner. Allow jars to cool completely. Check the seals by pressing on the top of the lid. The lid needs to be suctioned in and firm. If the lid pops back up, it has not sealed properly.
Labeling and Storing: Be sure to label the jars with the month and year they were canned. This will help you rotate through your food effectively. Canned foods can stay good for up to 5 years but for maximum taste and freshness, I like to use them within 18-24 months.
Hot Pack vs. Raw Pack
Hot packing means heating your food and putting it in the jars while hot before processing. Raw packing means putting the food directly into the jars and covering it with very hot canning liquid or water. Some raw packing methods don’t require adding hot liquid, but processing times will be quite a bit longer. Some foods are best suited for hot packing while others may be best suited for raw packing. Follow your canning recipe closely and you will be guided on which method to use.

Common Mistakes to Avoid
Over-filling jars – If your jars are too full, the food can expand when heated and break your seal. Make sure you leave enough headspace in your jars and follow canning recipes closely.
Under-processing – Follow your recipes exactly when it comes to the processing time. Under-processed jars are not safe for consumption. Check and double-check these times to avoid spoilage.
Using damaged lids – Damaged lids won’t seal. To avoid this, check every jar lid after processing to make sure you have a good seal before shelving.
Not adding acid or lemon juice to the jars – This is mostly for tomatoes. You absolutely must add more acidity to your jars when canning tomatoes. If you forget, you will have to add the acidity right away and re-process the jars.
Best Canning Resources
When in doubt, research it out. If you aren’t absolutely certain what can be canned or how long it should process, it never hurts to just check with the National Center for Home Food Preservation or the USDA’s National Institute of Food and Agriculture. Both of these resources will give you the most up-to-date information on canning food.
Our Most Popular Canning Recipes
Need a guide on how to can specific foods? We have made it super easy for you by creating recipes and methods for you that are safe for canning:
Canning Peaches at Home: A complete guide
Virginia Sweet Chunk Pickles
Canned Spaghetti Sauce
Canned Salsa
Savory Canned Salsa
How to Can Whole Tomatoes
How to Can Diced Tomatoes
Homemade Tomato Juice
Frequently Asked Questions
Home canned foods can last 5+ years but after 1 year, freshness, taste, and quality may start decreasing. I usually try to consume my home canned foods within 18-24 months.
No. This is a big NO. You must use new lids every time. Even if your jar doesn’t seal while processing and you have to re-process, you must use a new lid.
If your jars don’t seal you will want to re-process them within 2 hours. Check the headspace in the jars, wipe down the mouth of the jar, check for cracks or inconsistencies, place the food in a new jar if necessary, add a new lid, and re-process.
This was so helpful! I loved learning all the tips and tricks for water bath canning!
Your tips were so helpful. I canned my apple pie filling for the first time today and it was smooth sailing.
Lately, we’ve been into campings! And this canning technique is a must-try! So easy and convenient for campers!
i use to watch my mother can- i did not- until now. people said i can’t can because of my health.-(i had trouble walking.) but this year i got some recipe and put up some veggie. people such shake their head at me- but i enjoy it, thank, for this canning tips-it help use to not waste food- and help those who forgot this arts . please send more canning recipe.