This post may contain affiliate links. See our disclosure policy.
These homemade dinner rolls have been a favorite in our family for generations. We serve them with dinner, especially Thanksgiving and Christmas dinner.
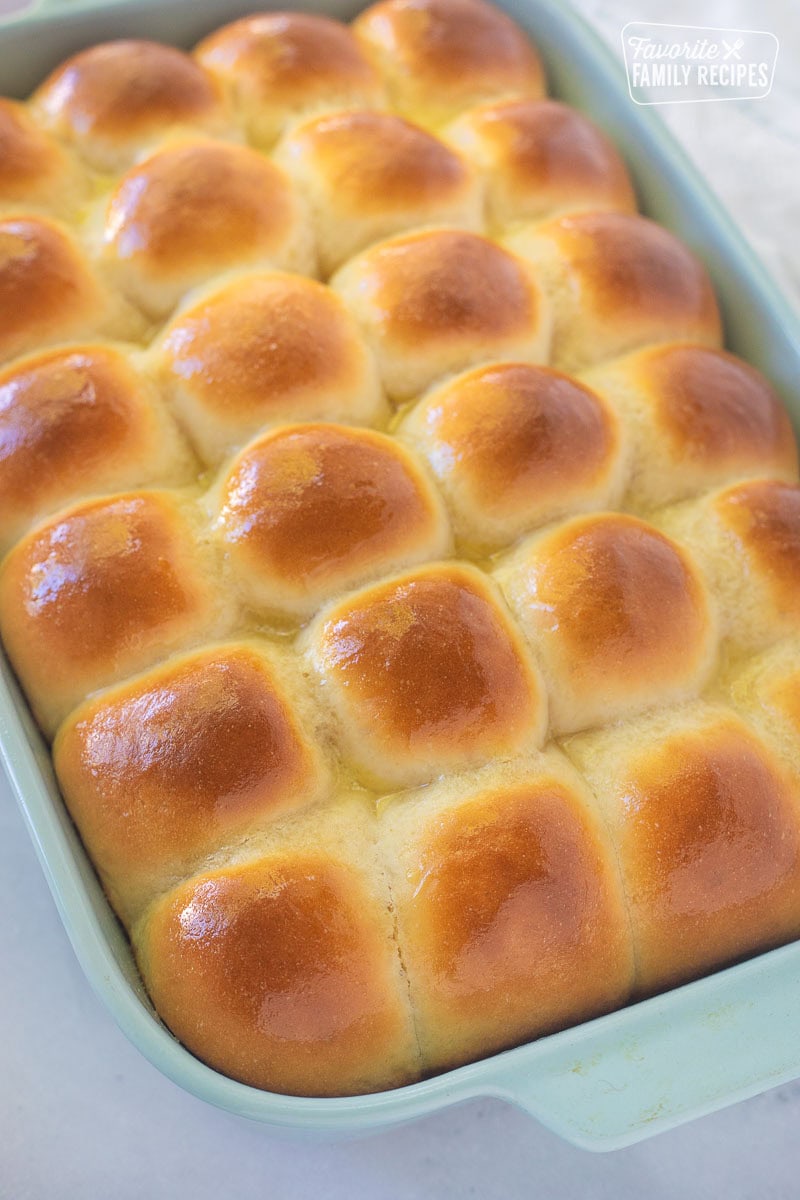
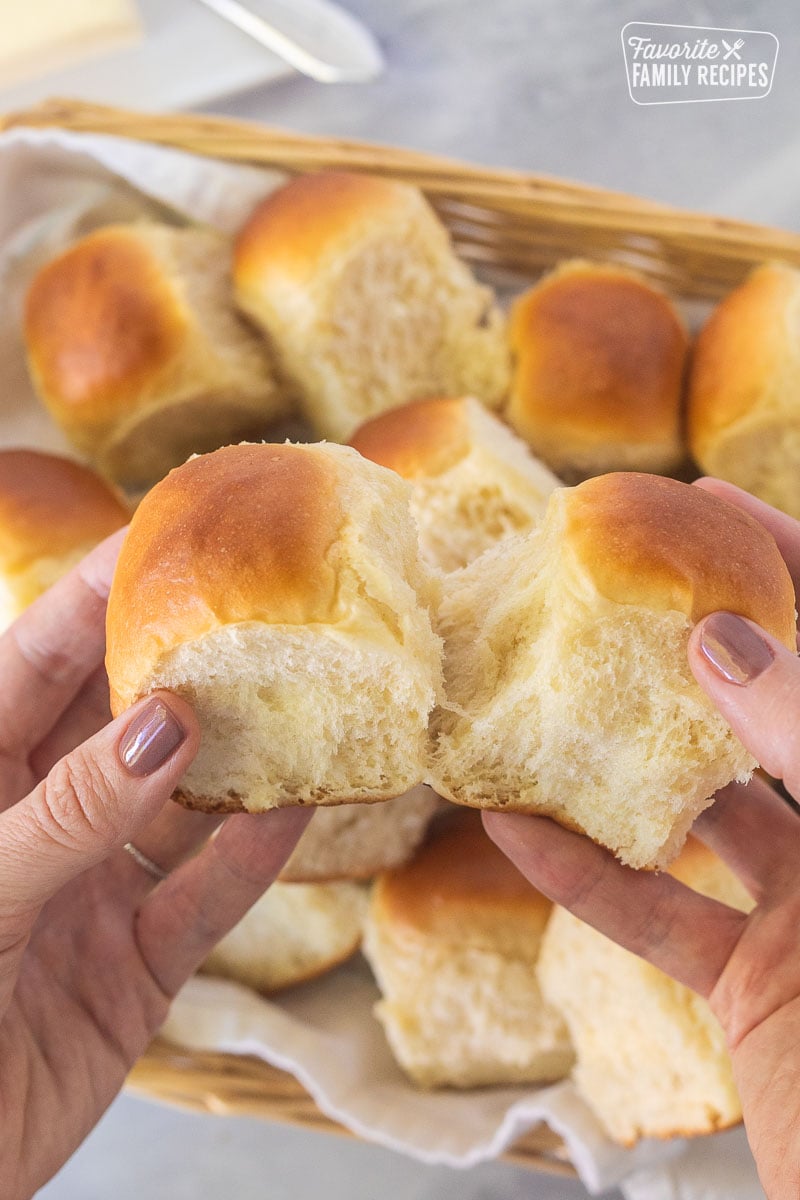
Our mom has made these homemade dinner rolls as far back as I can remember for Sunday dinners and special occasions. They disappear off the table pretty fast. The texture and flavor of these rolls are perfect. They are soft, fluffy, buttery, and complement any meal.
How to Make Dinner Rolls from Scratch
Homemade dinner rolls are SO easy to make. The hardest thing about this recipe is just having a little patience while the dough rises. Start by gathering a simple list of ingredients: Active dry yeast, sugar, water, milk, butter, sea salt, an egg, and flour. Then, follow these steps:
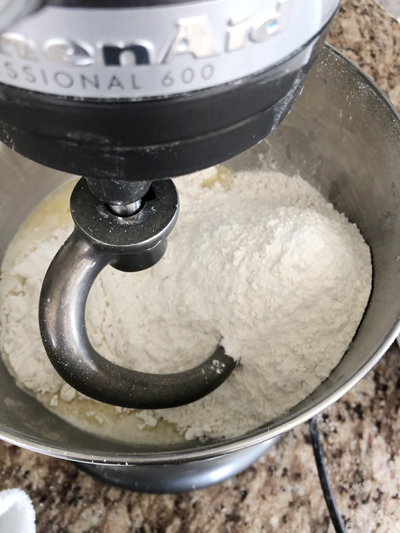
- First, combine the warm water, sugar, and active dry yeast. Set aside while the yeast activates.
- Then in a large bowl or mixing bowl, combine scalded milk, softened butter, sugar, salt, and egg. Stir to combine and then add your yeast mixture.
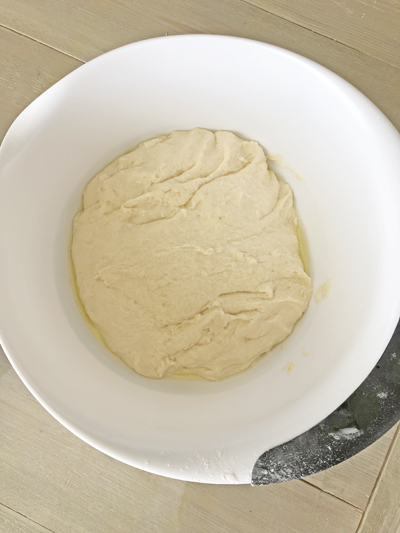
- Add all-purpose flour (bread flour will work as well) a half cup of flour at a time and mix at medium speed.
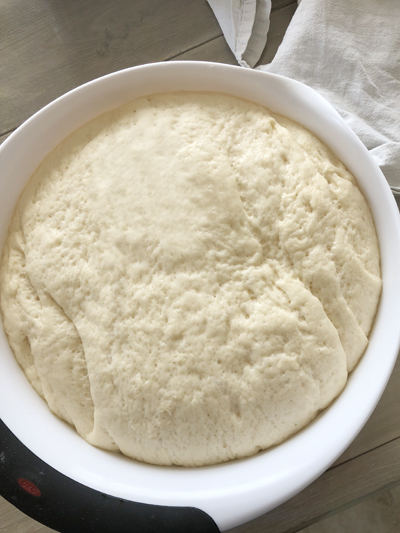
- Let dough rise.
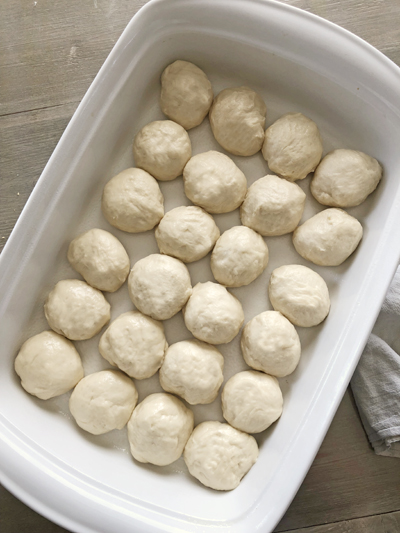
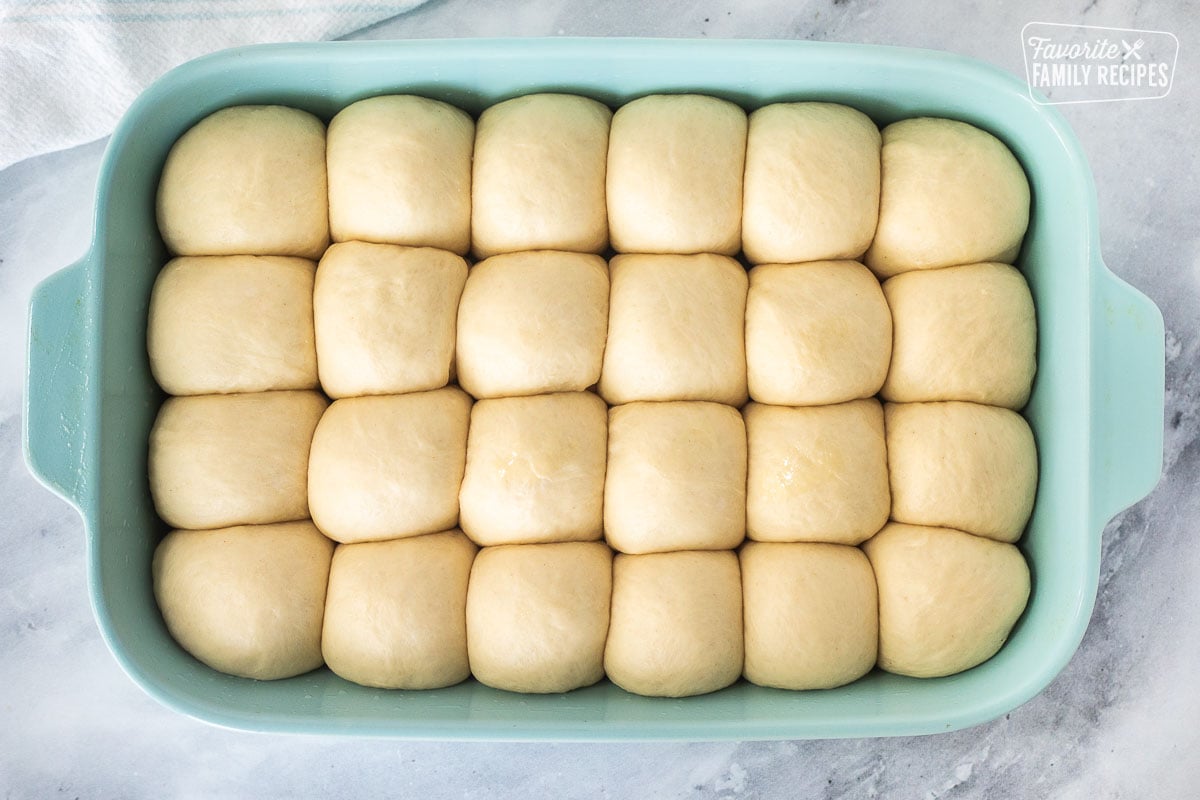
- Use a bench scraper or dough knife to cut smaller pieces and form into rolls on a lightly floured surface. Grease a 9×13 baking pan and place rolls in rows and let rise again, covered with plastic wrap sprayed with cooking spray or a clean kitchen towel.
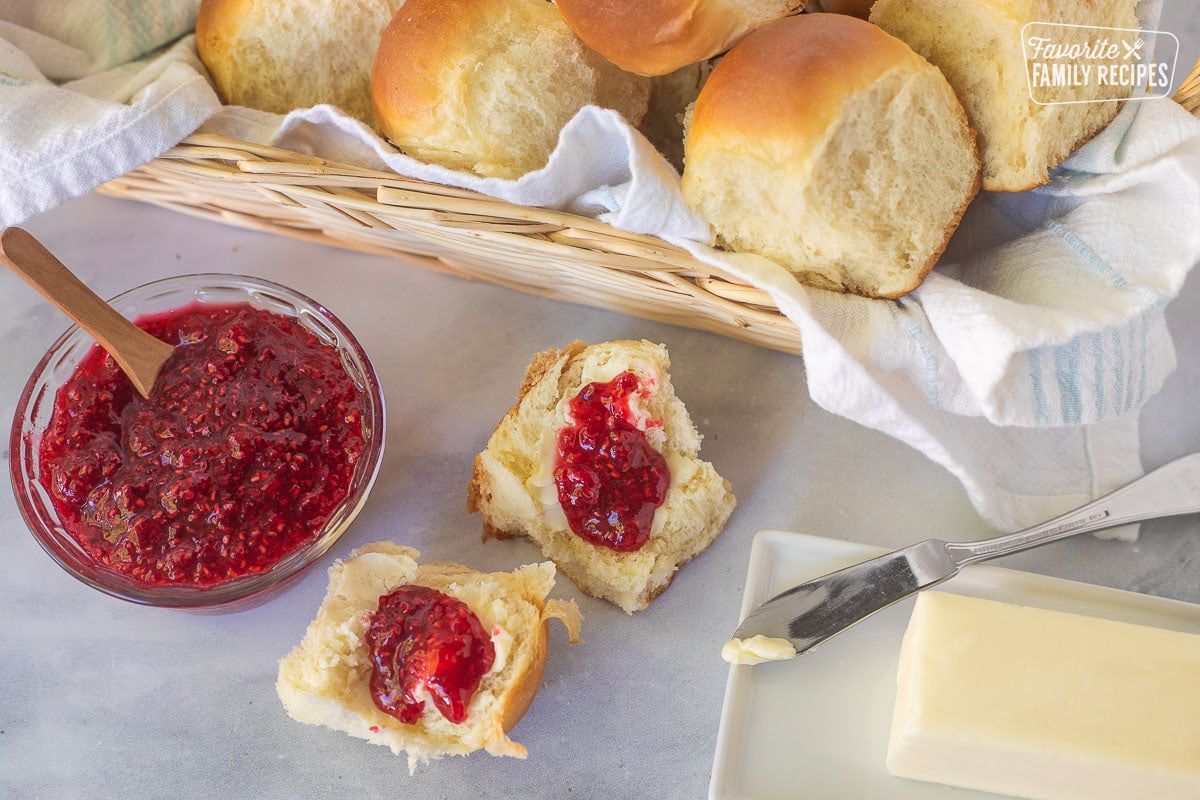
- Bake, butter, and serve!
Making Dinner Rolls Without a Stand Mixer
No stand mixer? No problem. After you add the flour, turn the dough onto a floured work surface and knead the dough by hand until it is soft and smooth. Add a flour a little at a time as needed and continue kneading for about 10 minutes—just make sure not to add too much flour. You want the dough to be soft but not too dense or the rolls won’t be as fluffy as you would probably like.
How to Store Homemade Dinner Rolls
We have found the best way to store homemade dinner rolls is to first allow them to cool, and then place them in a Ziplock bag. Squeeze out all the air, then seal the bag tightly and store in the refrigerator for 2-3 days. If you would like to reheat them in the microwave, then you can wrap them one at a time in a paper towel and heat for 7-8 seconds.
How to Freeze Dinner Rolls
If you want to save yourself some time in the future, or just want to make it easy to bake up a few rolls at a time, try freezing the rolls before baking. It’s like making your own homemade Rhodes rolls recipe. Here’s what to do:
Prepare the Dough: Prepare the dough as directed in the recipe below, through step 6. Do not allow the dough to rise a second time.
Place on a Tray: Put the shaped rolls on a baking sheet or tray lined with parchment paper, making sure they don’t touch each other. You can put a bunch of the roll balls on to one tray, just give them a little space so they don’t accidentally stick together.
Freeze: Place the baking sheet with the rolls into the freezer and leave them there for about 3-4 hours. This will help the rolls harden.
Wrap for Storage: After the rolls have frozen for a few hours, remove them from the freezer and wrap each roll individually in plastic wrap or aluminum foil. Make sure they are tightly wrapped to prevent air from getting in.
Put in a Bag or Container: After wrapping each roll, you can place them all in a large freezer-safe plastic bag or airtight container. This will help keep them organized and protected in the freezer.
Freeze: Put the bag or container in the freezer, and make sure your freezer is set at a very cold temperature to keep the rolls fresh.
How to Thaw and Bake Frozen Dinner Rolls
You would make these much like you would frozen dinner rolls you buy in the store. Place them in a greased 9×13 baking dish at room temperature, cover, and allow them to thaw and rise for anywhere from 2-6 hours, depending on how warm it is where they are thawing. Once they have risen, bake them as you normally would per the instructions below. Don’t forget to butter them when they come out of the oven!
Why aren’t my dinner rolls fluffy?
If you follow this dinner roll recipe as outlined, you will get soft, fluffy dinner rolls every time. The best way you can tell if you are going to get soft rolls is by how the dough rises. If your dough isn’t rising well, your rolls are going to be denser.
The key is to make sure your yeast is activated in the warm water and sugar mixture before you add it to the bowl of other ingredients. Visually, it should look foamy, not like a liquid.
Always check the labels on your yeast packages or packet to make sure it isn’t expired and that you are using it within 4-6 months from the first use. Also, be sure to keep yeast refrigerated or frozen after breaking the original seal.
More Yummy Roll Recipes
- Pani Popo (Samoan Coconut Rolls)
- Homemade Crescent Rolls
- Homemade Cinnamon Rolls
- Homemade Orange Rolls
- Peach Cinnamon Rolls
- Biscoff Spread Cinnamon Rolls
- Caramel Apple Cinnamon Rolls
How to Make Dinner Rolls

Homemade Dinner Rolls
Video
Equipment
Ingredients
- 2 tablespoons yeast active, dry
- 1 tablespoon sugar
- 1/2 cup warm water
- 1 cup whole milk scalded (microwave for 1.5 min)
- 1/2 cup butter softened (you can use salted or unsalted butter)
- ½ cup sugar
- 1 teaspoon Kosher salt or sea salt
- 1 large egg
- 5-6 cups flour
- 2-3 tablespoons butter melted
Instructions
- Combine yeast, 1 tablespoon sugar, and warm water in a small bowl and set aside.
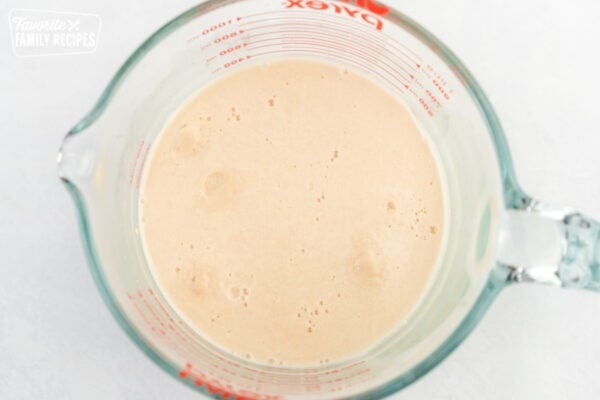
- In a large stand-mixer bowl with a dough hook attachment combine scalded milk, softened butter, ½ cup sugar, salt, and egg. Stir until well combined.Stir in yeast mixture.
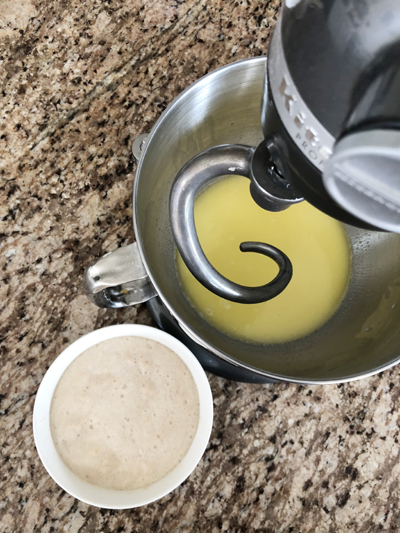
- Add 4 cups flour, adding ½ cup flour at a time until the dough pulls away from the sides of the bowl, it should still be slightly sticky. You may need more flour or even a little less than the full amount- it is best to eyeball this and go by feel than exact amounts.

- Slightly oil a large mixing bowl. Place dough in bowl and turn once to lightly cover dough in oil. Cover lightly with plastic wrap or light kitchen cloth.

- Allow dough to rise for 1 hour. Punch down dough. Lightly knead on a floured surface if dough is too sticky.

- Break off sections to form into small rolls. They should be roughly the size of a ping-pong ball (or approximately 2 oz.). Pinch the bottom of the rolls (so you have a smooth, round top) and place seam-side down in a greased 9×13 glass baking dish. You should be able to get 6 rows of 4 rolls (24 rolls total) and possibly a few extra.

- Cover lightly with plastic wrap (greased so dough doesn't stick to it) or light kitchen towel and allow to rise 30-45 minutes or until rolls have at least doubled in size.
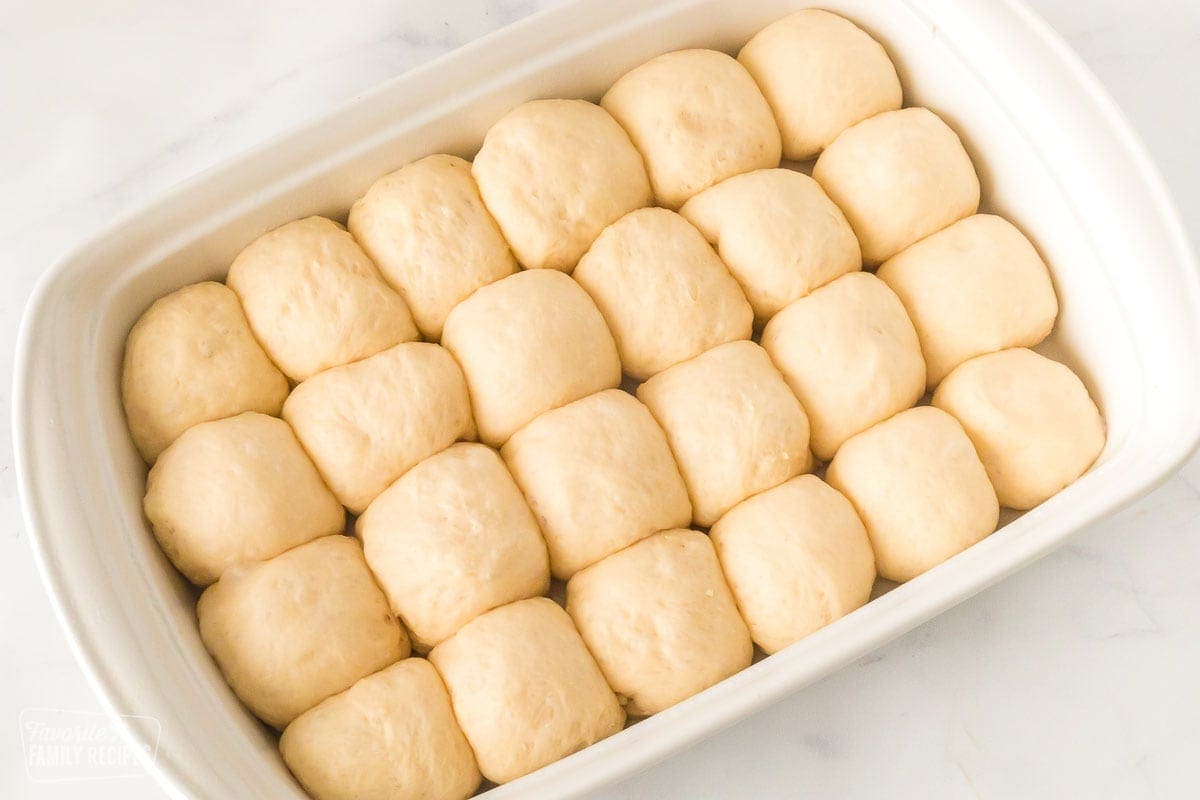
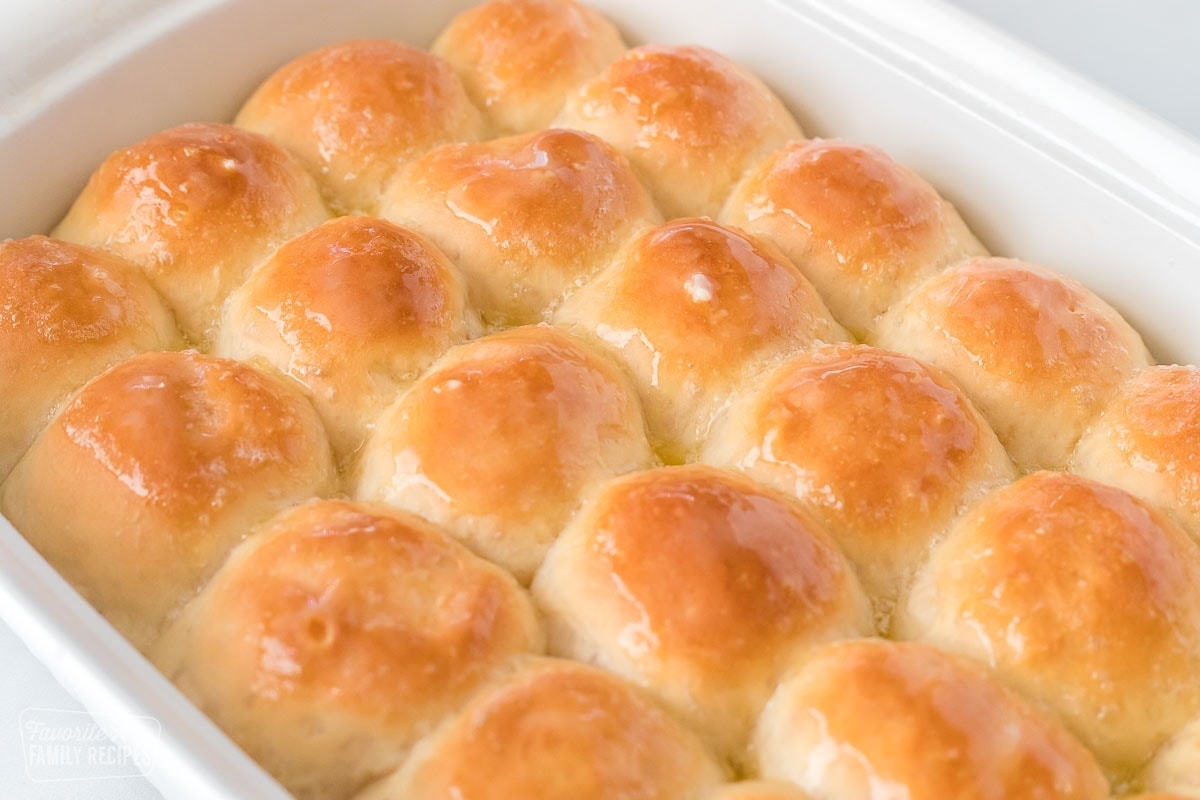
- Bake at 375 degrees for 10 to 12 minutes or until tops of the rolls become light golden brown. Tip: This recipe may vary by elevation, if the middle of the rolls seem too doughy, lightly cover with foil and bake another 3-5 minutes or until centers are light and fluffy.Remove from oven and brush the tops of the rolls with melted butter. Cool slightly and serve.
Notes
- We have found the best way to store homemade dinner rolls is to first allow them to cool, and then place them in a Ziploc bag. Squeeze out all the air, then seal the bag tightly and store in the refrigerator for 2-3 days.
- If you would like to reheat them in the microwave, then you can wrap them one at a time in a paper towel and heat for 7-8 seconds.
- No stand mixer? No problem. After you add the flour, turn the dough onto a floured work surface and knead the dough by hand until it is soft and smooth. Add a flour a little at a time as needed and continue kneading for about 10 minutes—just make sure not to add too much flour. You want the dough to be soft but not too dense or the rolls won’t be as fluffy as you would probably like.
Do you really add 2 tablespoons or of yeast? Normally when making any type of roll, I add 2 teaspoons. Please clarify.
2 tablespoons is correct. You can add less but we like big, puffy rolls.
These remind me so much of my childhood when the cafeteria ladies would make them. So delicious
These are so good and very easy to make. I did not even brush the tops with butter… it did not need it.
Good not great. But this tastes exactly like my grandmother’s recipe for her buns, so thanks for the nostalgia.
Can’t wait to make these for Easter with ham and cheese potatoes
These are AMAZE BALLS!!! I made rolls and made them again but baked in two loaf pans and they were just as Delicious!!! Homemade bread is something else I definitely don’t need to buy store bread again.
Did you put the balls into two loaf pans? Or just halved the dough into two loaf pans?
Easy and delicious. Perfect way to make this Thanksgiving special.
These are so wonderful. Old memories come back when I eat these. Thanksgiving was a time that Grandma made these. They taste just like Grandma’s.
I make bread all the time. This recipe looks incredible
Homemade rolls do seem a little intimidating but you thought of everything to make the process easy peasy! Excellent step-by-step instructions and recommendations. I love all of your tips and suggestions and even the recipe ideas to try with your rolls. Absolutely delicious! Nothing quite as comforting as a warm, fluffy, buttered roll!
Thank you, Caryn! Happy Thanksgiving!
Look super good can’t wait to make them Thanks for the recipe
Rate 5 if it turns out – my wife has trouble making these things
These are absolutely delicious. A must for any family get together ❤
I cannot wait to try these for Thanksgiving. I could make a whole meal on good hot rolls and lots of butter. YUM!
I give these rolls five stars. So easy in preparing & absolutely delicious.
Thank you.
Love the fact I can make ahead and freeze them before baking to save time.
Nothing better than homemade rolls! These are delicious. We all love them.
Great instructions on how to make the rolls. And how to make ahead.
Thank you, Leslie!
These are the best! My family devoured them. Will be making these again. The recipe was easy to follow and came out perfect.
I’m so happy this recipe was a success for you!
It’s not Thanksgiving if we don’t have these rolls! The great thing is we can freeze them and prepare them the day of so it cuts out a lot of work on the busy holiday. We also love them with soups!
I’m definitely making these for Thanksgiving! Thanks for the great easy to follow instructions and pictures.
These dinner rolls are awesome. Great taste, texture, and so easy to make. I never buy store-bought rolls any longer. Even though I’m a senior and the only one who eats rolls, I still make my own and freeze so I can have them when I desire.
I think this is a tremendous recipe, but scalding milk always makes me just a bit nervous.
Can’t wait to try these. They sound easy enough and delicious. Thank you.
This recipe is like one that I made when I was living at home. Will have to try this and see how they compare. Thank you for all the wonderful recipes.
Don’t fill up on dinner rolls!!!! Tempting… I know. Just an idea… I mix a bit of honey with my melted butter before I swipe the tops of the rolls. They taste like dessert.
These rolls were incredible. The difficulty I had was that they took way longer to bake and even after baking them for an extra 30min or so the bottoms were still underdone. I took them out as I didn’t want the tops to get over baked. Any suggestions?
Will definately be making these. Love yeast dinner rolls.
I know many people believe Thanksgiving is about the turkey but for me it has always been the homemade rolls! Love warm bread and butter and this is a great recipe.
Easy and good!
Who wants to wait for Thanksgiving to eat a warm. buttery, fresh from the oven roll!! Making these tomorrow, just for a test run. LOL
I forgot that I will be converting this recipe to gluten free hopefully successfully.
These were absolutely delicious and so easy to make. It makes quite a bit so I froze some for another time. Thanks for the great recipe!
They do freeze well! Thank you, Amita. I’m glad you enjoyed the recipe.
These rolls are really similar to rolls my mom made every year for holiday dinner. I love that yeasty smell and taste. The frothy yeast is the key. It’s nice to see that really good recipes are still being used and passed down through generations.
Thanks for the step by step visuals!
Thank you, Linda! Happy Thanksgiving!
This recipe looks very easy to do. I think I will try it this year. Thank you for your wonderful posts.
There is nothing better than homemade dinner rolls with your Thanksgiving dinner!
I love soft dinner rolls and this recipe is easy and delicious to make.
So yummy and easy to make. The directions for freezing to use later is great. This lets me batch make them and store some for future weeknight dinners.
These rolls were delicious and easy to make.
Thank you, Pauline!
I have used your recipe before and rolled some into balls and others I rolled out and made them into curly rolls, we enjoyed them both ways. I am always asked for the recipe they are enjoyed that much!!
There is nothing like having hot rolls for Thanksgiving dinner. Yummy!!
LOVE THIS RECIPE!!! Easy to make and not a lot of ingredients. I have made these rolls many times!!! Thank you, I love all your recipes. Thank you for sharing!!
Thank you, Teresa! Happy Thanksgiving!
Oh my god! I wasn’t able to wait till thanksgiving so I made them yesterday. Everybody loved it! It will be on the holiday tabel 100 percent!
That’s impressive! Way to go! Happy Thanksgiving!
Never made homemade rolls but I’d love to try
My family loves rolls, biscuits, rice, tortillas etc. What’s great about these rolls is that they are so versatile, sliders, top chicken pies, as of course rolls to eat on Thanksgiving. They are easy to make, not a lot of ingredients.
Delicious and easy to make
I make these rolls once or twice a month and freeze them. It’s so tasty and it’s so easy.
These are great not just for Thanksgiving but any day of the year!
Excellent rolls for any occasion!
I tried these rolls & they turned out great I have tried many different recipes for rolls but this is by far the best & easiest.. Thanks..
I love these rolls and will make them again
love to make homemade rolls, this recipe sounds delicious.
This recipe sounds so good. I will defiantly make these for Thanksgiving and Christmas. Homemade is better than store bought.
This recipe looks just amazing and I really want to try this recipe Thank you so much for shearing it
Have made these and they are so gooood. They are so easy to make and your mouth waters when you take them out of the oven. Have some in my frrezer right now nut will make a fresh batch for Thanksgiving.
Thanks for several of your roll recipes.
Thank YOU, Maureen!
I love a good dinner roll 😋
Melt in your mouth dinner rolls!
This recipe sounds delicious!
These rolls are light and fluffy.
Best ever for the Holidays .Will be my holiday or any day go to.
So Yummy!
Love these rolls! Just like granny jo used to make.
Go very soft and yummy with butter and cranberry jelly.
This is my go-to recipe when I make dinner rolls. The recipe is easy to follow and turn out perfect every time.
Thank you, Vanessa!
I love yeast rolls and these are the best. Very easy to make, these will be on my Thanksgiving table for years to come!!! Thank You for sharing your recipes!!!
Really luv these Dinner Rolls, I will sure ly make this all the time, thanks
Love this recipe. Never had good luck with making yeast rolls until I used this recipe. Everyone loves them, I do have to knead mine because I don’t have a stand mixer.
Thank you for all the great recipes, this is like my personal cookbook.
These rolls came out delicious!
I will be switching out our store bought buns for these homemade deliciousness buns!
My people will love the homemade buns!
In fact I am going to make them today for supper tonight!
They’ll be a big Texas hit!
These look so good. I’ll definitely five them a try.
These are so good – soft and buttery.
can’t wait for turkey day!
Love these rolls
These rolls are worth every step that it takes to make! Simply light and delicious! You can even freeze them for another time to eat.
Fantastic recipe and looks relatively easy. Will definitely try this.
Fantastic rolls. Love them with our spicy chili and beef stews. Wonderful!
Great slider rolls
If you do not make these homemade dinner rolls with your turkey dinner,you are missing a lot of the comfort that comes with a great turkey dinner. Five stars nothing less.
Thank you, Alex! Happy Thanksgiving!
Bread has always been my weakness. Soft & Fluffy Rolls are at the top of my list! Slather on some butter or jelly or syrup or gravy…well just about anything! I am always asked to bring these rolls to a family gathering.
I agree 100%. Thanks Cindy!
These Rolls are excellent and not too hard for a person who’s yeast rolls never turn out. These were fantastic!
I’m going to give these a go. fingers crossed, wish me luck!
Homemade dinner rolls are the best!
looks very tasty and a great addition to my menu. Thank you
I love how easy these rolls are to make. This will be the 3rd time baking these beauties. Great for the Holidays too! Thank you for sharing…
Hands down, the Homemade Dinner Rolls are at the top of my family’s list of favorites. Thank you for your amazing recipes!
Delicious‼️ Thank you‼️
I love these dinner rolls, they are so delicious and I intend to keep making them.
Thanks for the recipe
Loved them! They turned out perfect. I also used this to make cinnamon rolls. They turned out great as well.
You can’t go wrong with homemade dinner rolls!! This recipe makes the softest, most delicious rolls! We make them all the time!
These are really so buttery and soft. The perfect dinner roll for any entrée. This is my go-to roll recipe.
What does it mean to “pinch the bottom”?
It just means to pinch the dough together with your fingers at the bottom so that the dough at the top is smooth.
Is it 2 tablespoons of yeast? That seems like a lot!
Yep! They come out sooo fluffy! You’ll love it!
Will these be good with bread flour too?
I haven’t tried making them with bread flour, so I’m not sure! Let me know how it turns out if you do try it!
I love making these in advance and freezing as you instruct above – great for when catering for a crowd like at Christmas.
These really are the best of the best!
Do these stay soft a day or two later? That’s the biggest problem with most homemade roll recipes…they’re great when they first come out of the oven only??
Yes! Ours usually stay good and soft for a couple of days.
Do you have to use whole milk or will 1% work?
1% should work!
hello – can this be done in a bread maker?
thanks,
Yes, you can make the dough in a bread machine and let it rise in there. Take the dough out and knead if needed and then roll into individual rolls and allow to rise again before baking in the oven (it won’t work to bake them in the bread machine– it will all clump together and just make bread). Hope this makes sense!
Salted or unsalted is what I meant lol
We used this recipe to make garlic butter pull apart bread. SO yummy! I love it and will be using it again! Thank you!
Hi there. I am going to try this recipe but I am doing MyFitnessPal and noticed that the calorie count listed is 256. How many rolls would that calorie count be in reference to? Thanks in advance.
Hi Elaine, I’m so glad you asked! I reviewed our nutrition information on the recipe and found we had an error. I thought 256 calories seemed really high for one roll. I’ve corrected the error. There are 169 calories in one serving (1 roll). Thank you for asking!
I made these rolls tonight and everything went perfectly… until I baked them. I baked them at 375° for 12 minutes and they didn’t look done so I baked them 2 more minutes… then 2 more minutes… I finally took them out and after cooling for 5 minutes, the rolls in the middle of the pan kind of shrunk into themselves. So I put them back into the oven for 10 more minutes, this time at 350° and they are finally baked enough so we can eat them. They are delicious and I love this recipe, but why didn’t mine bake well?
It is so hard to know why a recipe doesn’t turn out! It could be the altitude, a difference in oven temp, or freshness of ingredients. The climate where you live can affect it too. I am so sorry it didn’t bake well for you.
This happens to me too. This is the second time making this recipe and again not cooked in the centre.
What flour do you use please?
All-Purpose!
So when you freeze them, do you let the dough do a first rise, shape then freeze them before the second rise? Thanks for the post I will be making these in the near future!
Yes, that is exactly right! We hope you enjoy!
I just love homemade dinner rolls, they make a meal so much more special. These made the house smell amazing too which always makes me happy 🙂
I agree, nothing beats that smell! So glad you liked this recipe!
Salted or unsalted is what I meant lol
I always use salted butter, but the dough has salt in it already if you are worried about the salt content.
wow, I am so tempted to try these soft and fluffy dinner rolls. You nailed it.
These rolls are so light and fluffy just like the ones you get in a good restaurant. I make a double batch and freeze one for later.
Amazing! Who knew making dinner rolls from scratch was so simple?!
I’ve always struggled with making these from scratch, but this recipe is so easy. Even I can do it!
what wattage microwave for the milk? or what watt micro did you use?
We have a 1,000 watt microwave. Hope this helps!